
AEG: How to Edit a GPO for Certificate Enrollment
Dec 8, 2022
AEG: How to Edit a GPO for Certificate Enrollment
Introduction
This article will walk you through editing a GPO for Certificate Enrollment. If this is not the solution you are looking for, please search for the solution in the search bar above.
NOTE: If you want to know how to create and link a new GPO to AD, please refer to our support article re: How to Create and Link a GPO in Active Directory.
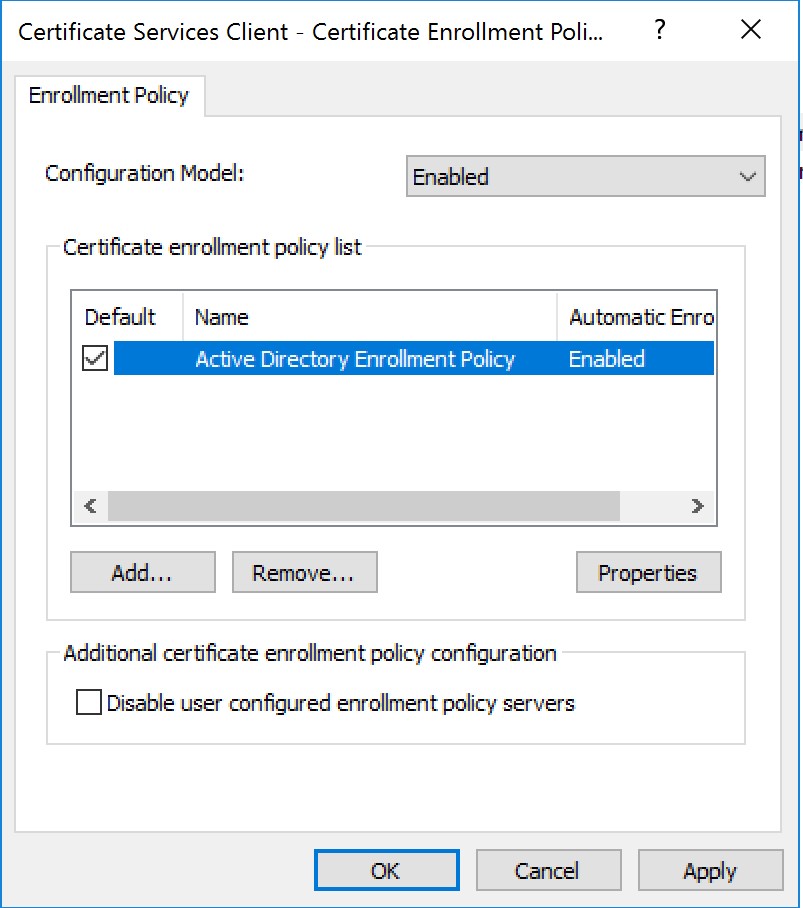
Certificate Services Client - Certificate Enrollment Policy
These are the settings that define the URL for the policy servers which users and computers will contact. By default (in a newly created GPO), these setting will be set to "Not Configured", and will need to be changed to "Enabled". When you enable it, it will have a default Certificate Enrollment Policy (CEP) in the list called Active Directory Enrollment Policy, and it will be set as the default.
NOTE: In most AEG installations, this will be removed completely from the configuration, unless the customer is using their own CA in parallel with AEG, and are configuring it in the same GPO (this is unlikely though).
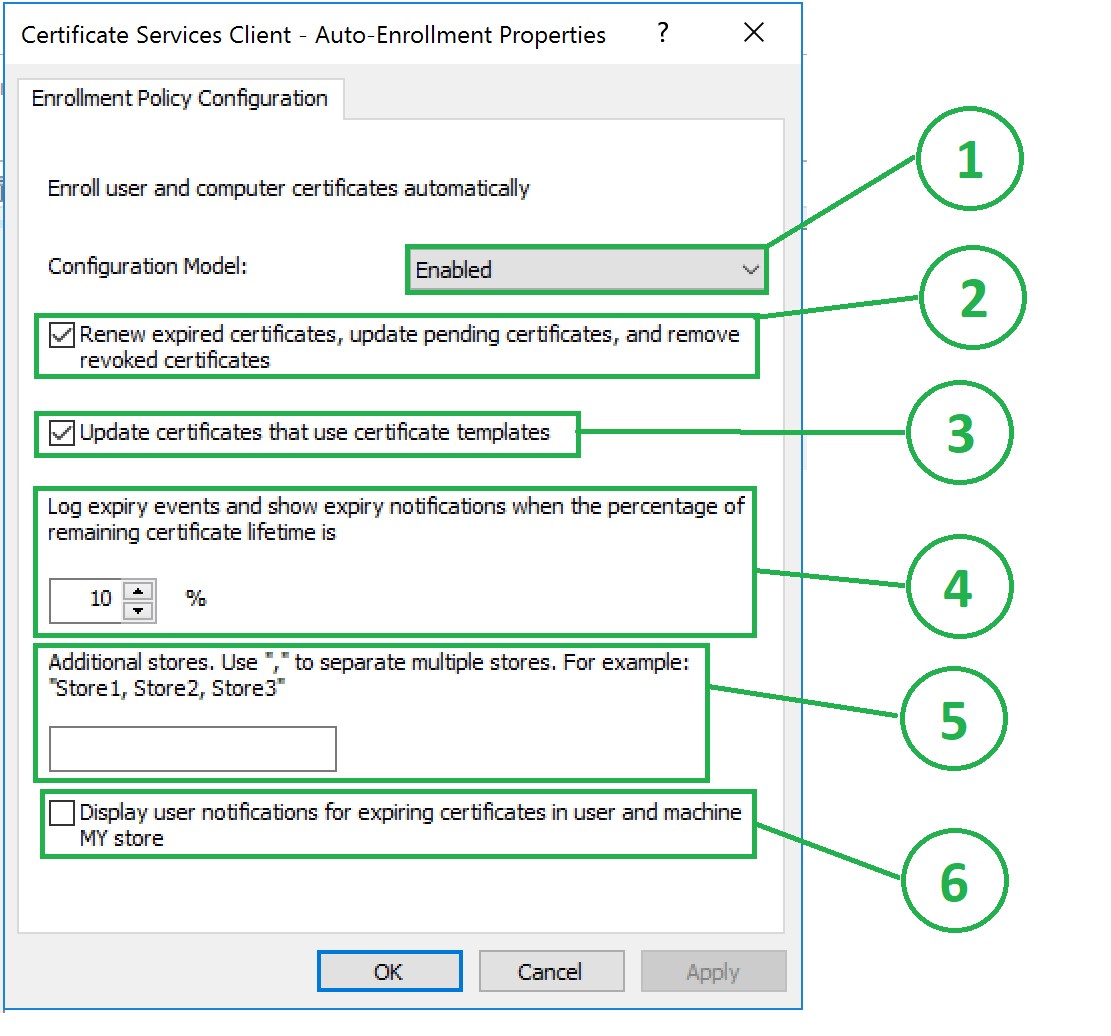
Certificate Services Client - Auto-Enrollment
These are the settings that define the Auto-Enrollment permissions and behavior. By default, it will be set to "Not Configured". When you change it to Enabled, you will see options as shown below:
-
Configuration Model - This setting determines the state of the configuration. It has 3 settings:
- Not Configured - This is the Default in a new policy, and means nothing is being applied by these settings, and it is yet to be configured.
- Disabled - This means the settings are configured, but are not being used by the policy and has not no effect.
- Enabled - This means the settings are configured and actively being used and will be applied to certificate templates for security groups that have Auto-Enroll turned on for them on the template.
-
Renew expired certificates, update pending certificates, and remove revoked certificates. (Normally used in AEG installations)
- When this is checked, certificates that have expired will automatically enroll, pending certificates (requests) will be updated, and any certificates that have been revoked will be removed from the certificate store.
-
Update certificates that use certificate templates. (Normally used in AEG installations)
- If you configure a certificate template to super another template, the auto-enrollment feature will enroll for the certificate that supersedes the other.
-
Log expiry events and show expiry notifications when the percentage of remaining certificate life is: (Occasionally Used)
- This setting specifies a percent of the overall validity period prior to the expiration. For example, if you set it to 10%, and the certificate validity is 90 days, you will receive expiry notifications 9 days prior to the expiration date.
-
Additional stores… (Rarely used)
- This allows you to enable notifications for additional certificate stores.
-
Display user notifications for expiring certificates in user and machine MY store (Occasionally Used)
- This enables the expiration notifications.
Guidelines
-
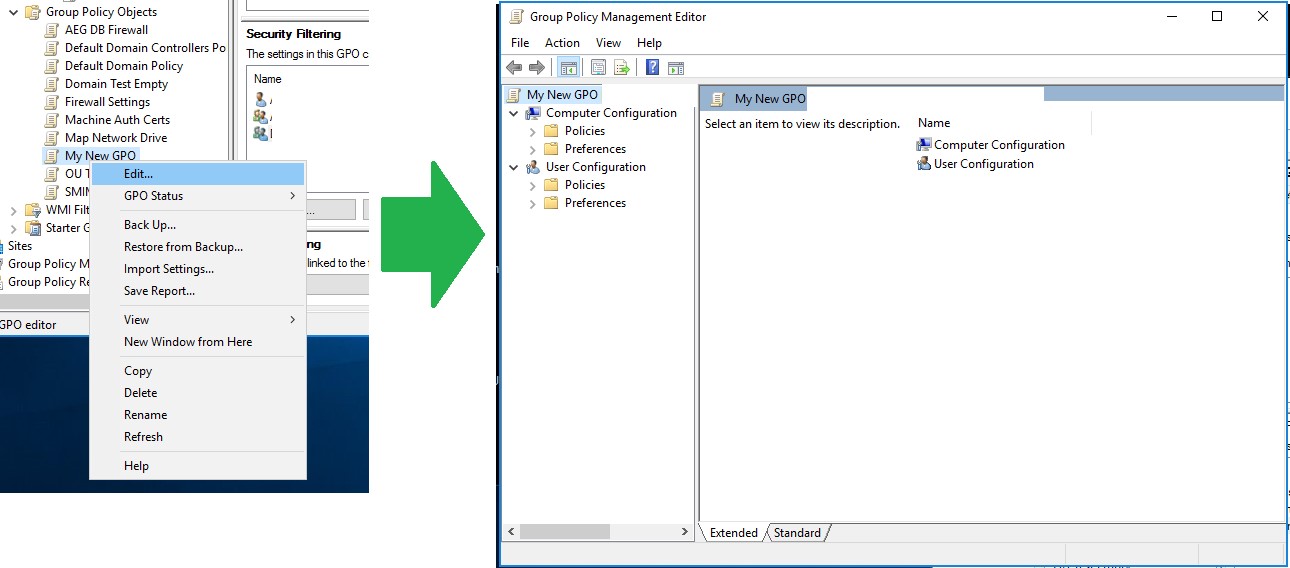
Right-click the GPO and select Edit. Change any of the policies you want to apply in the Computer and/or User Configuration.
-
Depending on the type of configuration that you want to apply to the policy, navigate to Computer/User Configuration > Policies > Security Settings > Public Key Policies > Certificate Services Client - Certificate Enrollment Policy.

-
To remove the Default Policy, simply select it in the list, and click "Remove...", then "Yes" when prompted.
-
Click the Add button in the same screen as shown in the screenshot above.
-
Enter the Enrollment Policy Server URI. Then click Validate Server. Note: The Enrollment Policy Server URI format is: https://<Insert AEG servers FQDN>/XCEP/xcep.svc . You may also copy the URI from the AEG Portal's main page.

-
After you've received a message that the URI was validated successfully, click Add. You will now see the Enrollment Policy ("GlobalSign Autoenrollment...") listed.
-
Check the Default box next to the policy, then tick the
Disable user configured enrollment policy servers checkbox.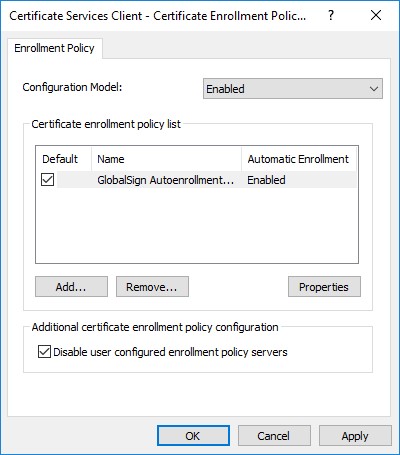
-
Click Apply, then click OK.
-
Double click Certificate Services Client Auto-Enrollment and select Enabled from the Configuration Model drop-down menu, click Apply, then click OK.
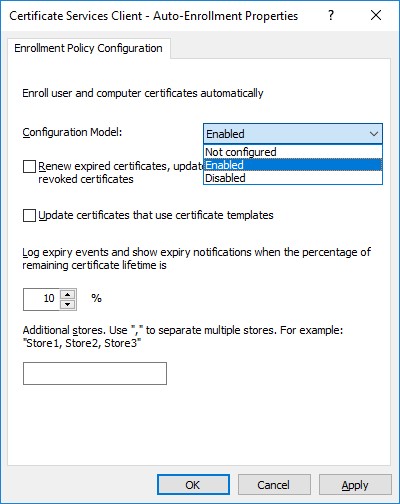
Note: Depending on the configuration that you want to achieve, you may consider selecting other options from the Auto-Enrollment properties.
Related Articles
SSL Configuration Test
Check your certificate installation for SSL issues and vulnerabilities.