PersonalSign Certificate Installation
Oct 8, 2025
PersonalSign Certificate Installation
|
OVERVIEW: This page walks you through the process of downloading and installing your GlobalSign PersonalSign Certificate. At the completion of this procedure, your Certificate will be ready to be configured on your desired platform, email client, etc. Learn more about PersonalSign Certificate management and more here. |
Content
Based on your selection during ordering, download and install your GlobalSign PersonalSign Certificate with the following guidelines:
Guidelines
|
IMPORTANT: Once you completed the order process, go to your email and open the link in the email confirmation sent to you. Open the link and click I APPROVE if you authorize the application and you wish to proceed with the issuance of the certificate. Otherwise, click I DO NOT APPROVE to reject. Once approved, you will receive a new email that contains the certificate delivery link. Then, follow the steps below: |
Download and Install Certificate as .pfx (PKCS12)
|
IMPORTANT: If you selected the Download using a CSR or Download using Internet Explorer (IE) Compatibility Mode as key generation method during the ordering process, proceed with Download and Install Using CSR or Download and Install Using Internet Explorer (IE) Compatibility Mode. Otherwise, you need to cancel your current order and reorder to change your selection. |
- Click on the link in your pickup email to initiate the Certificate generation and installation process.
-
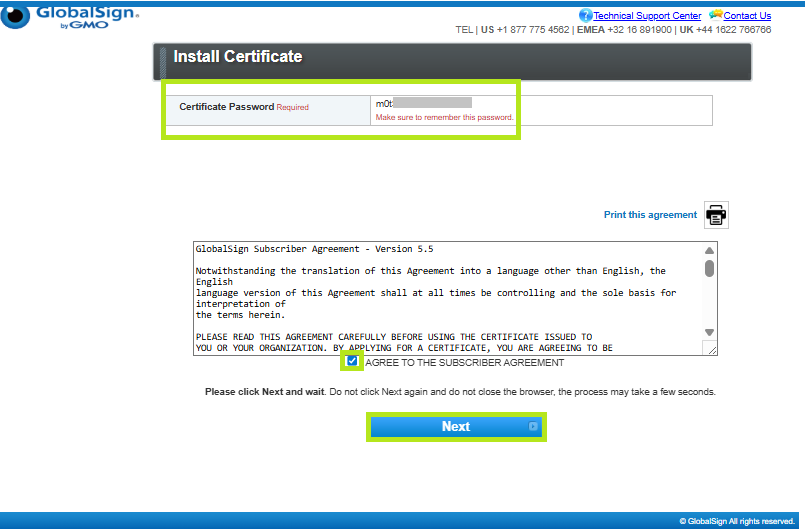
In the Install Certificate window, enter the pickup password created when you placed your order. Then, click Next.

-
The Certificate password (19-digits alphanumeric PKCS12 password) will be auto-generated.
IMPORTANT: Ensure to save this password in a safe location. The Certificate password (Private Key password) is required during Certificate installation. If lost or forgotten, do not close the tab where you entered the delivery link. You can retrieve the password by clicking the back button in the current tab or contact support for assistance.
Then, tick the I Agree to the subscriber agreement box and click Next.
-
Click Download My Certificate to download your certificate as .pfx (PKCS12) file.

-
Once your PKCS#12 file is downloaded, it is ready to be installed.
-
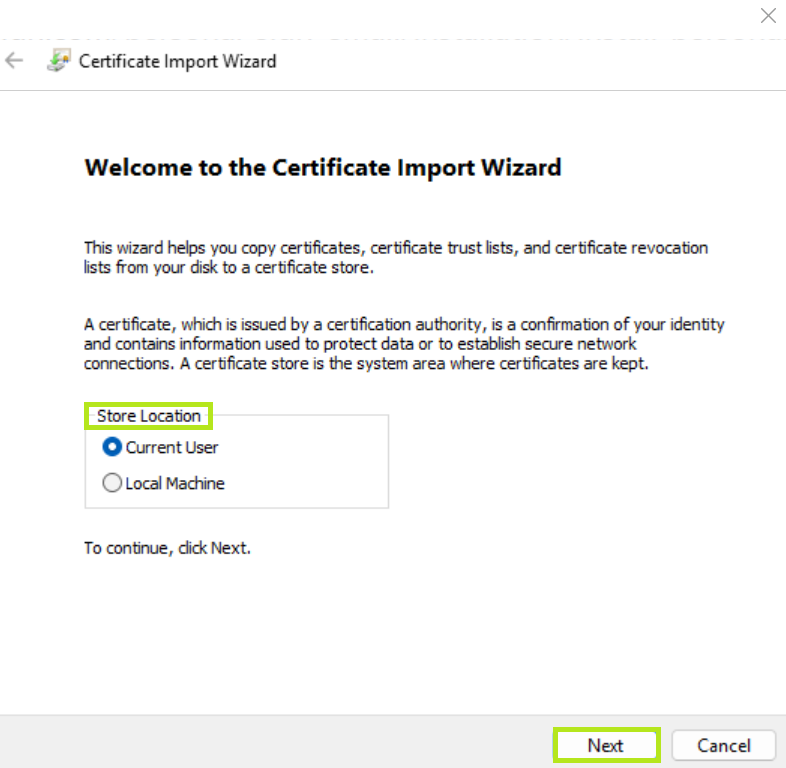
Open the file in the location where it was downloaded. It will open the Certificate Import Wizard window.
-
Select your preferred Store Location. Then, click Next.
-
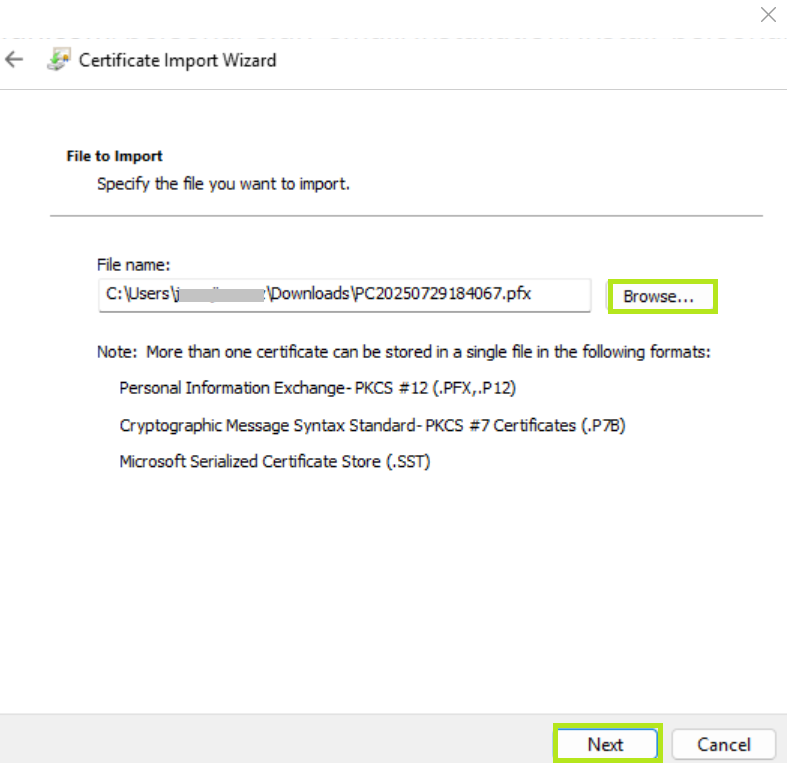
Select the location and click Next.
-
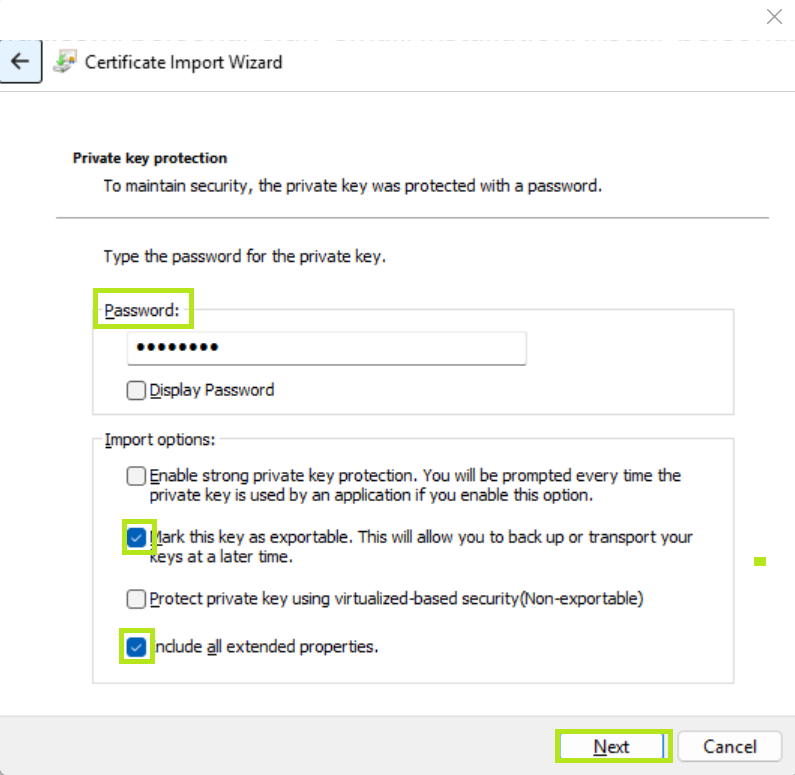
Enter the Private Key Password (Certificate password) that was auto-generated when you downloaded the Certificate. Then, tick boxes of the following options:
• Mark this key as exportable - this will allow you to export the private key from the certificate.
• Include all extended properties - this will carry over all the certificate details during import.
Then, click Next.
-
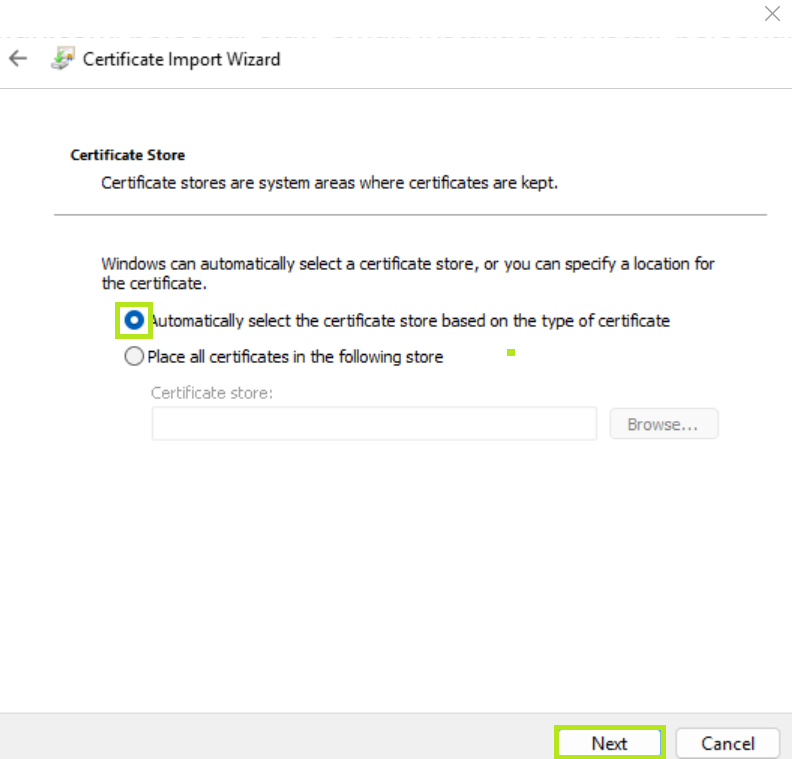
Select the first option and let the Certificate Import Wizard determine the best place for the installation. Then, click Next.
IMPORTANT: In some instances the certificate may not install under Personal. If this is the case then select the second option and manually browse for your preferred when rerunning the installation.
-
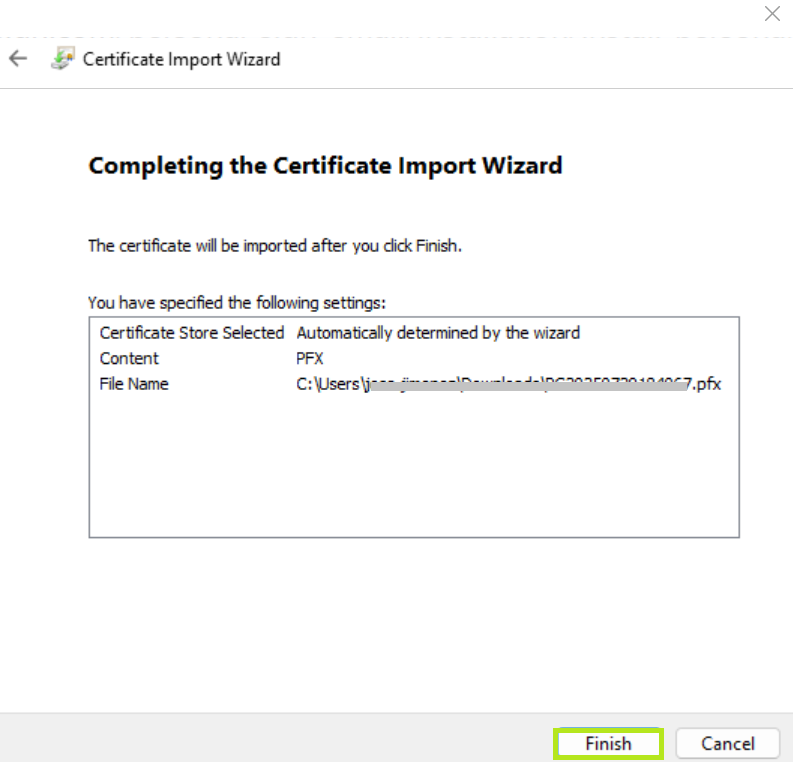
Review your setting and click Finish.
-
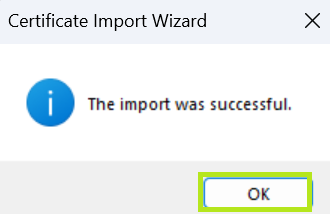
Click OK to complete the process. Your certificate is successfully installed.
Download and Install Using a CSR
|
IMPORTANT: If you selected the Download using as .pfx (PKCS12) or Download using Internet Explorer (IE) Compatibility Mode as key generation method during the ordering process, proceed with Download and Install as .pfx (PKCS12) or Download and Install using Internet Explorer (IE) Compatibility Mode. Otherwise, you need to cancel your current order and reorder to change your selection. |
-
Click on the link in your pickup email to initiate the Certificate generation and installation process.
-
In the Install Certificate window, enter the pickup password created when you placed your order. Then, click Next.
-
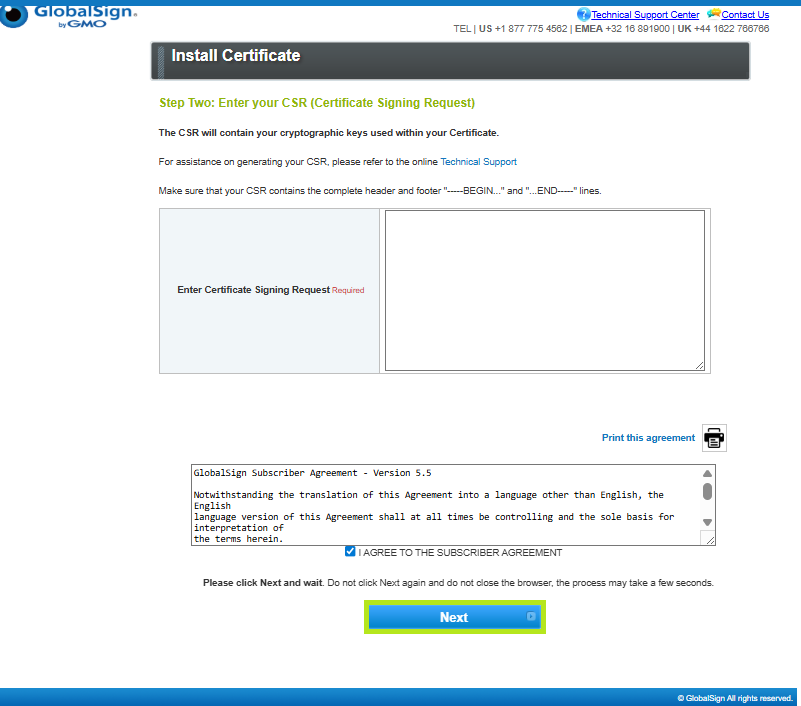
Enter your CSR and tick the I Agree to the subscriber agreement box. Then, click Next.
-
Click Download My Certificate to download your certificate, as well as the Intermediate CA Certificate.

-
Once your certificate file is downloaded, it is ready to be installed.
-
Open the file in the location where it was downloaded. It will open the Certificate window.

-
In the Certificate window, click Install Certificate.

-
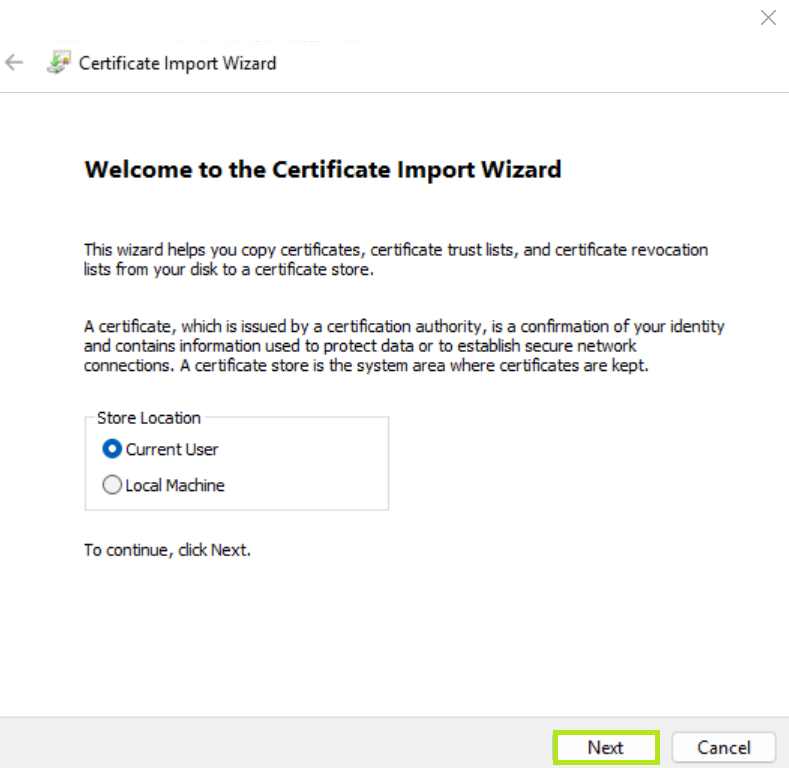
Select your preferred Store Location. Then, click Next.
-
Select the first option and let the Certificate Import Wizard determine the best place for the installation. Then, click Next.
IMPORTANT: In some instances the certificate may not install under Personal. If this is the case then select the second option and manually browse for your preferred when rerunning the installation.

-
Review your setting and click Finish.

-
Click OK to complete the process. Your certificate is successfully installed.

Download and Install Using Internet Explorer (IE) Compatibility Mode
|
IMPORTANT: If you selected the Download using as .pfx (PKCS12) or Download using Internet Explorer (IE) Compatibility Mode as key generation method during the ordering process, proceed with Download and Install as .pfx (PKCS12) or Download and Install Using CSR. Otherwise, you need to cancel your current order and reorder to change your selection. |
-
Click on the link in your pickup email to initiate the Certificate generation and installation process.
IMPORTANT: Ensure that your are downloading this file in the Microsoft Edge browser using Internet Explorer (IE) Compatibility Mode. To enable the compatibility mode, please refer to this page.
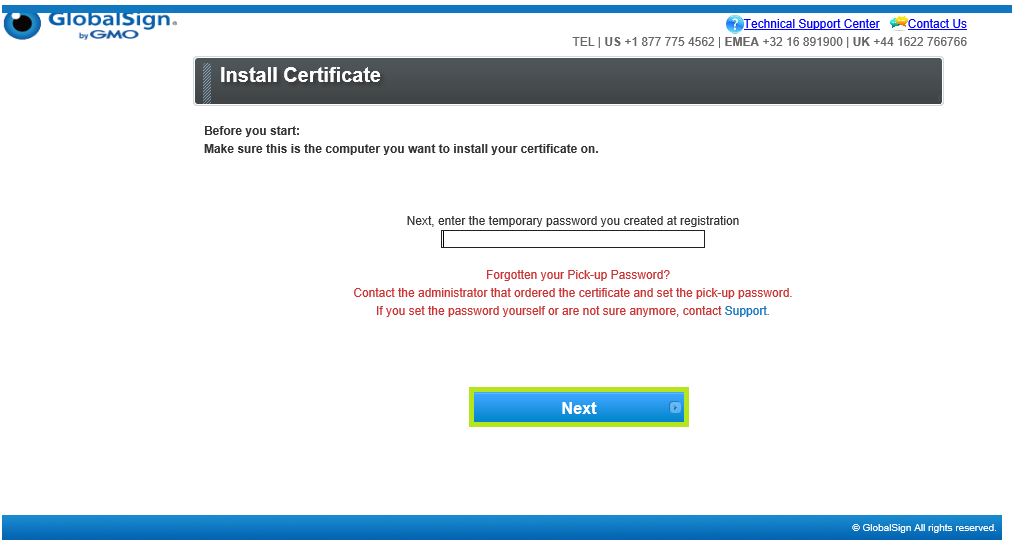
- In the Install Certificate window, enter the pickup password created when you placed your order. Then, click Next
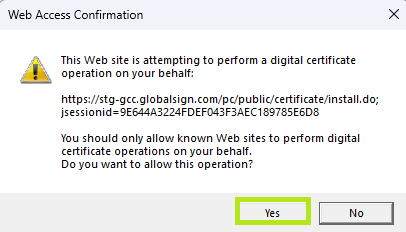
- Click Yes to confirm Web Access.
-
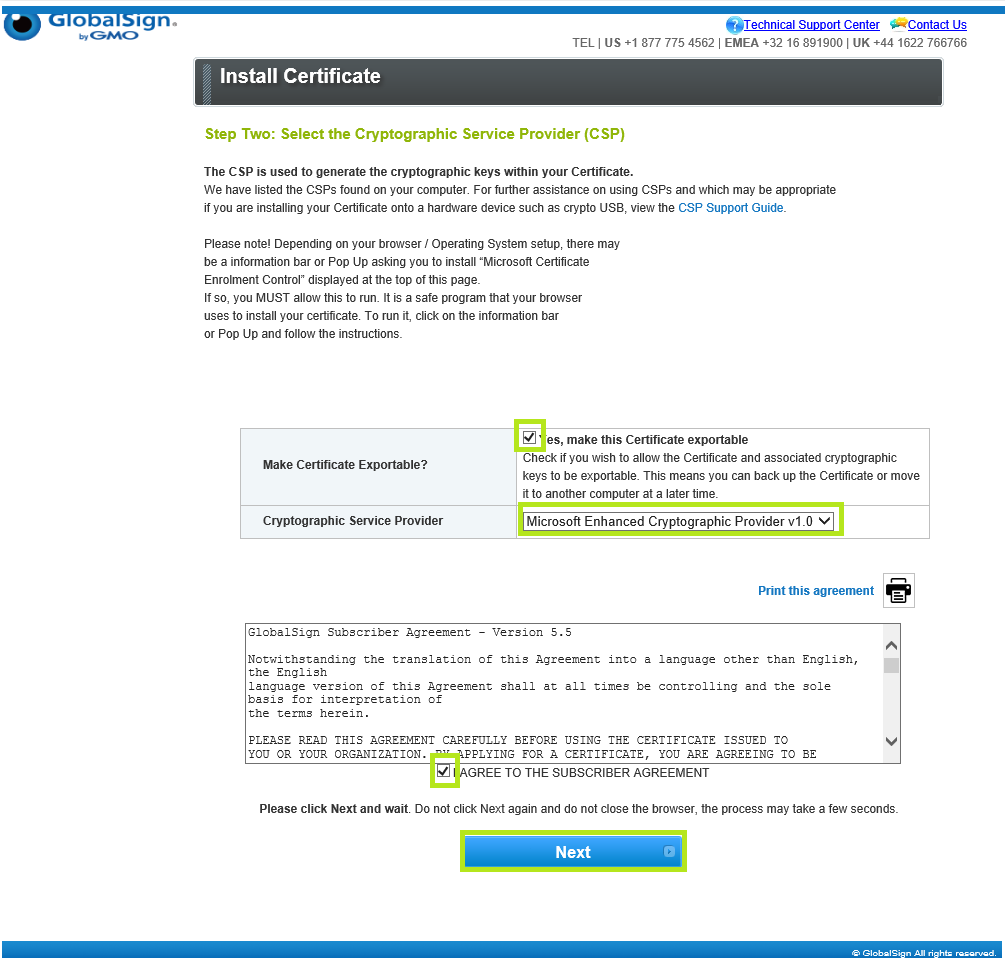
Tick the box if you wish to make your certificate exportable and select Microsoft Enhanced Cyrptographic Provider v1.0 as your Cyrptographic Service Provider. Then, tick the I Agree to the subscriber agreement box and click Next.
-
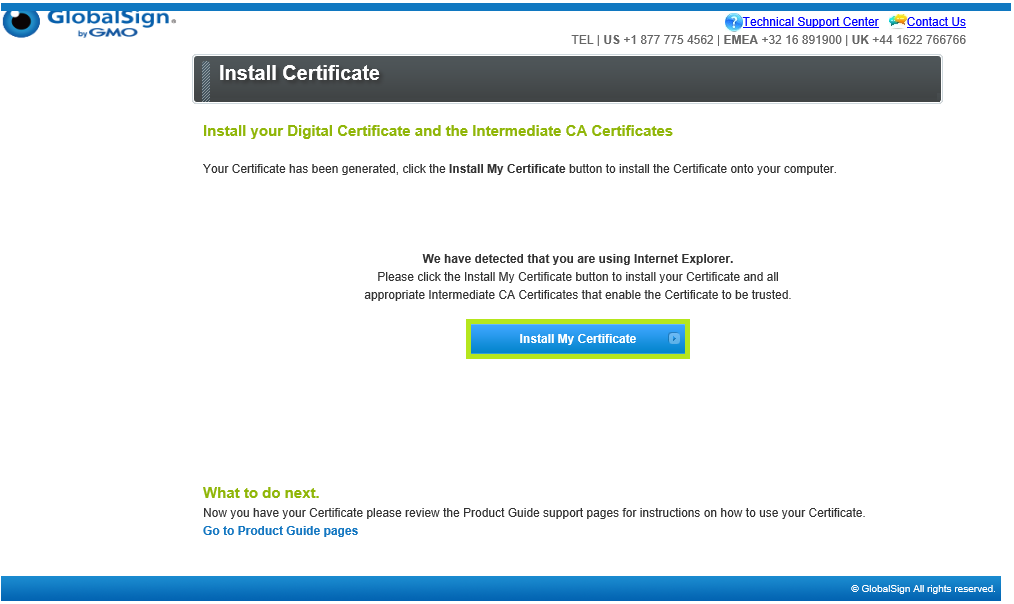
Click Install My Certificate to proceed with installation.
-
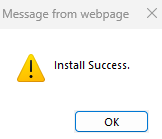
Click OK to complete the process. Your certificate is successfully installed.
Other installation options
Here are other relevant PersonalSign installation guides:
- Install PersonalSign Certificate - Windows Certificate Importer
- Install PersonalSign Certificate - Windows Mobile PDA
- Install PersonalSign 3 Certifificate - Belgian Government Compliant Digital Signatures
|
WHAT'S NEXT: Now that you have successfully installed your PersonalSign Certificate, you may now configure it on your desired platform, email client. For instructions on how to configure your GlobalSign PersonalSign certificate to your preferred platform, see this page. |
Related Articles
SSL Configuration Test
Check your certificate installation for SSL issues and vulnerabilities.
