
Signing a Microsoft Office 2010 / 2013 Document
Feb 19, 2025
Signing a Microsoft Office 2010 / 2013 Document
Introduction
Digitally signing your Microsoft Office documents adds additional security and assurance to your documents. PersonalSign 2+ and AATL certificates attest to the identity of the signer and adds assurance as to who actually signed the document. Additionally, when you digitally sign a document, any modifications made to the document after signing will remove the digital signature. This security feature makes certain that the content of what you signed has not been modified.
There are two methods for signing Microsoft Office documents. You can place either a visible signature or an invisible signature. Both the visible and non-visible signatures provide the same level of cryptographic security, the visible signature adds an aesthetic element to your signature.
Guidelines
You can watch the video below for a tutorial.
Or, you can check the step by step guidelines below.
Placing a Visible Signature
-
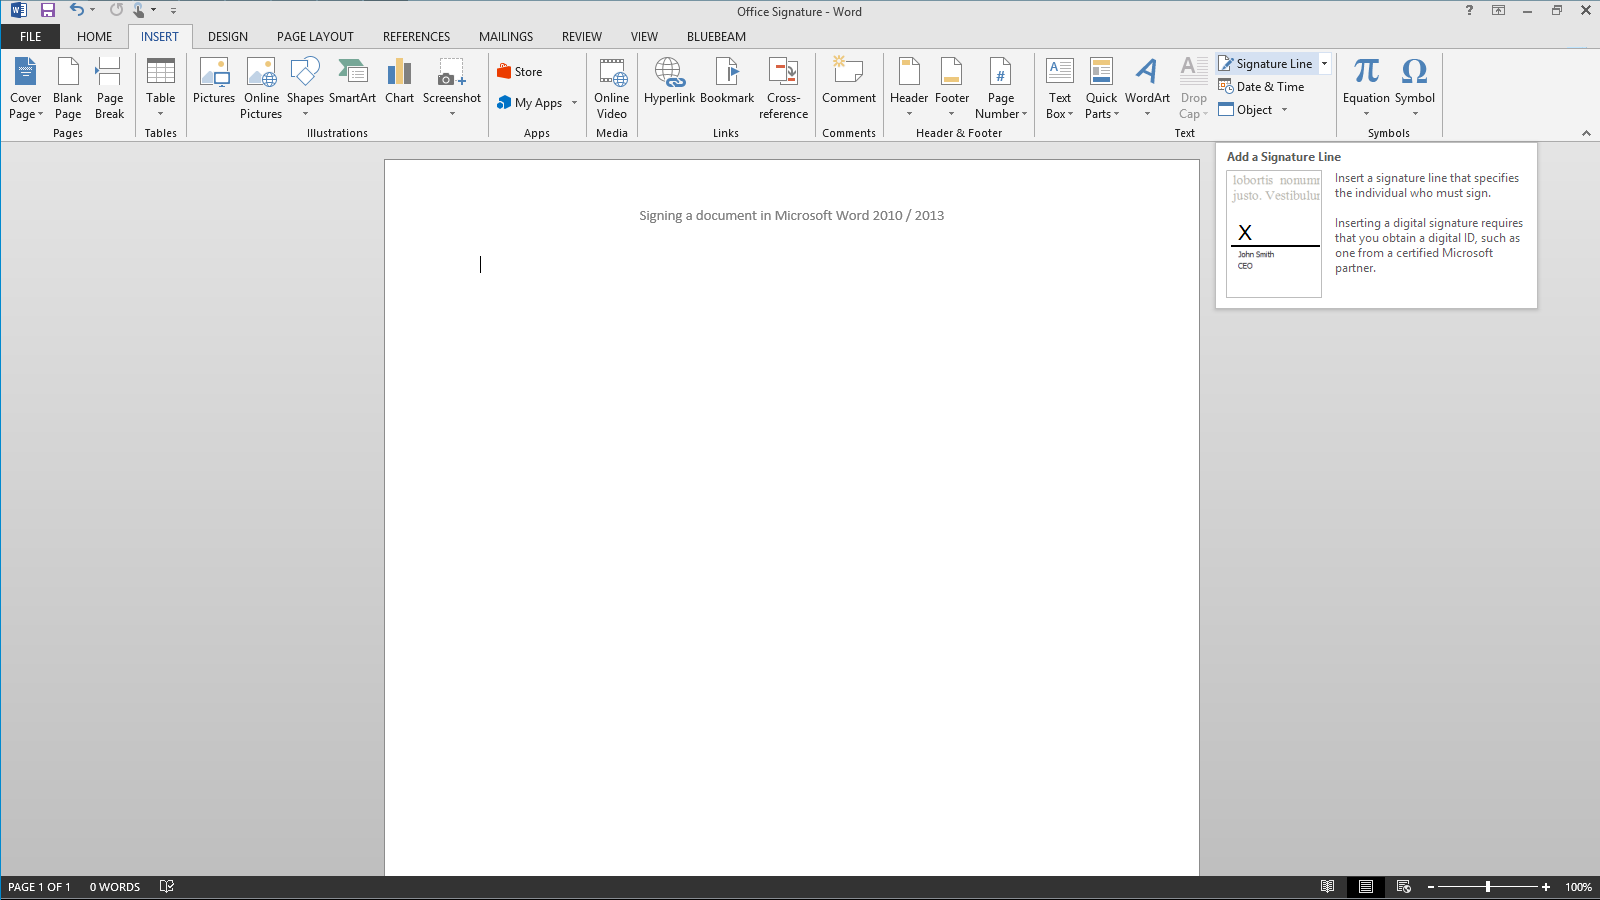
Open the document you wish to sign in Office 2010 & 2013. Move the cursor and click on the area of the document where you'd like your signature to appear.
- On the Insert tab, click the Signature Line button.
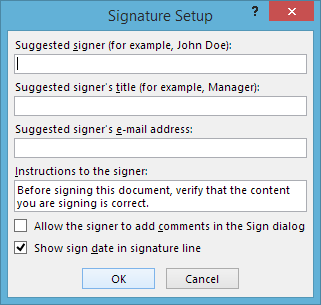
- You may fill out the suggested fields, but they are not required. These fields only indicate who should sign the document. Click OK.
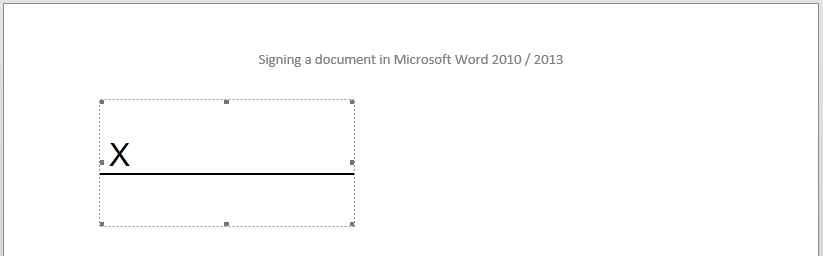
- A signature line will appear on the document. Double-click the signature box.
Note: You may also save the document at this point and send it to someone else to be signed.
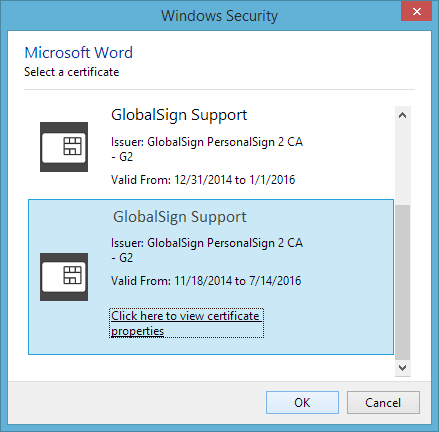
- At the bottom of the signing window, check the Signing as: and Issued by: fields to make sure you have the correct certificate selected.
Click Change... if you need to choose a different certificate. Once you have your signing certificate selected, press OK.
- Back on the signing window, you may either type your name or select an image to be displayed on the signature line. This may be a scan of your signature or a company seal. Once you have your name typed or image selected, press Sign.

- If you have not already saved your document you will be prompted to save. If your certificate has strong private key protection enabled, you may also be prompted for a password at this step.
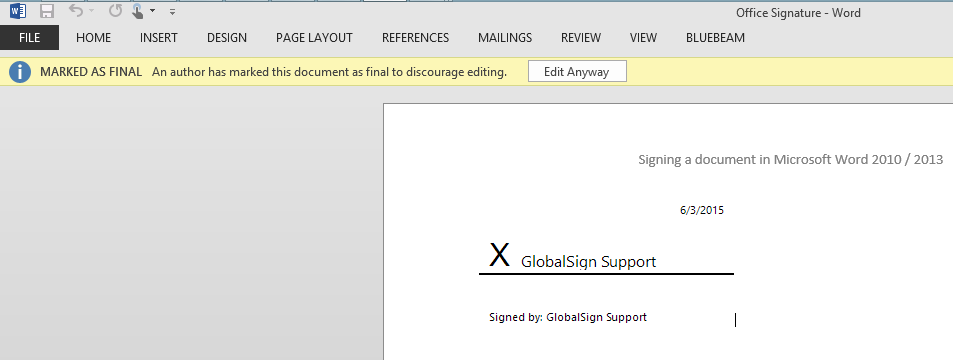
- Once the document is saved and any passwords entered, the document will be signed. Any modifications to it after this point will render the signature invalid:
Placing a Non-Visible Signature
Open the document you wish to sign in Microsoft Office 2010 or 2013.
-
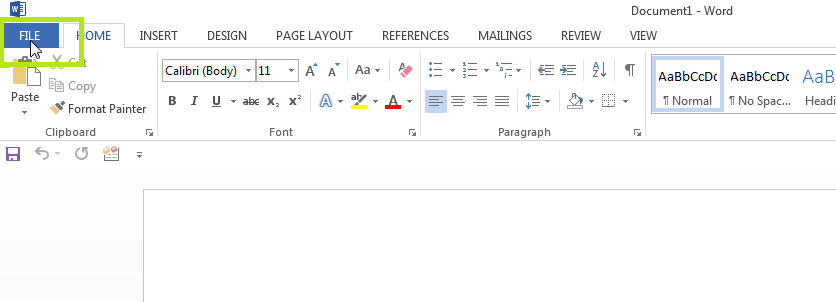
Click File.
-
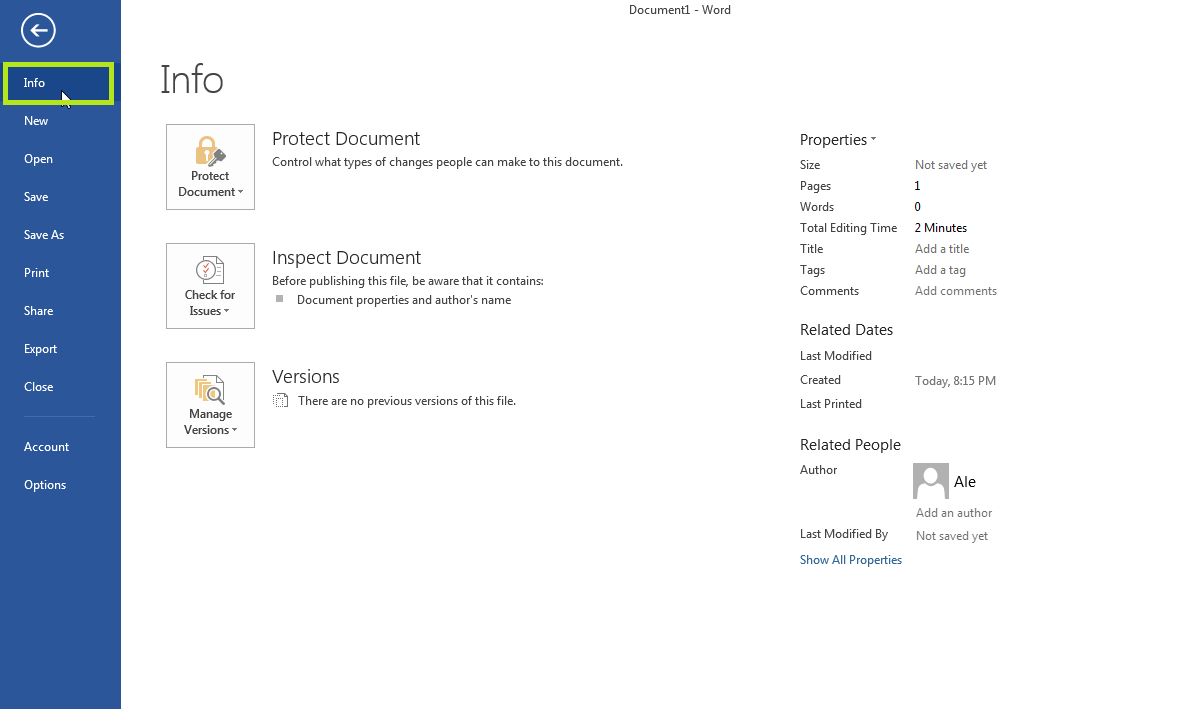
Click Info.
-
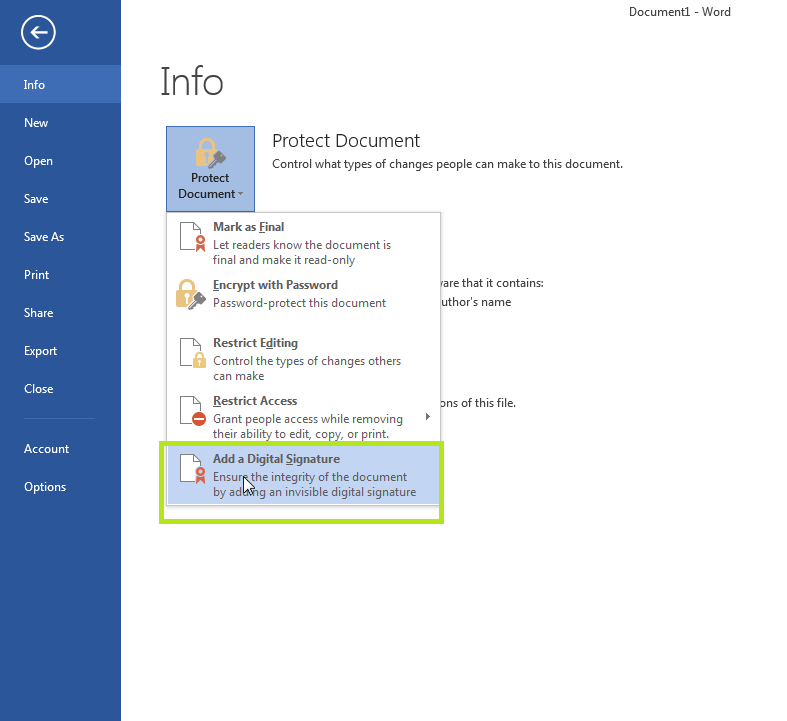
Click Protect Document and select the Add a Digital Signature option.
-
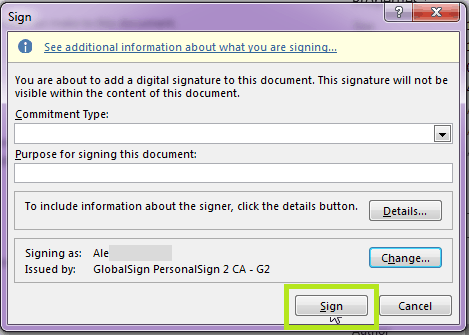
Select the commitment type and add any details you would like as to why the document is being signed. Make sure the correct certificate is selected and click Sign.
-
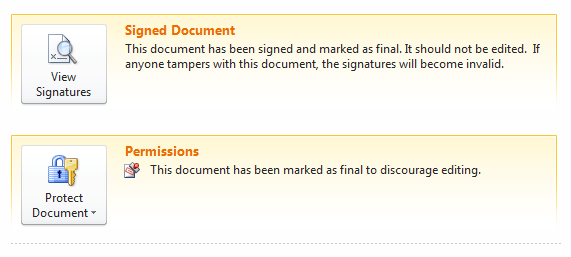
You will know your document has been signed correctly as it will display as a Signed Document and the Permissions will be highlighted.
Note: Once the document is signed it should not be modified. Modifying the signed document will void the signature.
Related Articles
SSL Configuration Test
Check your certificate installation for SSL issues and vulnerabilities.