
Configure PersonalSign Certificate - Microsoft Outlook 2013, 2016 and 2019
Mar 10, 2026
Configure PersonalSign Certificate - Microsoft Outlook 2013, 2016 and 2019
|
OVERVIEW: This page walks you through the process for installing PersonalSign certificates in Microsoft Outlook 2013, 2016, and 2019. After completing the steps, the certificate will be available in Outlook so you can digitally sign emails. For more PersonalSign Certificate Configuration guides, please refer to this page. |
|
IMPORTANT: The screenshots in this guide were captured from Microsoft Outlook 2013, 2016, and 2019. They are provided for reference only and may differ slightly from what you see, but the steps and overall process remain the same. |
Prerequisites
- Microsoft Outlook 2013, 2016, or 2019 is installed.
- Your PersonalSign certificate has already been downloaded and installed in the Windows Certificate Store.
- PersonalSign Certificate Installation - See: Download and Install Certificate as .pfx (PKCS12)
Guidelines
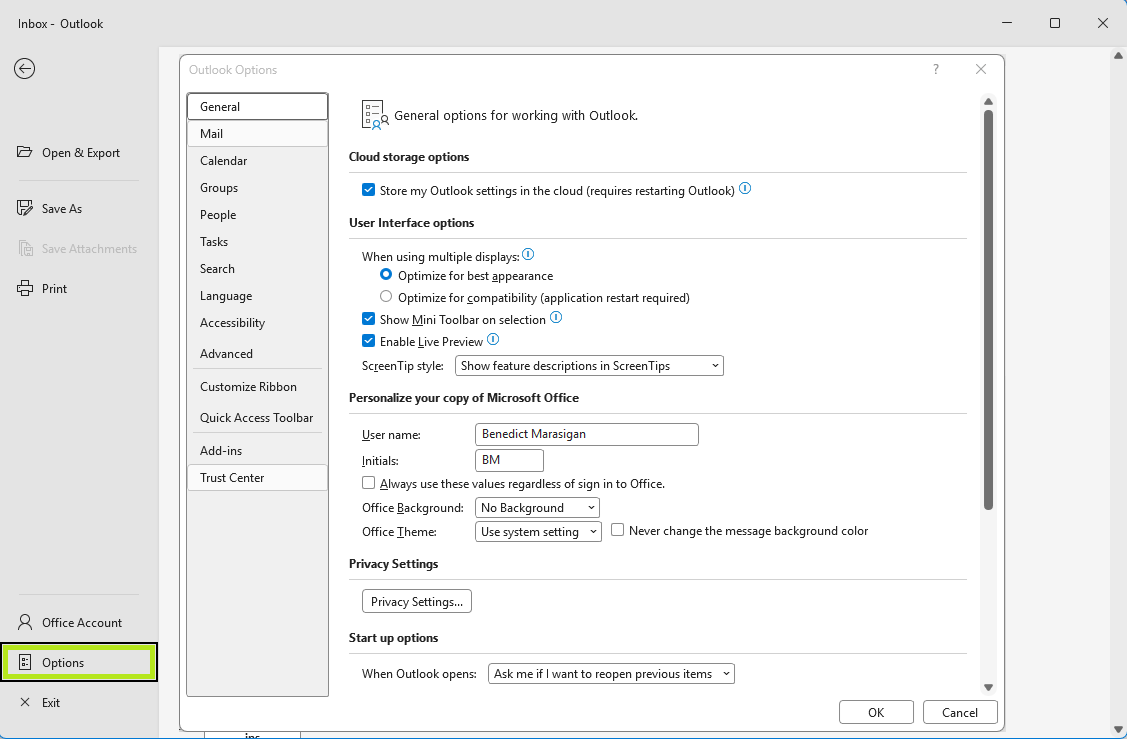
- Open Microsoft Outlook. From the left-hand part of the toolbar, click File.

- On the left menu bar, click Options.
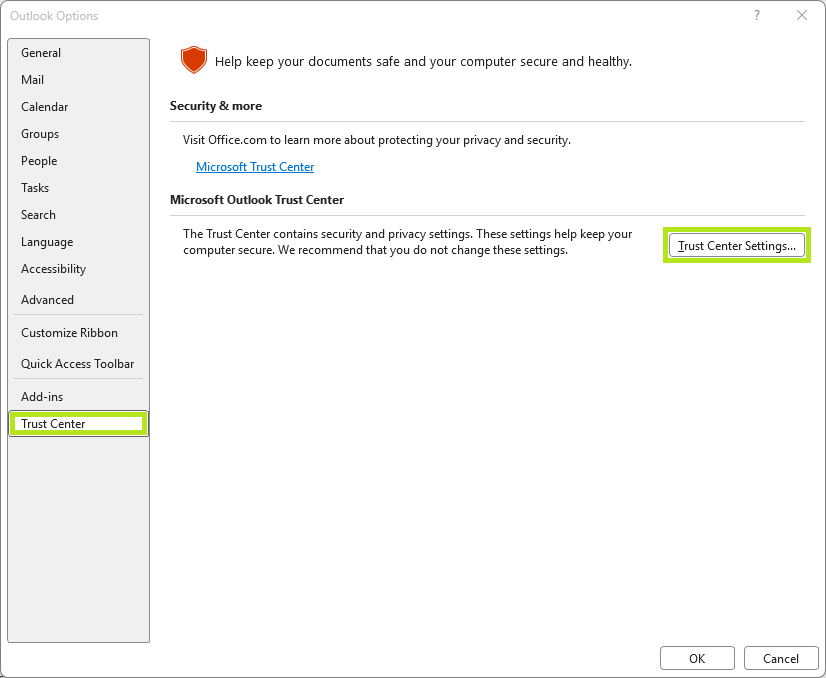
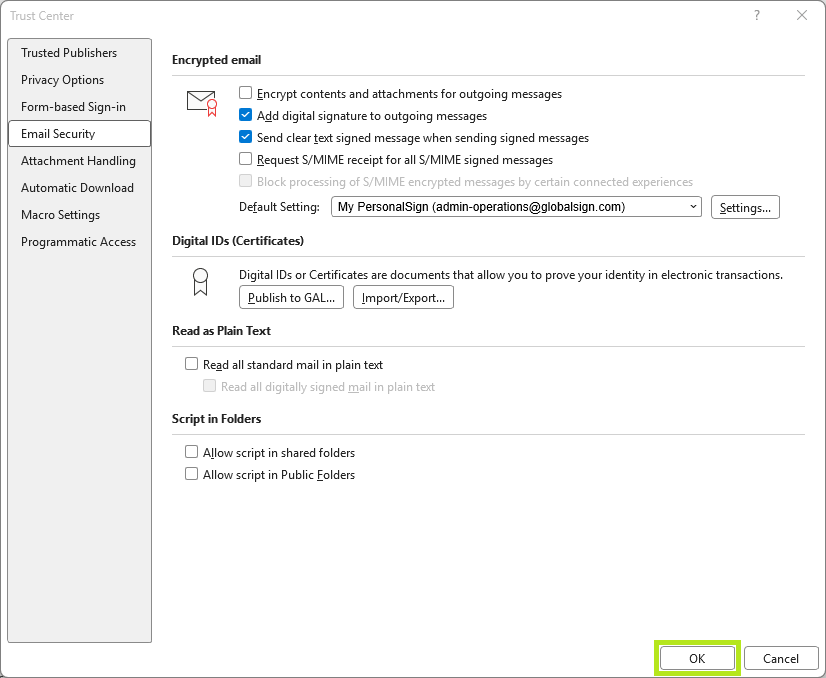
- On the left menu bar, click Trust Center, then Trust Center Settings.
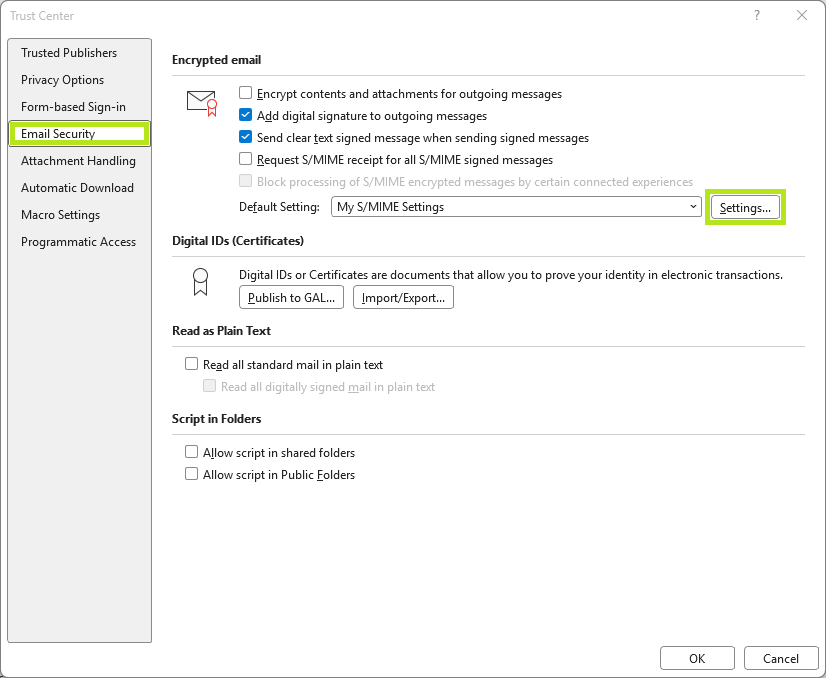
- Click Email Security, then Settings.
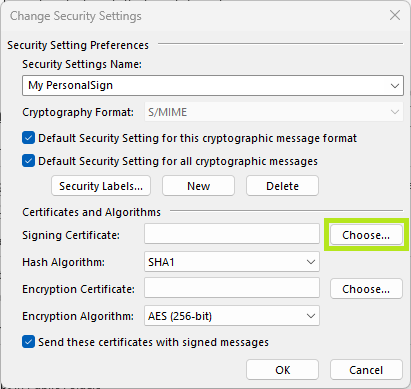
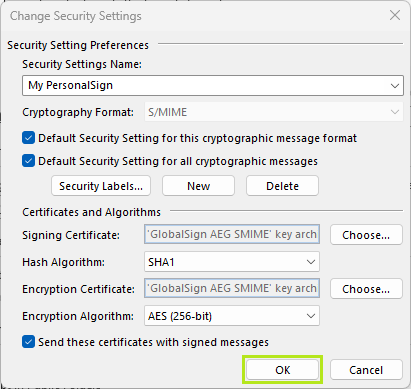
- Enter a name for the security settings.
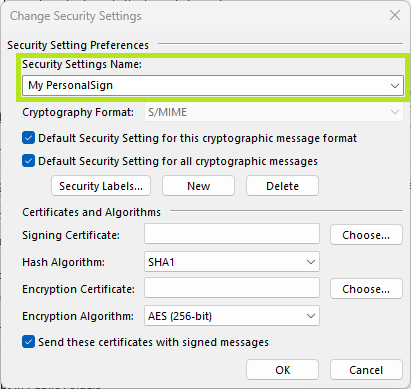
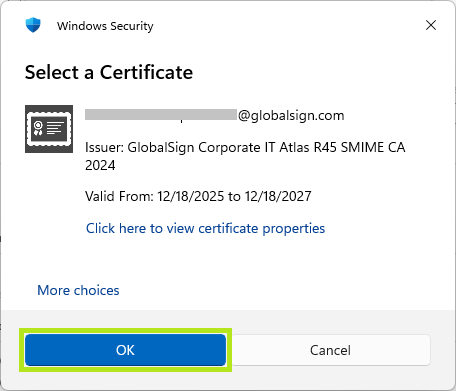
- Click Choose then select the signing certificate from the list that matches the email address you are currently configuring.
NOTE: You must pick the certificate that exactly matches your email address. If the list is empty, the certificate was likely not installed correctly (see PREREQUISITES for more information).
-
After selecting your signing certificate from the list, click OK.
-
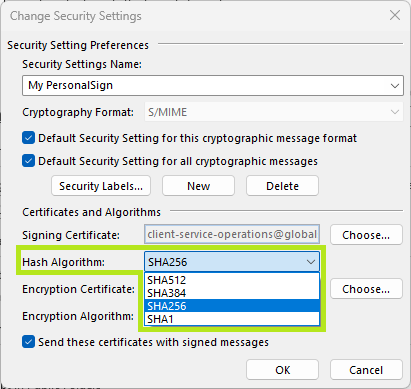
Select SHA256 from the Hash Algorithm dropdown list.
- Click Choose then select the encryption certificate from the list that matches the email address you are currently configuring.
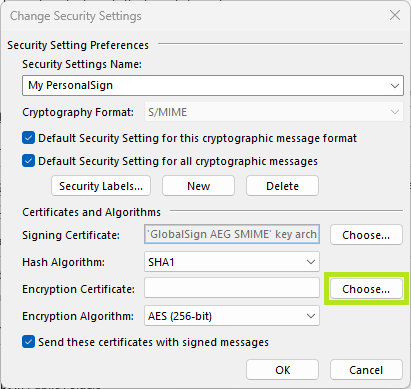
- After selecting your encryption certificate from the list, click OK.

- Click OK to confirm. Else, click Cancel to terminate transaction.
- After the signing and encryption certificates are set in, click OK to exit out of the Trust Center.
|
WHATS NEXT? After completing the PersonalSign Certificate Configuration process, you can now proceed to Sign & Encrypt with PersonalSign. |
Related Articles
SSL Configuration Test
Check your certificate installation for SSL issues and vulnerabilities.