
Install Client Certificate - Microsoft Edge for Windows
Nov 6, 2025
Install Client Certificate - Microsoft Edge for Windows
Introduction
This article provides step-by-step instructions for installing your Certificate in Windows using Microsoft Edge.
If this is not the solution you are looking for, please search for your solution in the search bar above.
Step-by-Step Guidelines
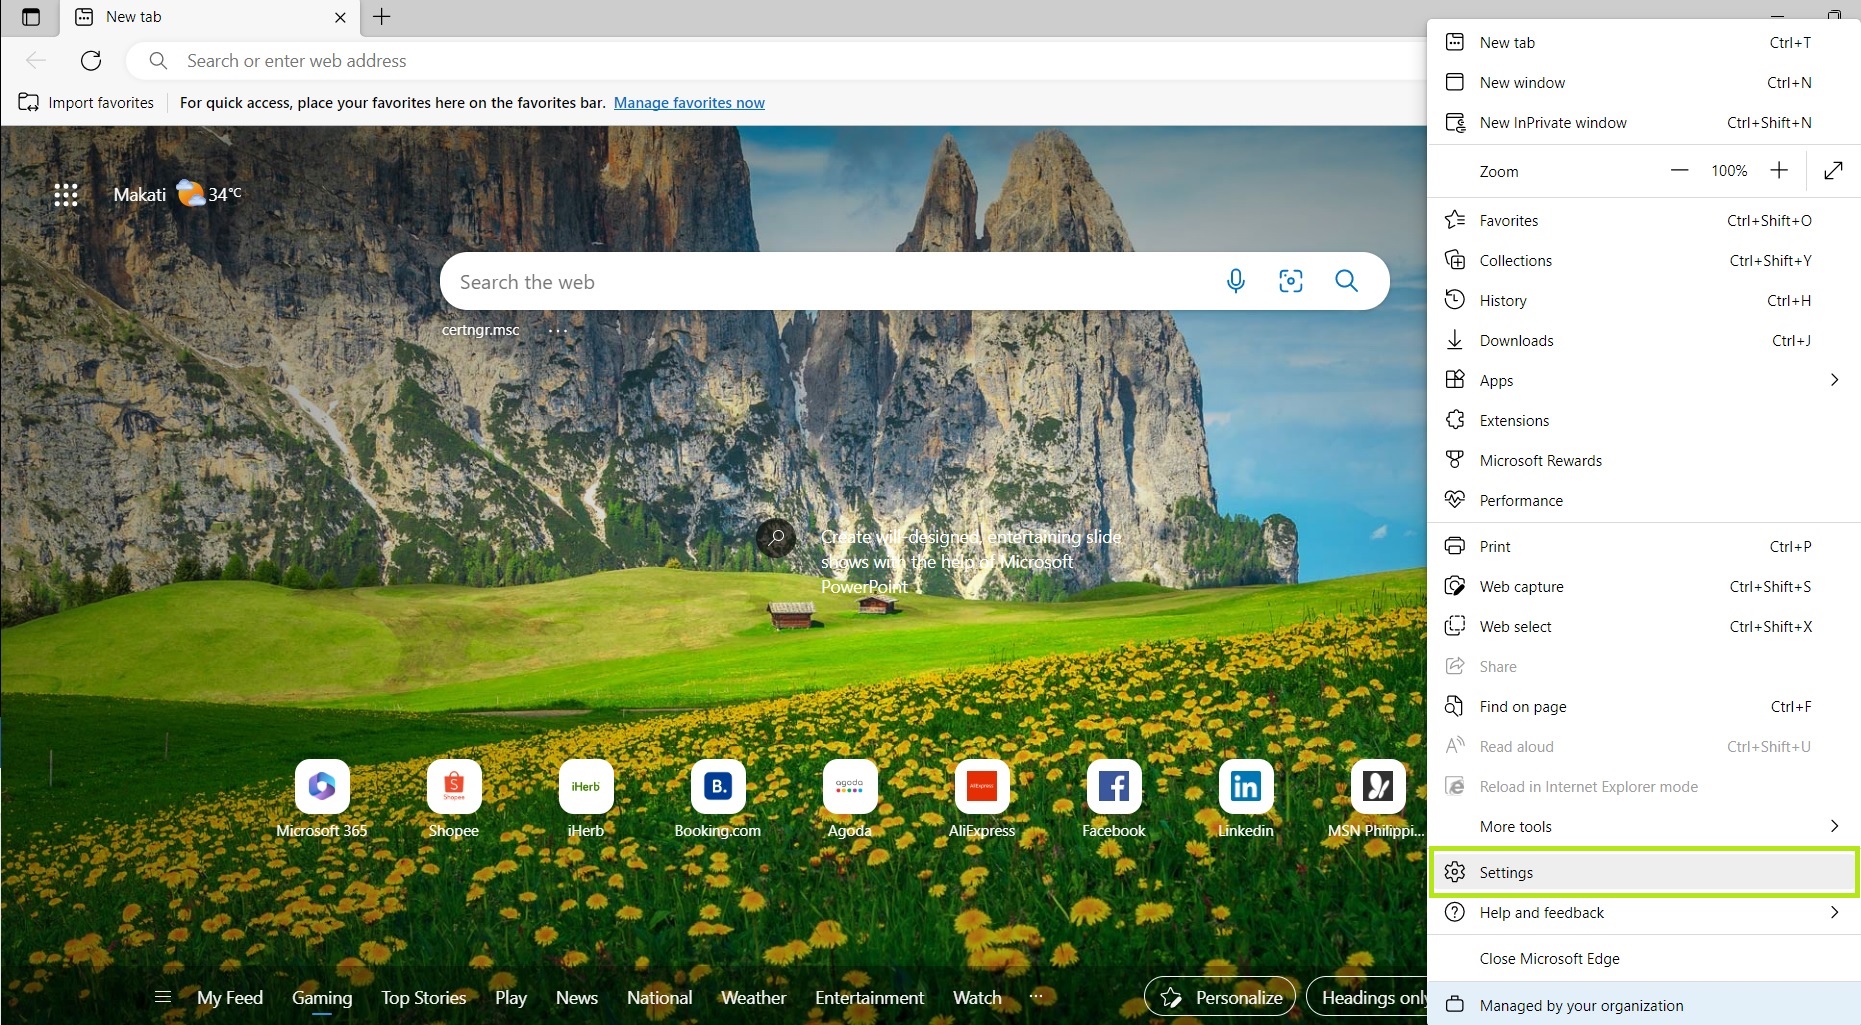
- Open Microsoft Edge. Then, open the menu at the top right corner and select Settings.
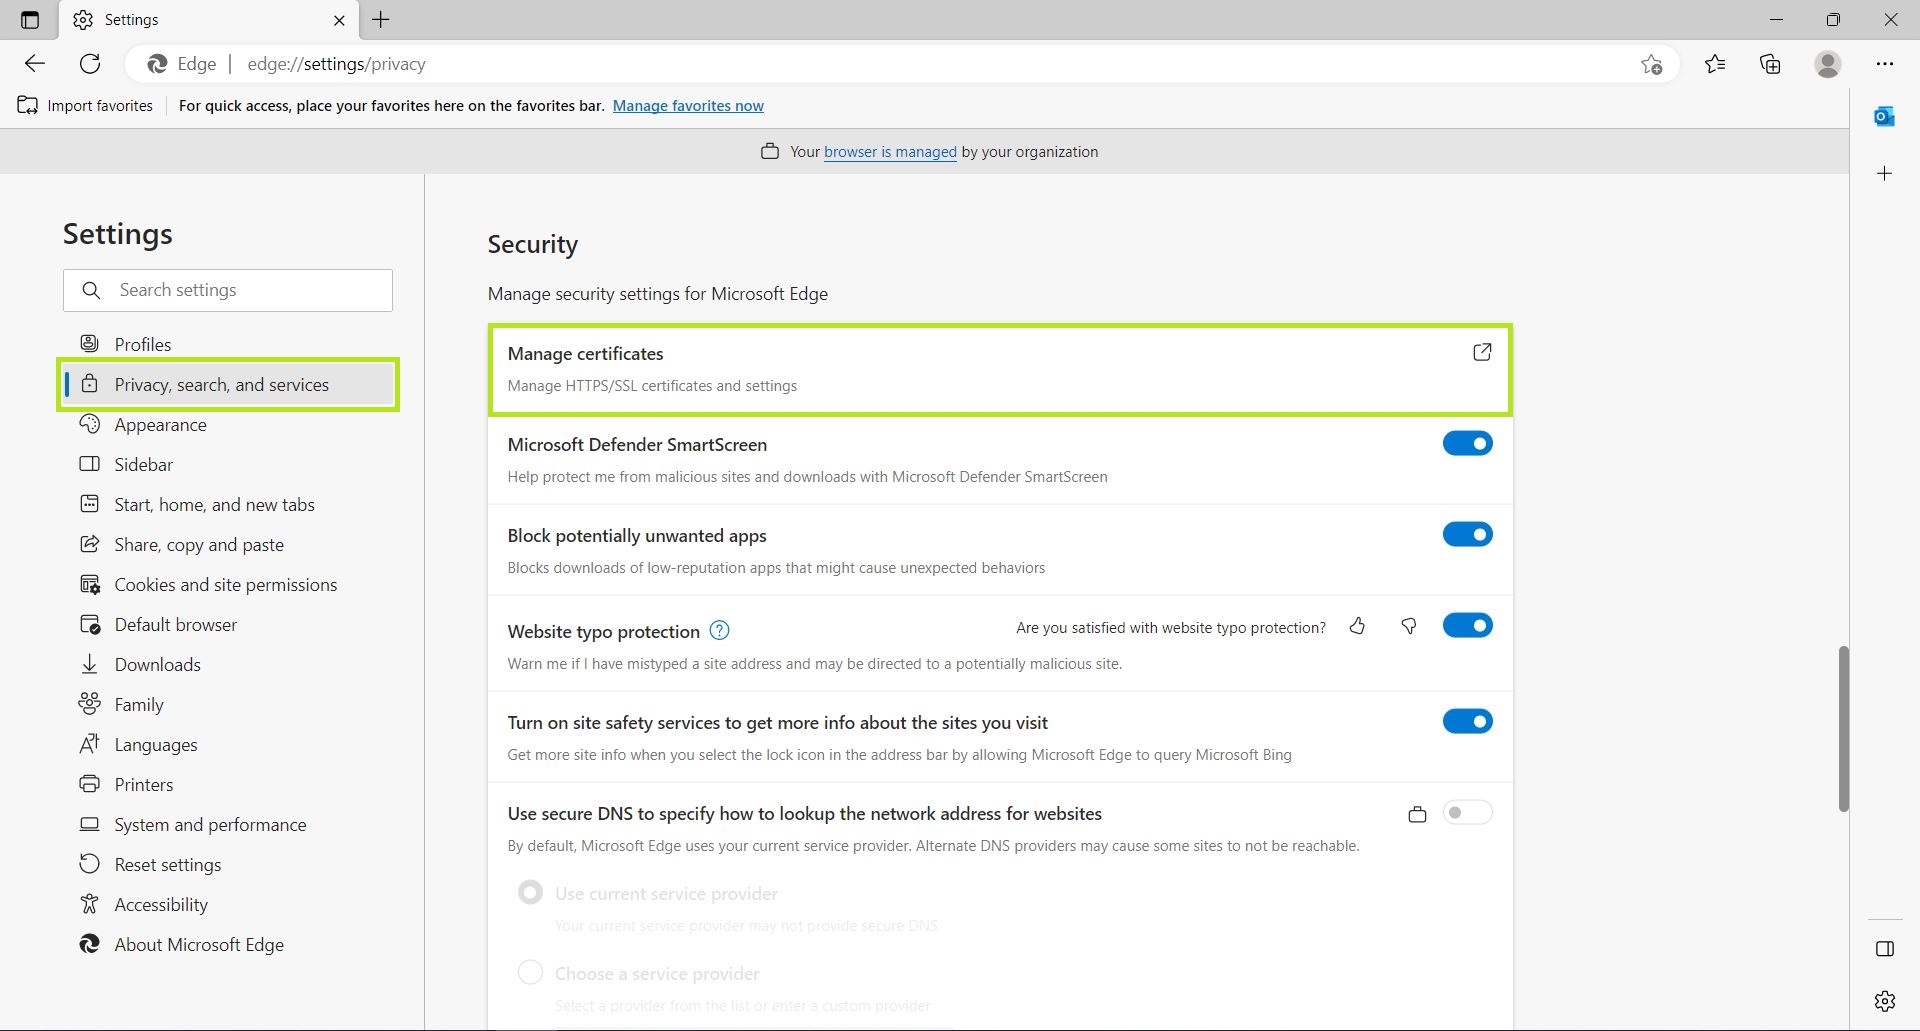
- Select Privacy, search and services, and the choose Manage certificates.
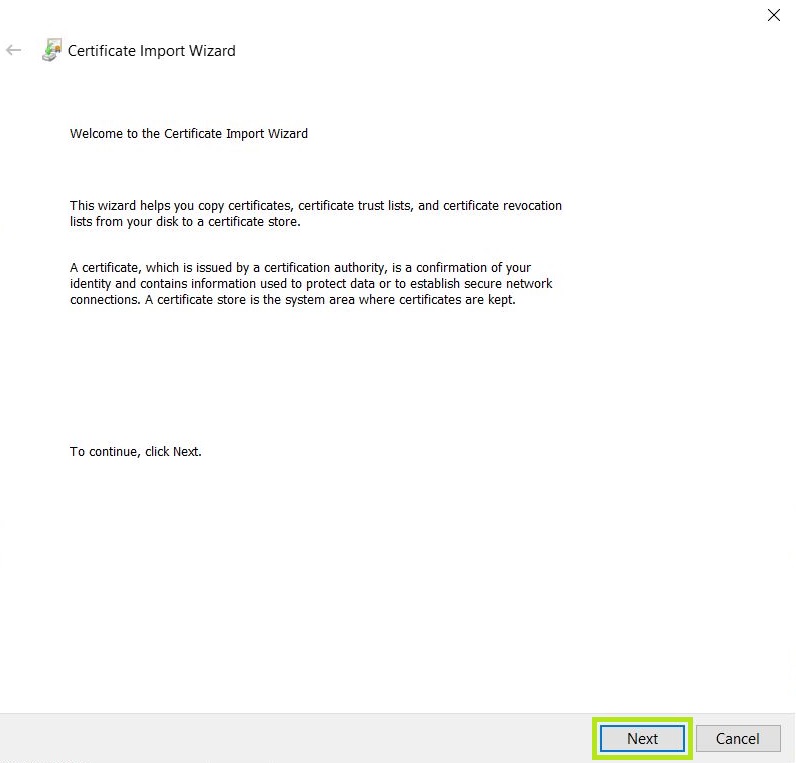
- Click Import to start the Certificate Import Wizard.

- Click Next, to continue.
- Browse to your downloaded Certificate PFX file and then click Next.
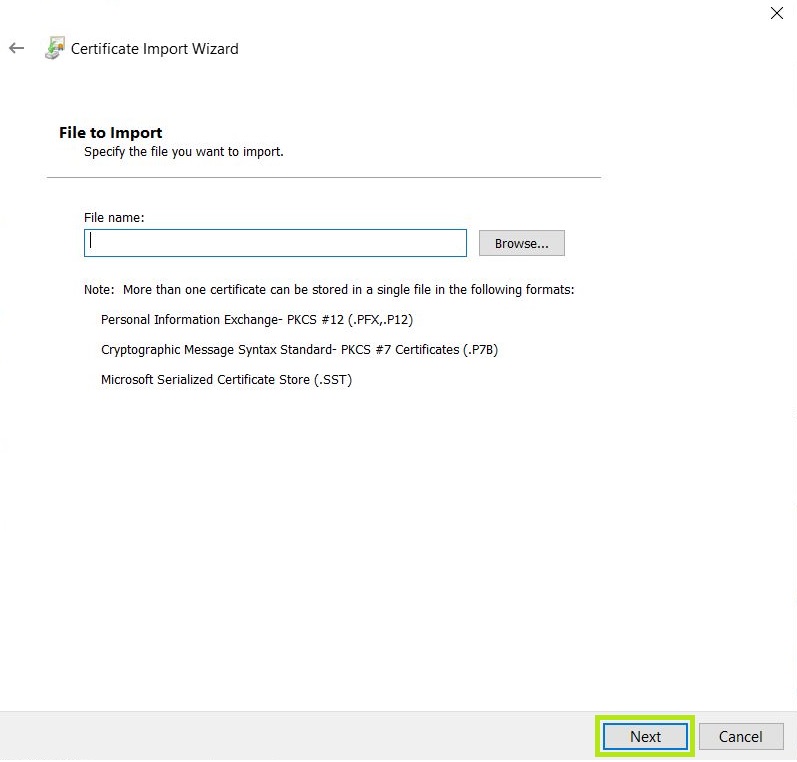
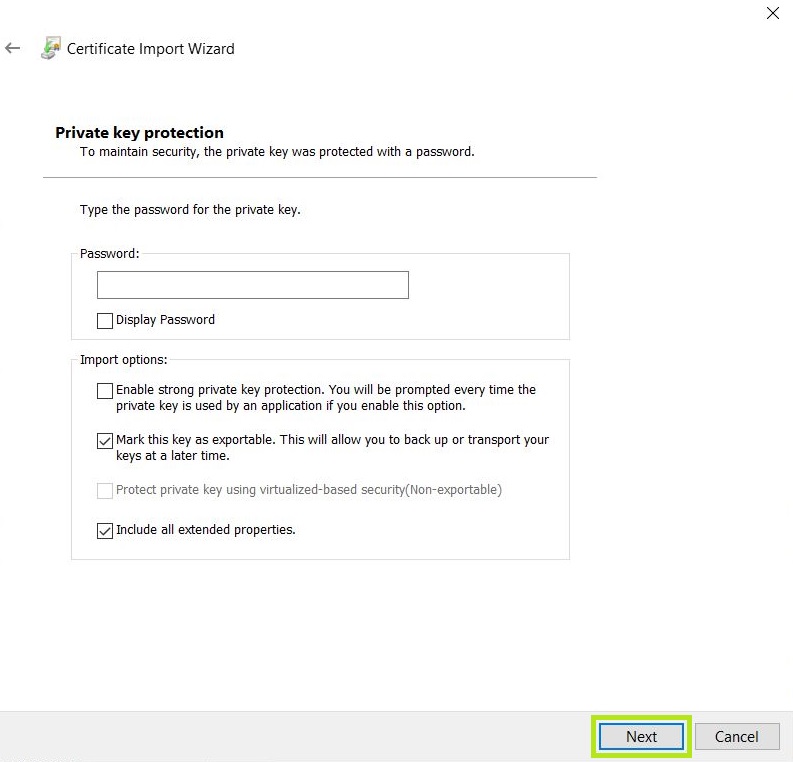
Note: When browsing to your PFX file, make sure the file type in the bottom-right of the browse window is changed to Personal Information Exchange, otherwise it will not find your file. - Input the password you entered when you downloaded the Certificate. We recommend you enable the second and third Import options as listed below. Then, click Next.
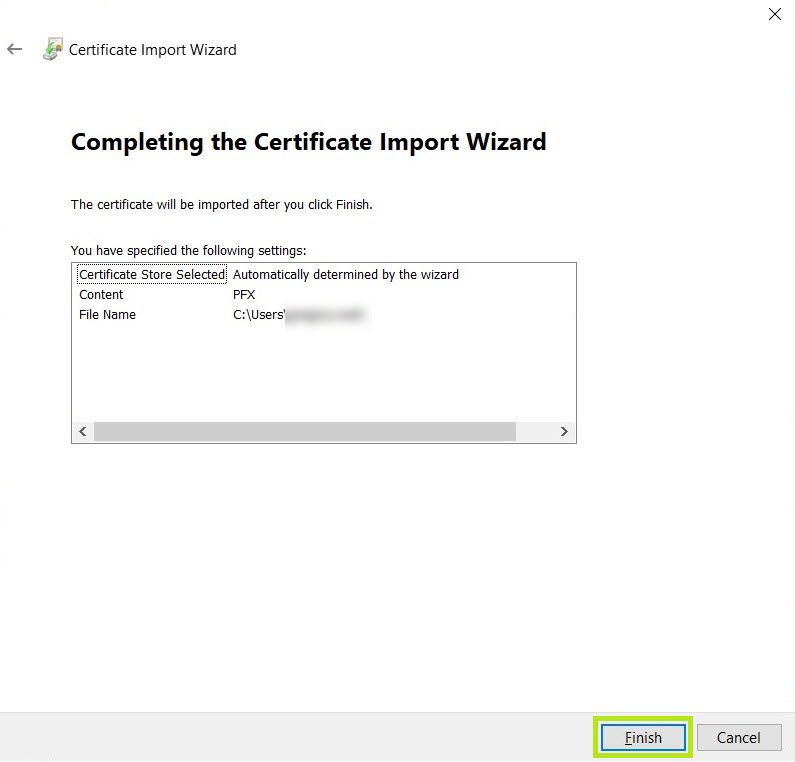
- Let the Certificate Import Wizard determine the best place for the installation. Click Next.
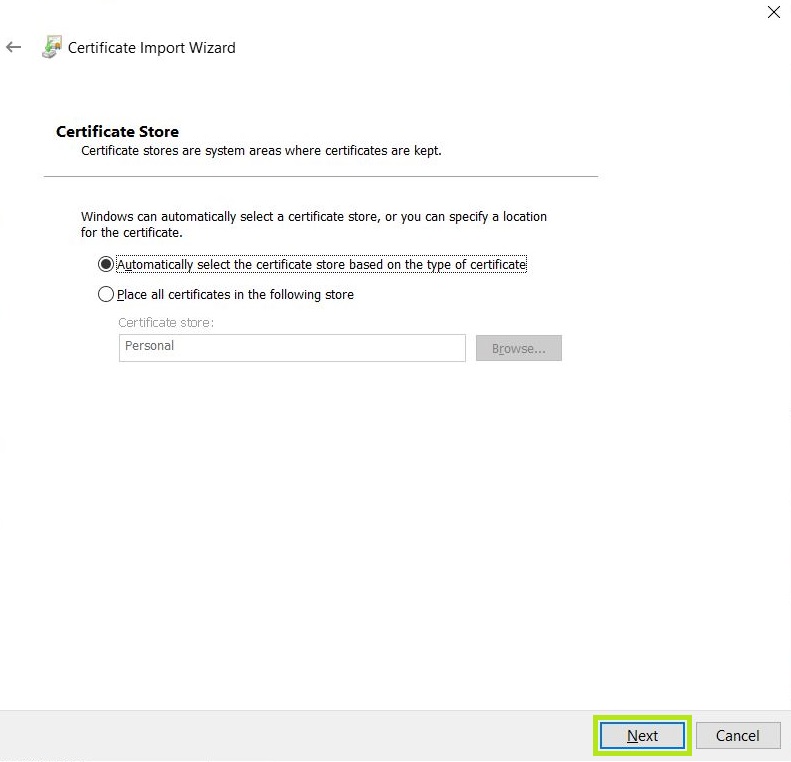
Note: In some instances, the Certificate may not install under Personal. If this is the case, then manually select the second option when rerunning the installation. - Click Next. Then, click Finish.
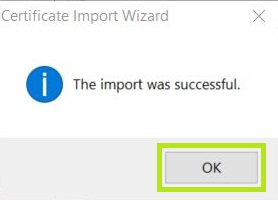
- The Certificate is now installed and can now be used for network or secure client authentication.
SSL Configuration Test
Check your certificate installation for SSL issues and vulnerabilities.
Contact Support
If you are an Atlas portal user, please submit request to support-atlas@globalsign.com.