
Initialize SafeNet eToken
Mar 11, 2026
Initialize SafeNet eToken
|
OVERVIEW: This page walks you through the process of initializing the earlier version of the SafeNet eToken (SafeNet eToken 5110) which commonly supports AATL certificates. At the completion of this procedure, you will be able to have your certificate stored in the eToken. If you are using the most recent version (SafeNet eToken 5110+ CC (940) version), please refer to this guide. |
Get Started
-
The initialization process is a requirement when:
• Setting up the SafeNet Token for the first time.
• Resetting the etoken to set up a new password for locked etoken or forgotten passwords. -
Reinitializing your eToken will delete all certificates currently installed on the token. If you have existing certificates on the eToken, they will be removed permanently and will have to be reissued and installed again.
-
GlobalSign provides one free token to new customers and offers free replacements if the token becomes unsupported or faulty. For additional token, you can buy directly from GlobalSign or from another vendor, provided the token is compatible with GlobalSign Requirements. GlobalSign support the following token models from Thales:
• Safenet eToken 5110 (For AATL Only)
• Safenet eToken 5110+ CC (940)
• Safenet eToken 5110+ CC (940B)
• Safenet eToken 5110+ CC (940C) -
GlobalSign verifies token compatibility during installation. If an unsupported token is used, an error message will appear, and the certificate will not install.
-
Prepare passwords for the following:
• Administrator Password. This password is used to manage the token. It can be updated, but not required.
• Token Password. This password is required to access the token certificate store. It is recommended to be updated.
• PUK or PIN. These passwords are not commonly used, but serves an extra layer of internal authentication method. This is required.
|
WARNING: If the token password is lost, forgotten or entered incorrectly several times, it can be retrieved by initializing the eToken using the administrator password. If the Administrator password is lost, forgotten or entered incorrectly several times, the eToken will be permanently locked. Keep passwords in a secure password manager for easier tracking. If a token is lost, blocked, or otherwise unusable due to customer actions, a replacement must be purchased. |
Prerequisites
- GlobalSign-provided USB Token. This is mailed upon ordering GlobalSign's Document, Email or Code Signing Certificate.
- Downloaded and installed SafeNet Authentication Client in your operating system. This tool is required to initialize your SafeNet USB token.
Guidelines
- Insert your SafeNet USB token into your computer.
- Open the SafeNet Authentication Client Tools.
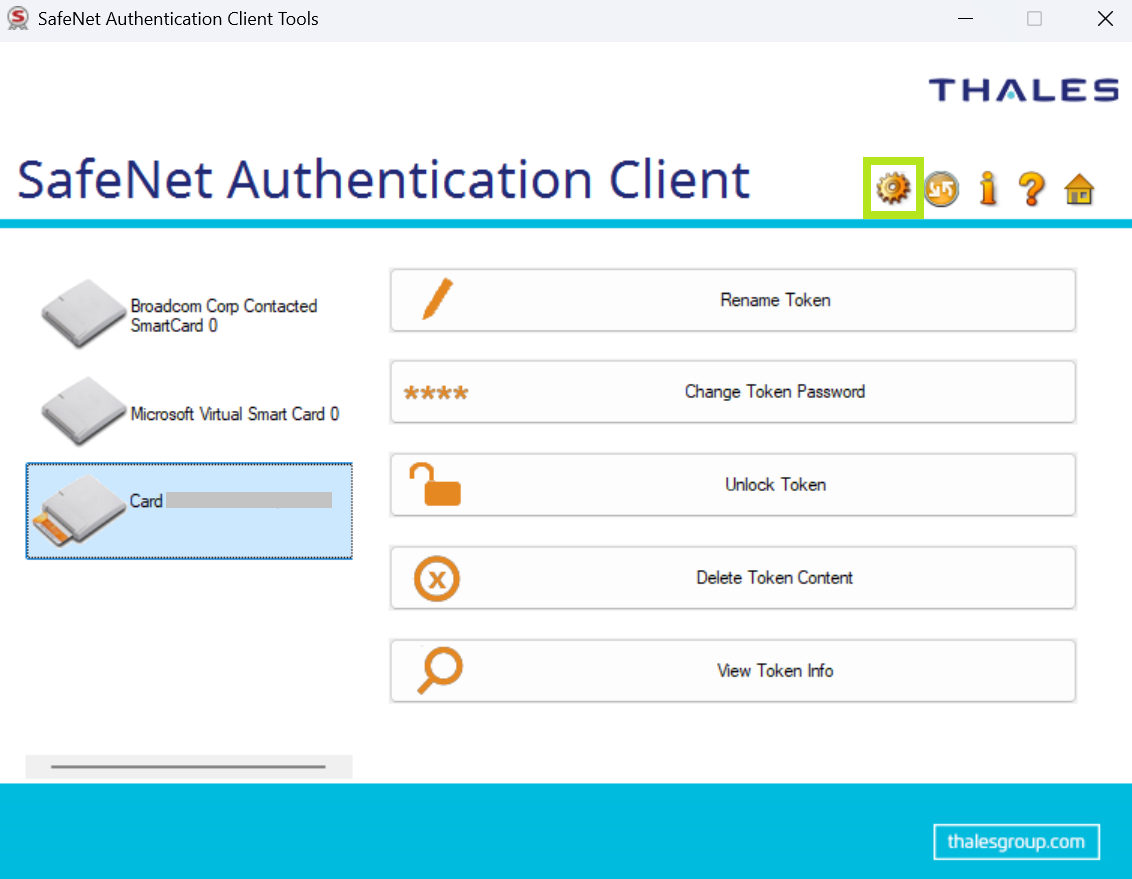
- Click the Gear icon on the top right for Advanced View. This will redirect you to the next window.
-
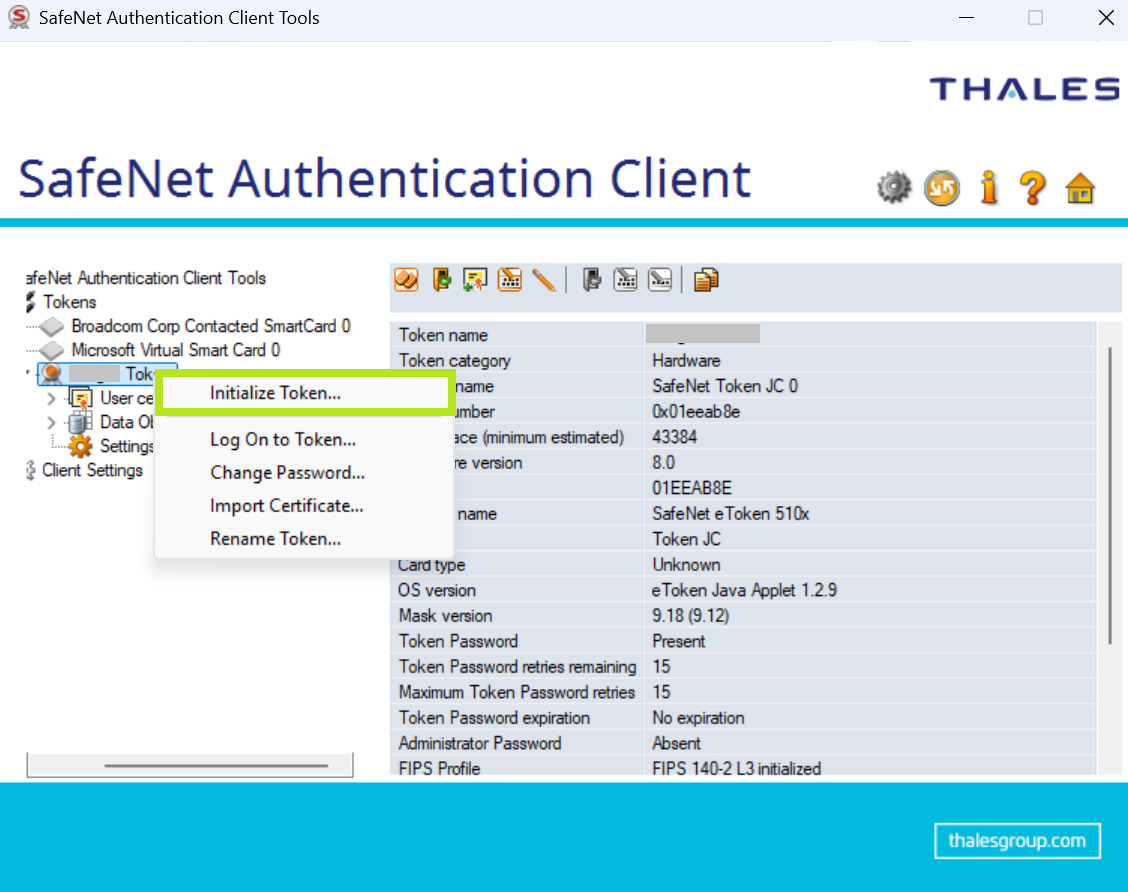
Right-click on your token name and select Initialize Token.
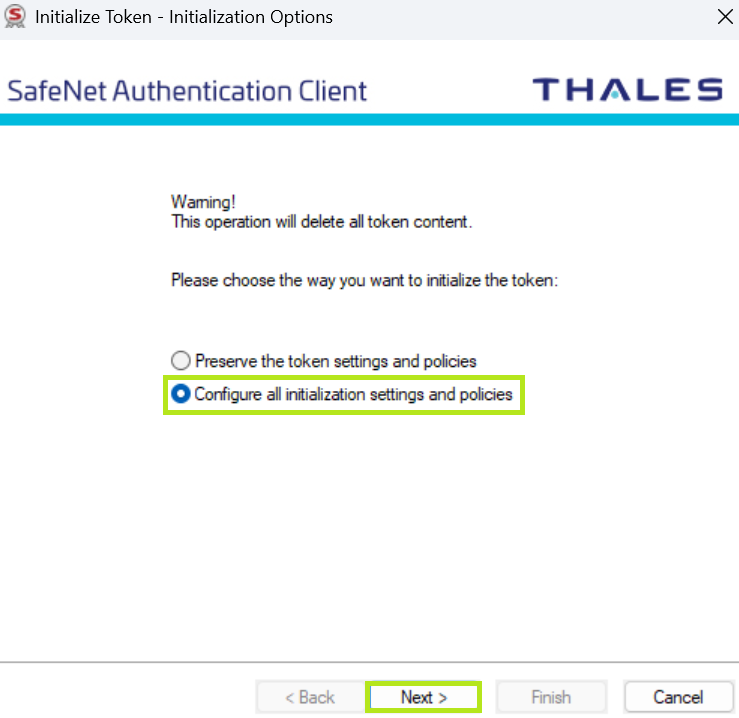
- In the Initialize Token - Initialization Options window, choose Configure all initialization settings and policies. Then, click Next to proceed.
-
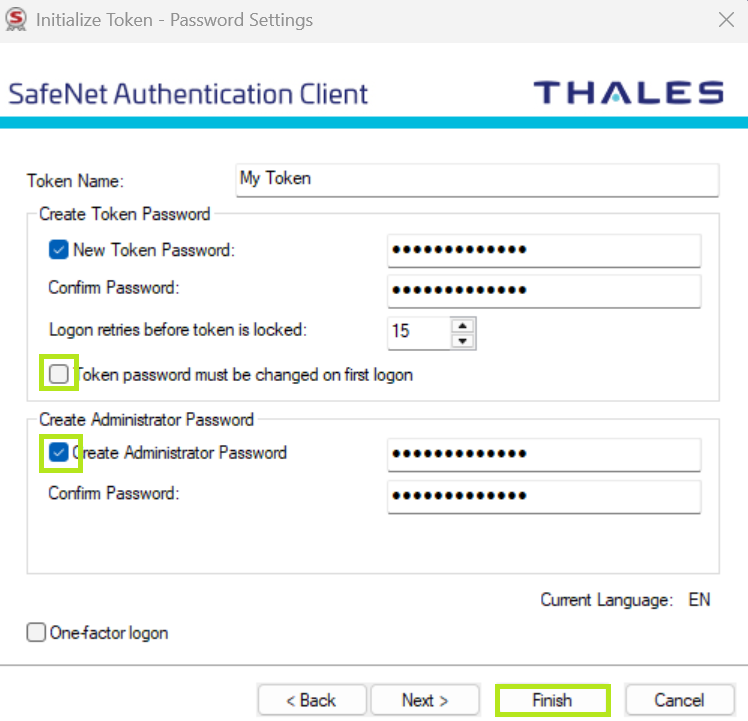
In the Initialize Token - Password Settings window, create a new password for your token. Enter and confirm your new passwords. Then, click Next.
Note: If you DO NOT want to make any changes with the current token password next time you access the token, untick the Token password must be changed on first logon box.IMPORTANT: Token Password is required to access the token certificate store. It can be retrieved using the Administrator Password. Administrator Password is used to manage the token. If lost, forgotten or entered incorrectly several times, the eToken will be permanently locked. The following passwords are recommended to be kept in a secure password manager for easier tracking.
-
Click OK to acknowledge that all current token contents will be deleted. This will start the initialization process.
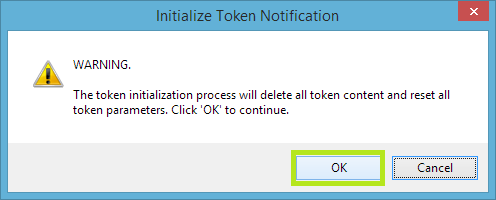
WARNING: The token must remain plugged in until the initialization process is complete. Removing the token during the operation will damage it.
-
Click OK to complete the process.

-
Your SafeNet eToken is initialized. It is now ready to have a Certificate installed.
Related Articles
SSL Configuration Test
Check your certificate installation for SSL issues and vulnerabilities.