
Install PersonalSign Certificate as .pfx (PKCS12)
Mar 24, 2026
Install PersonalSign Certificate as .pfx (PKCS12)
|
OVERVIEW: This page walks you through the process of downloading and installing your GlobalSign PersonalSign Certificate as .pfx (PKCS12). At the completion of this procedure, your Certificate will be ready to be configured on your desired platform, email client, etc. For more Certificate installation options, please refer to this page. |
|
IMPORTANT: This guide is for installing Certificate as .pfx (PKCS12). If you selected a different generation method during ordering (Step #4), please go back to the Installation page to find the correct guide. Otherwise, you need to cancel your current order and reorder to change your selection. |
Prerequisites
Before you proceed, make sure you have completed the following:
-
Approved and vetted GlobalSign PersonalSign Certificate.
To approve your Certificate, please refer to this page. -
Ensure that you are using the computer you want to install your certificate on.
Guidelines
- Open the Certificate Download Ready email and launch the pickup link using any browser.
-
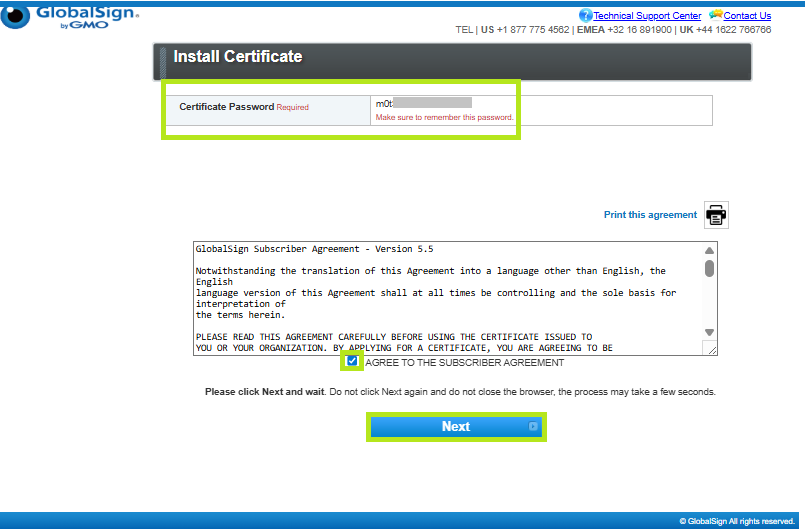
In the Install Certificate window, enter the pickup password created when you placed your order. Then, click Next.

-
The Certificate password (19-digits alphanumeric PKCS12 password) will be auto-generated. Copy the password and paste it in a safe location, then, tick the I Agree to the subscriber agreement box and click Next.
IMPORTANT: Ensure to save this password in a safe location. The Certificate password (Private Key password) is required during Certificate installation. If lost or forgotten, do not close the tab where you entered the delivery link. You can retrieve the password by clicking the back button in the current tab or contact support for assistance.
-
Click Download My Certificate to download your certificate as .pfx (PKCS12) file.

-
Once your PKCS#12 file is downloaded, it is ready to be installed.
-
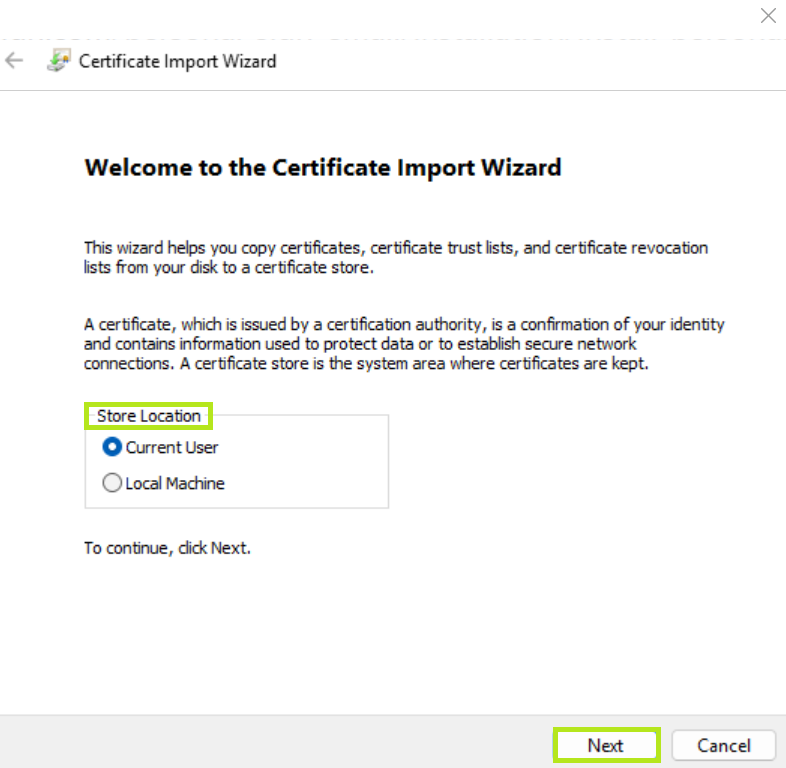
Open the file in the location where it was downloaded. It will open the Certificate Import Wizard window.
-
Select your preferred Store Location. Then, click Next.
-
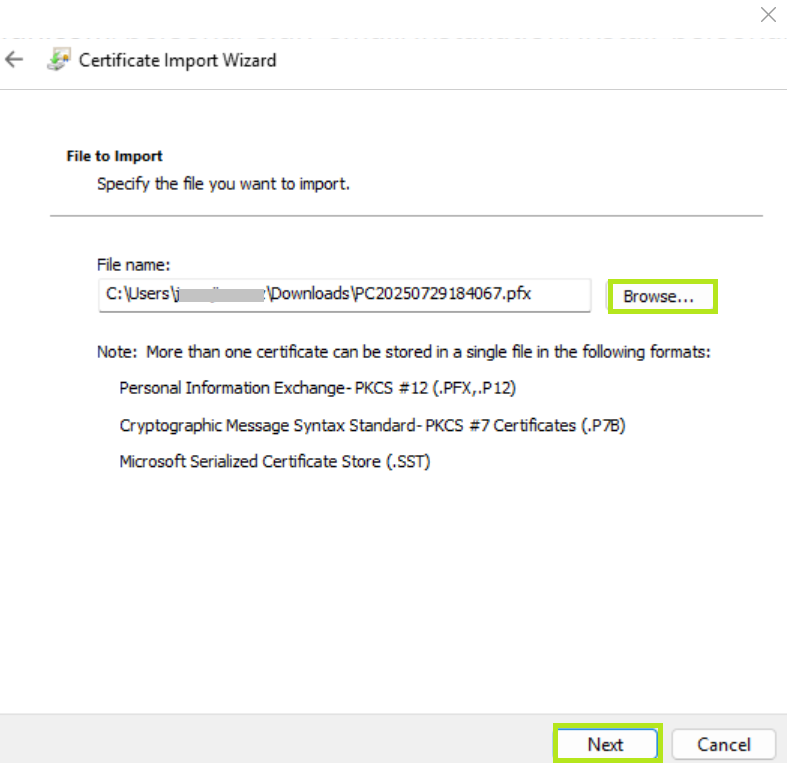
Select the location and click Next.
-
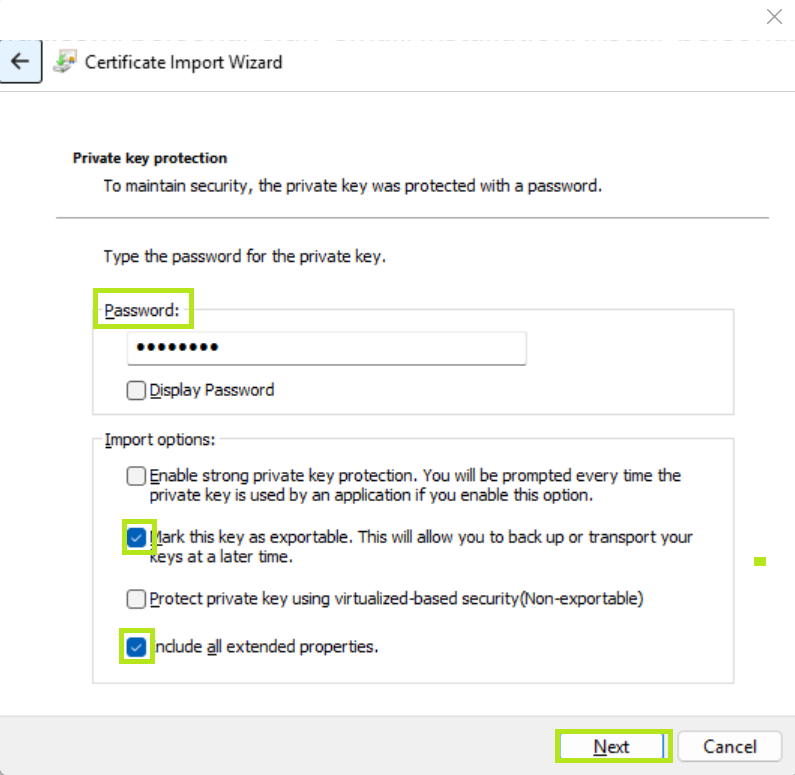
Enter the Private Key Password (Certificate password) that was auto-generated in Step # 3 when you downloaded the Certificate. Then, tick boxes of the following options:
• Mark this key as exportable - this will allow you to export the private key from the certificate.
• Include all extended properties - this will carry over all the certificate details during import.
Then, click Next.
-
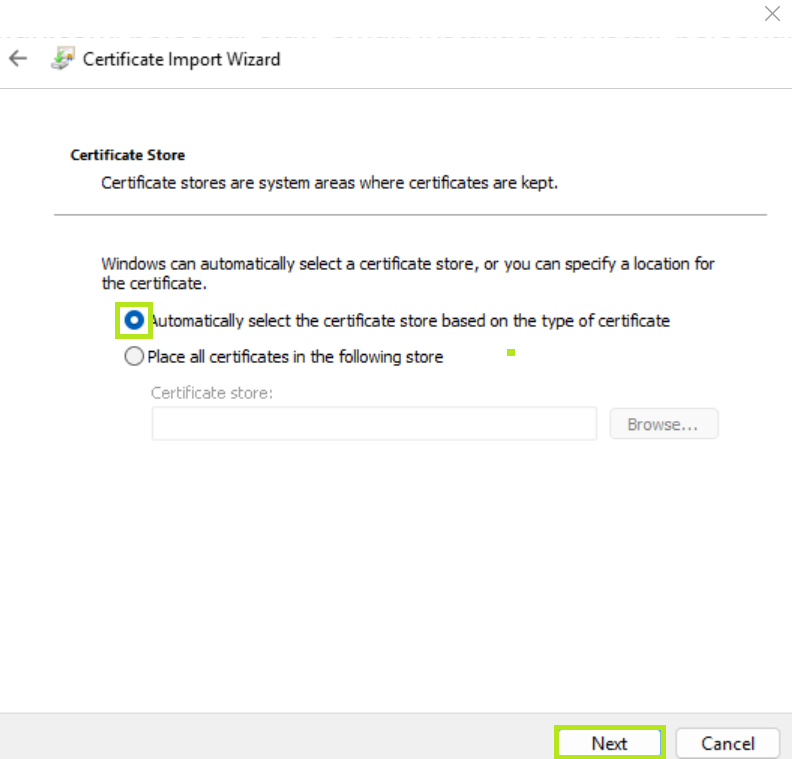
Select the first option and let the Certificate Import Wizard determine the best place for the installation. Then, click Next.
IMPORTANT: In some instances the certificate may not install under Personal. If this is the case, select the second option and manually browse for your preferred when rerunning the installation.
-
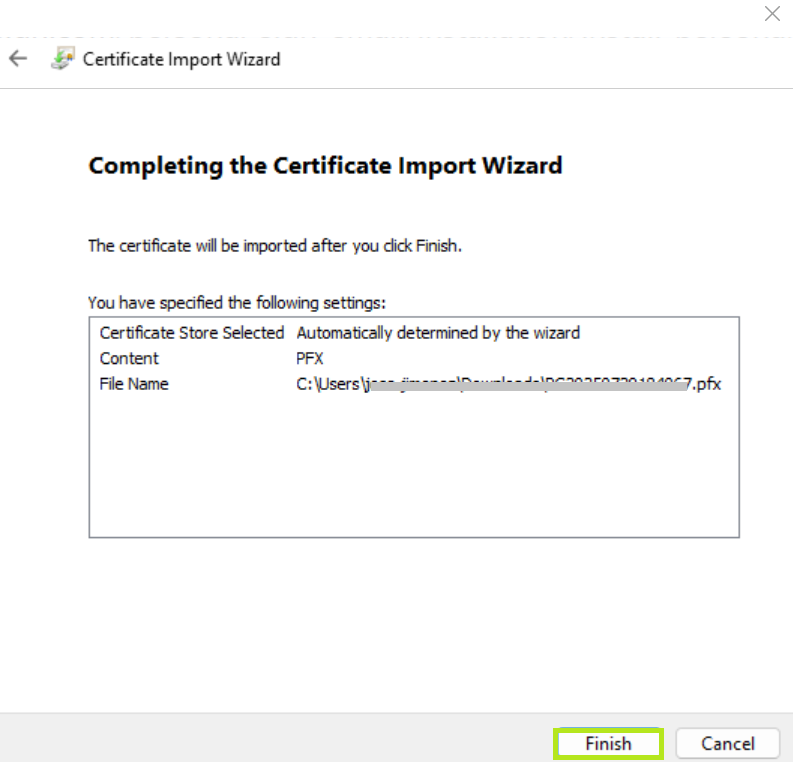
Review your setting and click Finish.
-
Click OK to complete the process. Your certificate is successfully installed.

|
WHAT'S NEXT: Now that you have successfully installed your PersonalSign Certificate, you may now configure it on your desired platform, email client. For instructions on how to configure your GlobalSign PersonalSign certificate to your preferred platform, please see this page. |
SSL Configuration Test
Check your certificate installation for SSL issues and vulnerabilities.