
Install PersonalSign Certificate - Step 2: Locate & Install Your Certificate
Mar 16, 2026
Install PersonalSign Certificate - Step 2: Locate & Install Your Certificate
Article Purpose: This article provides step-by-step instructions for locating and installing your certificate. If this is not the solution you are looking for, please search for your solution in the search bar above.
Installation Steps
Please make sure you have completed the PersonalSign Installation - Step 1: Downloading Your Certificate before continuing with the installation. Also if you cannot locate your PFX/certificate file please follow the steps to reissue your certificate.
Note: The following instructions apply to installing your certificate in Windows and Google Chrome.
While your certificate has been downloaded to your computer, it needs to be imported into a Certificate Store before it can be used.
- Click Start and enter your certificate order number into the Search Programs and Files box.
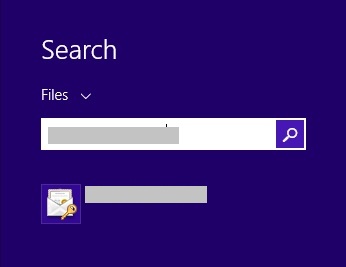
- Right click on the certificate and click Install PFX.
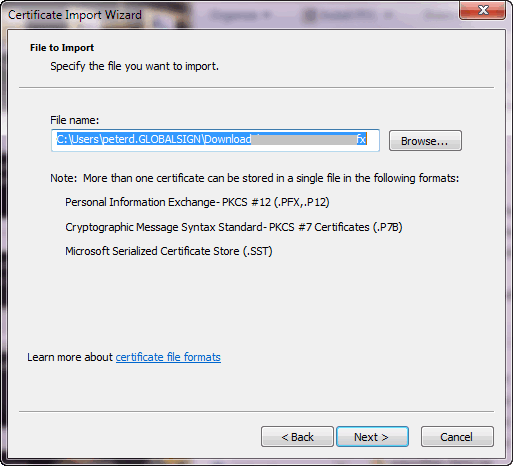
- You will now be guided through the Certificate Import Wizard. Click Next to begin the import process.
- The next screen prompts you to select the file you want to import. The correct file should be automatically pulled in, but you can browse for another file if needed. Click Next when you have the appropriate file selected.
- Paste the private key password. This is the password that was auto-generated when you downloaded the Certificate.
Check out the following options:
- Mark this key as exportable - this will allow you to export the private key from the certificate.
- Include all extended properties - this will carry over all the certificate details during import.
- Click Next.
- Let the Certificate Import Wizard determine the best place for the installation. Click Next.
Note: In some instances the certificate may not install under Personal.
If this is the case then manually select the second option when rerunning the installation.
- Click Finish.
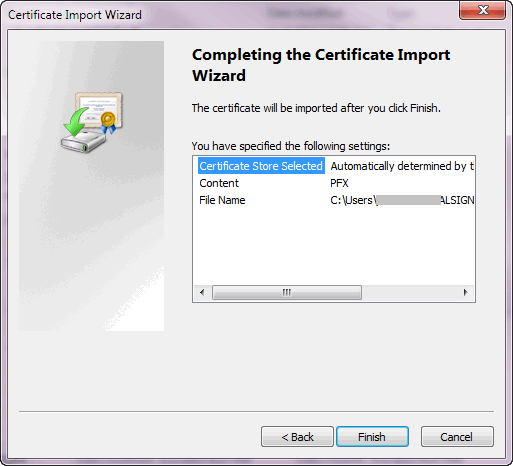
- Your certificate is successfully installed.
Now that you have successfully located and installed your certificate follow instructions for installing on your desired platform, email client, etc. Below are direct links to the more popular options:
SSL Configuration Test
Check your certificate installation for SSL issues and vulnerabilities.