Download and Install PersonalSign Certificate
Jun 9, 2025
Download and Install PersonalSign Certificate
Introduction
This article provides step-by-step instructions for downloading and installing a PersonalSign Certificate.
If this is not the solution you are looking for, please search for your solution in the search bar above.
Guidelines
You can watch the following video for a tutorial.
Or, you can check out the step-by-step guidelines below.
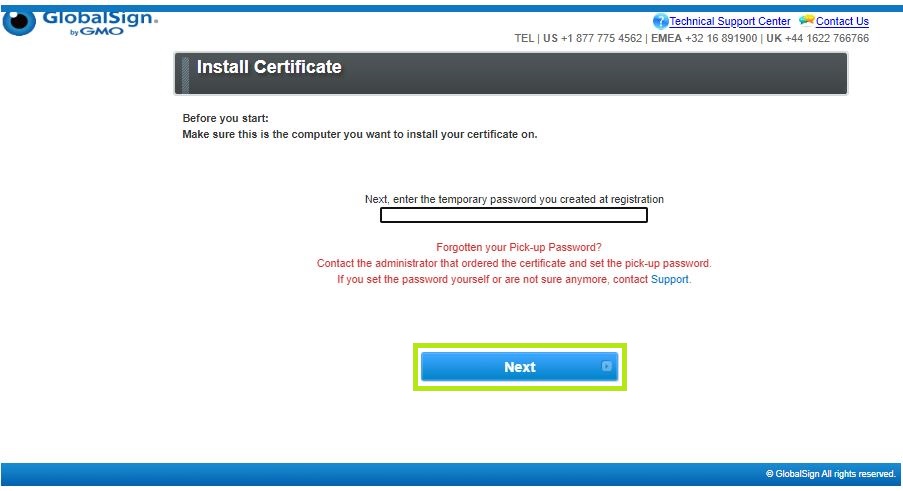
- Click on the link in your pickup email to initiate the Certificate generation and installation process.
On the Install Certificate window, enter the pickup password created when you placed your order, and then click the Next button.

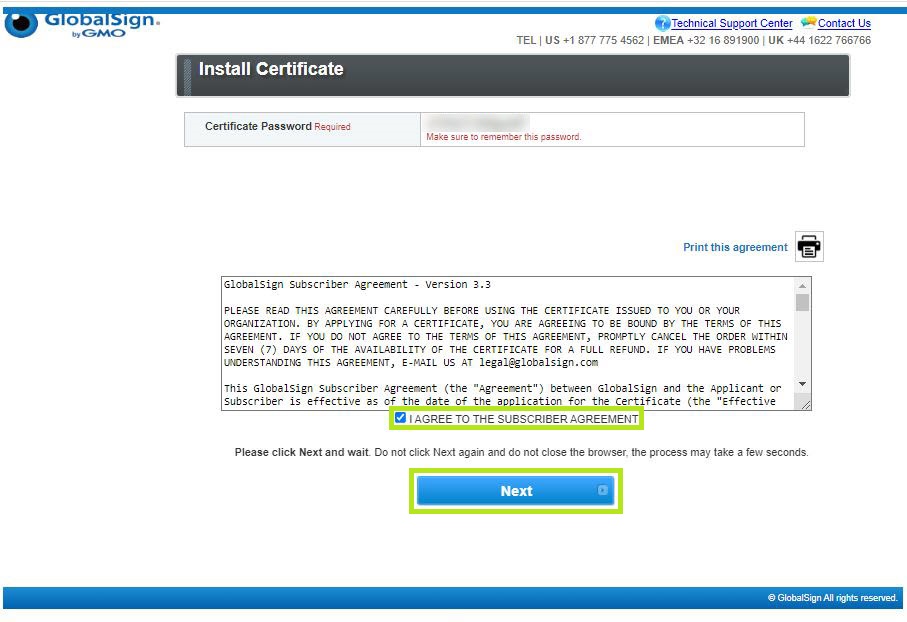
- The Certificate password (19-digits alphanumeric PKCS12 password) will be auto-generated. You can check this article for more information.
IMPORTANT: Please save this password, copy and paste it in a safe location.
Note: The Certificate password will be needed during Certificate installation.
In case you lost the auto-generated password, please reissue the Certificate following the guidelines here.
If you have a PS3 Pro and you have purchased our certificate through Marktconcurrent or Federation of Belgian Chambers of Commerce, please contact our Support Team to have the reissue done.
Then, tick the I Agree to the subscriber agreement box and press Next.

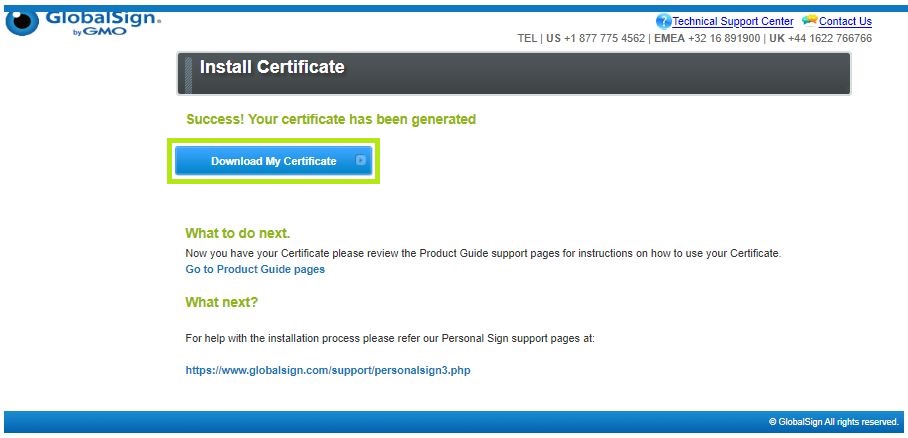
- Click the Download My Certificate button to download your PKCS#12 file (.pfx).

- Be sure to choose Save when prompted by your browser.
- Save your Certificate in a location you will remember and name it something you will remember. Click Save.

Install The Certificate
- Double-click on the .pfx file you just downloaded, and the Certificate Import Wizard will pop up as shown below.
Select the Current User option and click Next to begin the import process.

- The file path is automatically selected. Click Next to continue.

- Paste the private key password. This is the password that was auto-generated when you downloaded the Certificate.
Check out the following options:
- Mark this key as exportable.
- Include all extended properties - this will carry over all the Certificate details during import.
- Click Next.

- Let the Certificate Import Wizard determine the best place for the installation. Click Next.
Note: In some instances, the Certificate may not be installed under Personal.
If this is the case, then manually select the second option when rerunning the installation.

- Click Finish.

- Your Certificate is successfully installed.

You have now successfully obtained and installed a PersonalSign Certificate.
SSL Configuration Test
Check your certificate installation for SSL issues and vulnerabilities.
Contact Support
If you are an Atlas portal user, please submit request to support-atlas@globalsign.com.
