Atlas Certificate Management Portal
Feb 11, 2025
Atlas Certificate Management Portal
Introduction
This article will guide you on how to conduct simple Certificate Management actions in the Atlas portal, such as requesting, reissuing and revoking a Certificate.
Before you can use the Certificates module, you must have an active product pack or SAN license, a vetted identity profile, and a validated domain.
If this is not the solution you are looking for, we recommend using the search bar above.
Issue a Certificate
- Log into your Atlas portal.
- Select the Certificates tab on the left menu. Then, press the Request Certificates tab to begin the process.
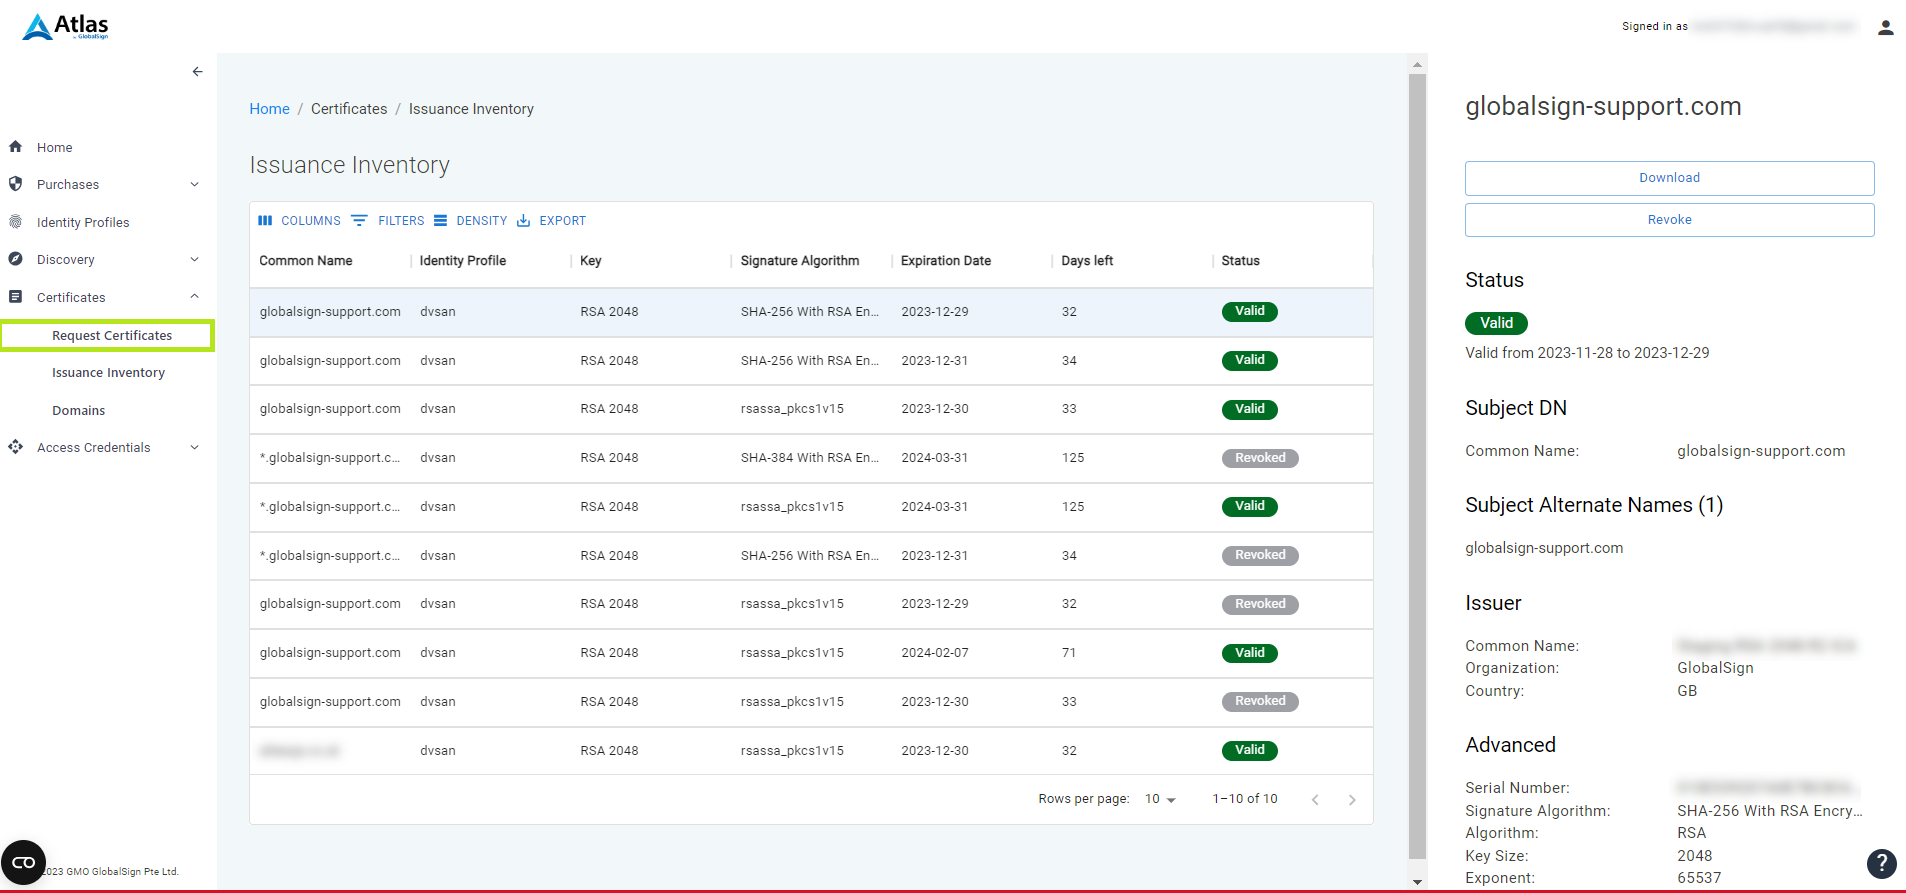
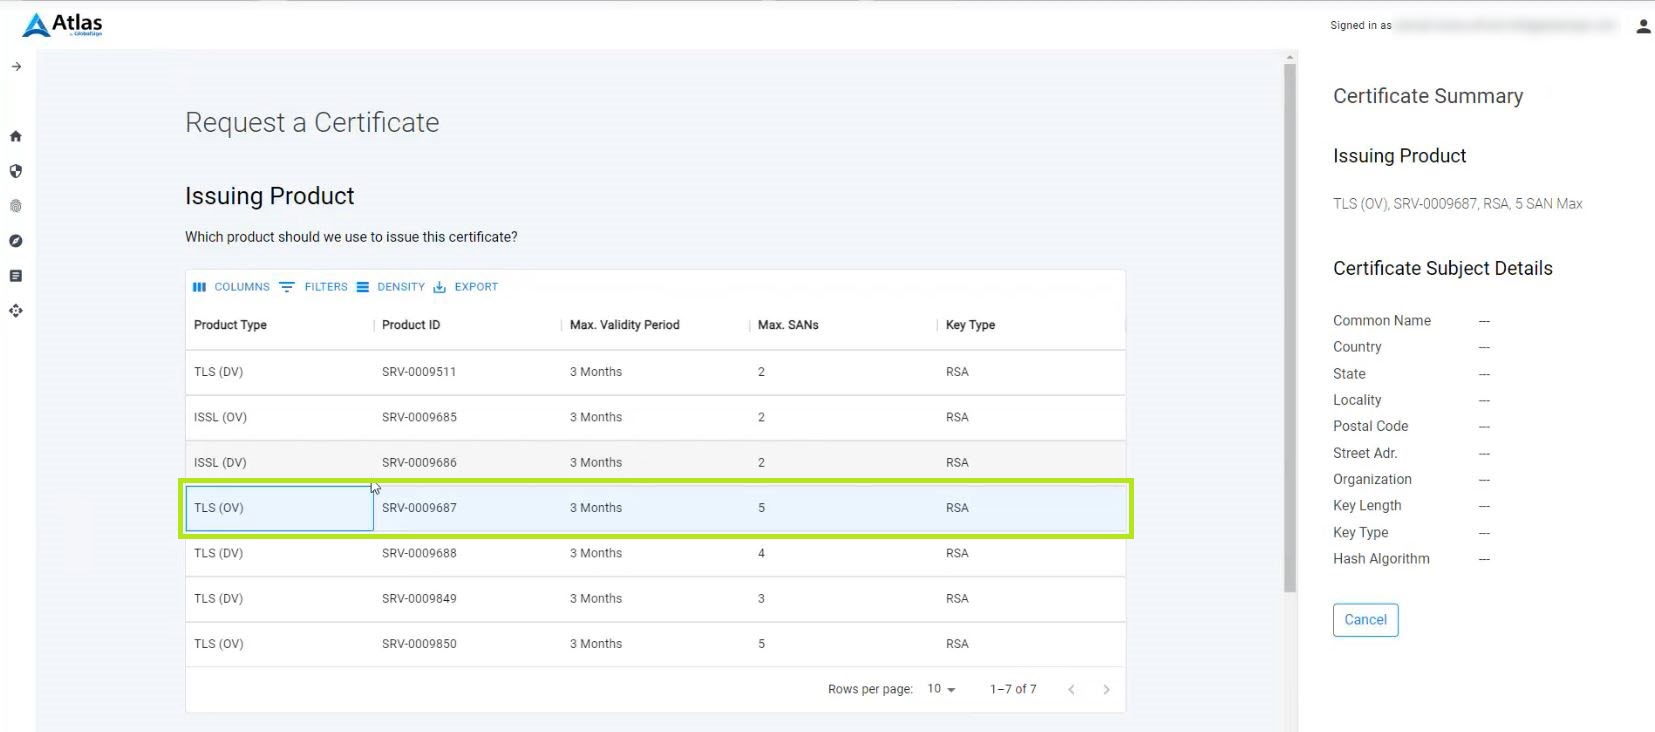
- On the Request a Certificate window, select the Product you wish to issue a Certificate from.
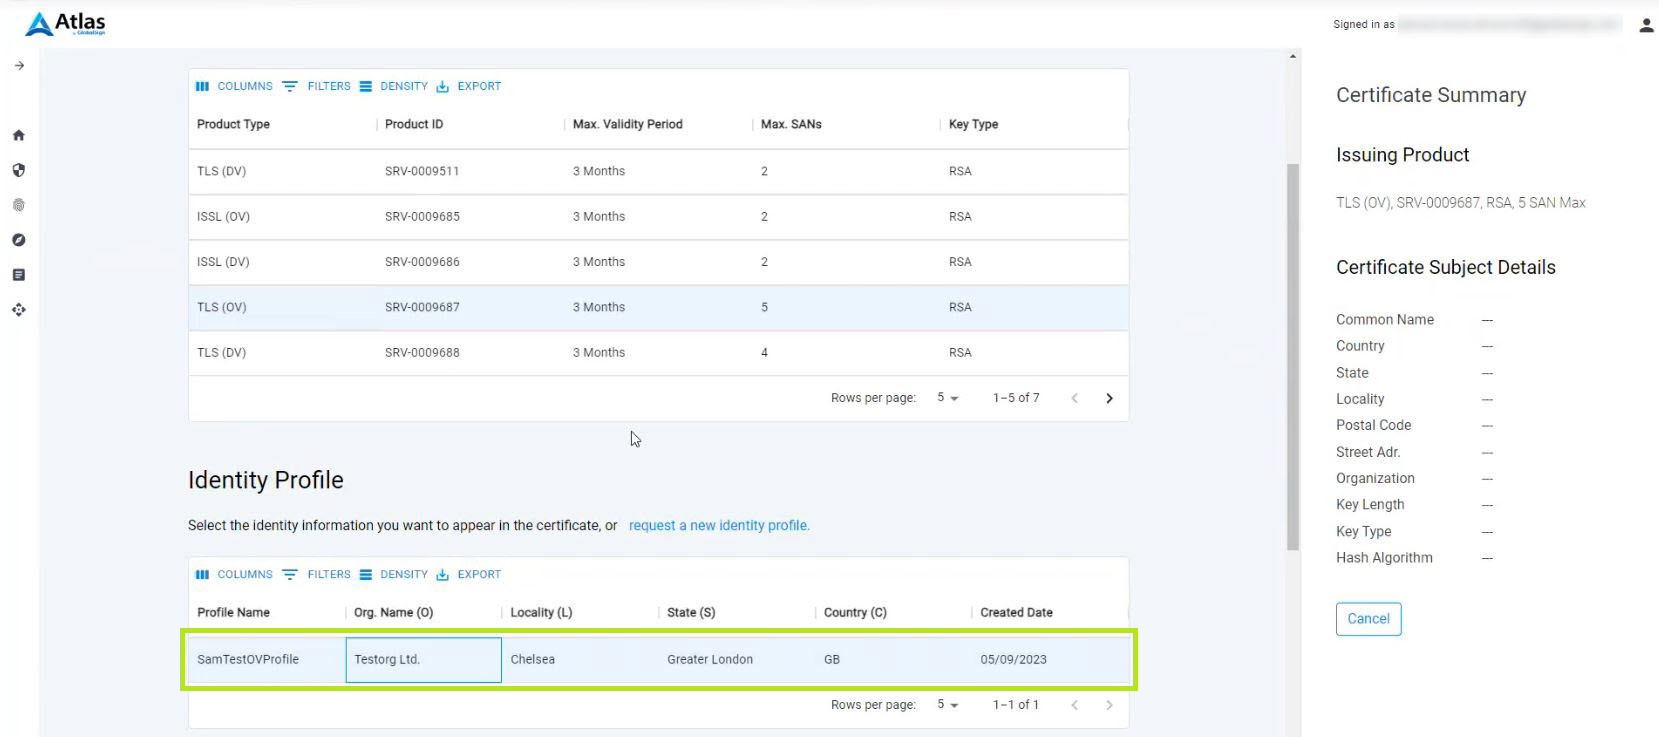
- Under the Identity Profile, select the Identity Information you want to appear in the Certificate or you can request a new Identity Profile.
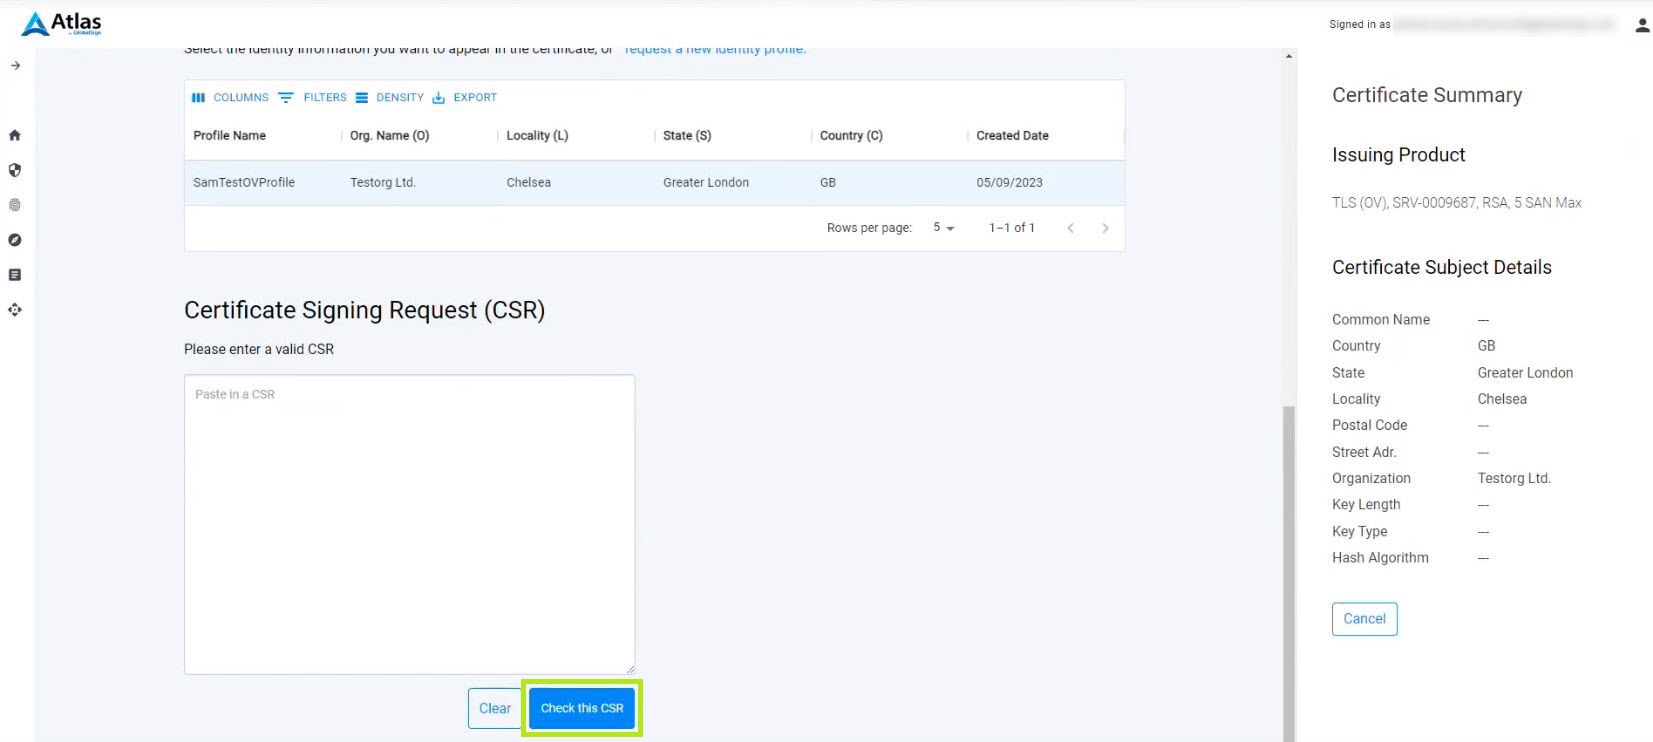
- Copy and paste your Certificate Signing Request (CSR), then click the Check this CSR button.
The CSR must match the signature algorithm of your selected product type.
- Under the Common Name section, input the domain for which you will issue a Certificate to.
Note: Make sure that you have verified control over this domain before requesting a Certificate.
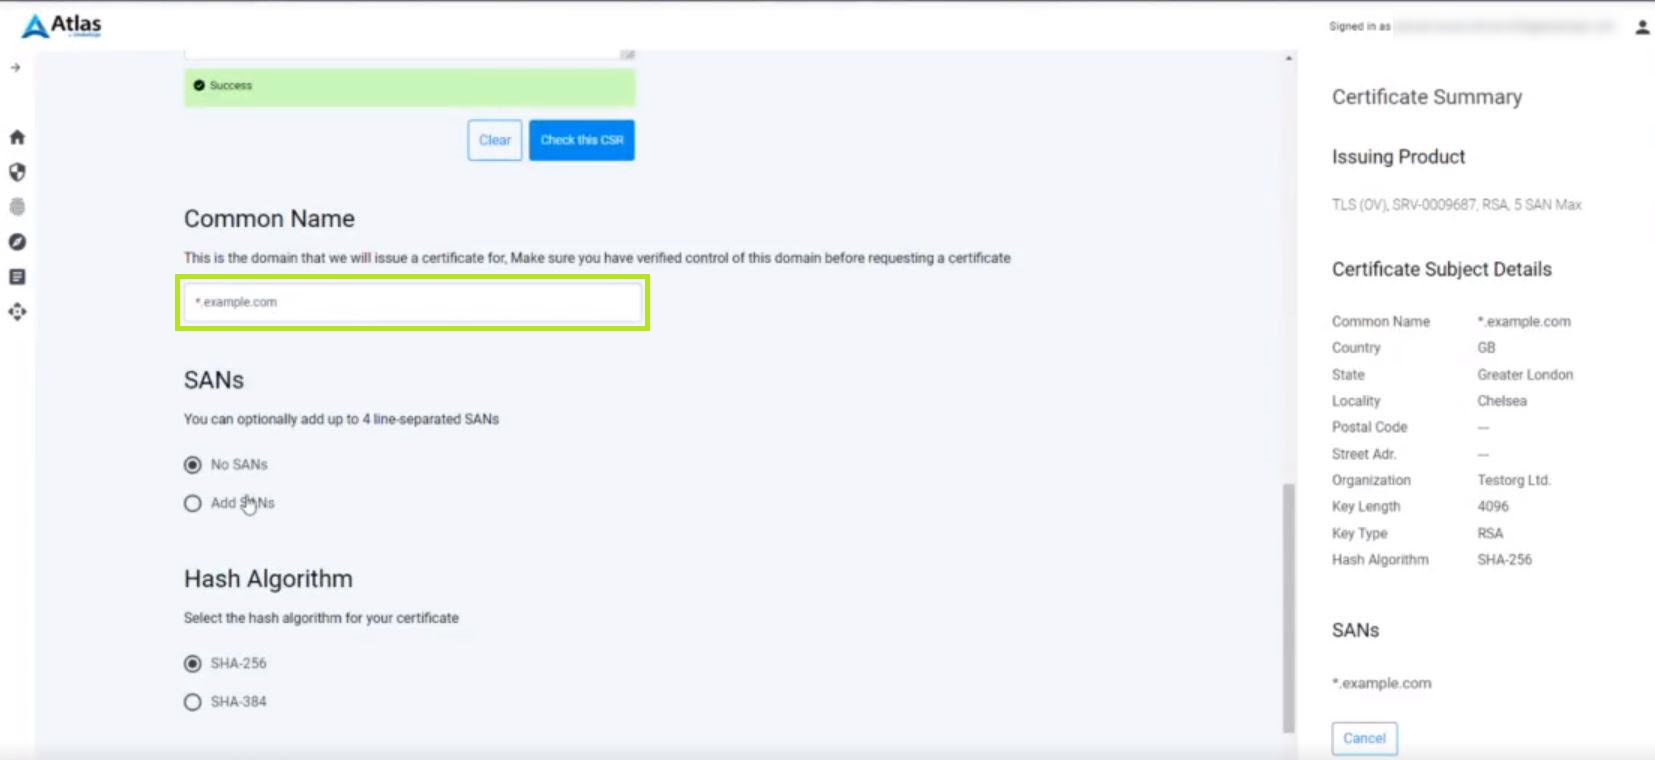
- Under the SANs section, you will have the option to add SANs. Tick the Add SANs option and input the domain(s) you would like to add.
Click the Add these SANs button.
Note: You can add SANs according to the maximum number of SANs as specified by your purchased product; e.g., if you have 5 maximum SANs in your product pack, you can add up to 4 additional SANs to your Certificate. 1 SAN will be taken as the Certificate Common Name.
- Under the Hash Algorithm section, you may be allowed to select the desired hash algorithm for your Certificate, according to your product type.
- Under the Expiration Date section, select the maximum expiration date for your Certificate.
You have the option to customize the End Date as shown below.
Then, tick the I have read and agree to the Subscriber Agreement option. This is mandatory to proceed with this request.
- Click the Request this Certificate button to complete the request.
- Your Certificate request has been submitted. It may take a few moments for the Certificate to display in your Issued Certificate inventory.
How to reissue TLS certificate in Atlas
Reissuing a certificate is the process of requesting a copy of an existing certificate that will last for the duration of the original certificate. The process requires submitting a new CSR signed with a new public/private key pair from the original certificate. The resulting certificate will have a public key type and length informed by the CSR, an expiration date that is the same as the original certificate (or abides by current industry standards), and subjectDN fields that match your Atlas identity profile.
This feature is available for certificates that have been issued through the GlobalSign Atlas portal, Atlas APIs, or Atlas ACME. The implementation of this new feature is focused on the Atlas portal.
Certificates that are reissued will not count against your service quota.
- Click ‘Certificates’ on the left hand menu and then click ‘Issuance Inventory’.

- Select the certificate you wish to reissue and select ‘reissue’ option on the right side of the window.

- Enter a valid CSR to reissue the certificate. This CSR should be signed with a new public/private key pair than from the original certificate. Click ‘Confirm’ when ready.
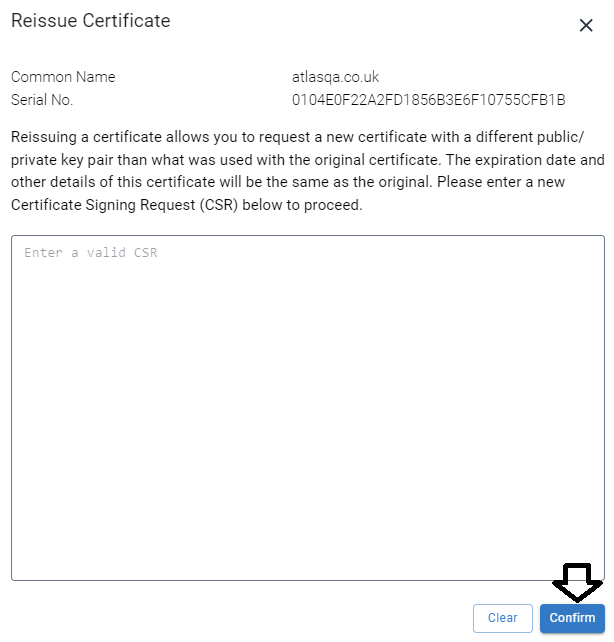
- Validation of the CSR will commence at this step. If all checks pass, the newly reissued certificate will appear on the top of your Issuance Inventory.
Note that the original certificate will remain in the issuance inventory until you revoke the certificate or it naturally expires.
Revoke a Certificate
If you need to revoke a Certificate for any reason, you may do so through the Atlas portal.
- Log into your Atlas portal.
- Select the Certificates tab on the left menu and then Issuance Inventory to begin the process.
- Select the Certificate you want to revoke from the inventory and click Revoke on the right panel.

- Tick the revocation reason, and then click Revoke.

- Your Certificate has been revoked. If you have a SAN license, any SANs on this Certificate will be added back to your license.
SSL Configuration Test
Check your certificate installation for SSL issues and vulnerabilities.
