
Code Signing using Azure Key-Vault and Azure Signtool
Aug 31, 2025
Introduction
The following article provides step-by-step instructions for Using Code Signing Certificate with Azure KeyVault. Note: If this is not the solution you are looking for, please search for your solution in the search bar above.
The CA and Browser Forum’s has new BR guidelines that affect code signing certificates. Private Keys and Code Signing Certificates needs to be stored on a Cloud HSM, Physical HSM, or security token. The token or HSM must be compliant with FIPS 140 Level 2 or 3.
After these new guidelines, conventional way of signing builds using a PFX file is obsolete, and developers are facing issues related to Signing executables. This article will help you in Signing Windows Executables using GlobalSign’s Code Signing Certificate, Azure Key Vault and Azure SignTool.
Pre-requisites:
- A Microsoft Azure account. If you do not already have an Azure account, start here.
- An Azure Key Vault. For more info, see Create a Key Vault.
- A Code Signing certificate from a Public certificate authority like GlobalSign. Click here to get GlobalSign’s CodeSigning Certificate.
- Download Azure Signtool to sign your Executables.
Step 1: Register Your New Azure Application
Register a new Azure application so you can further connect it with the Key Vault for code signing: -
- Sign in to the Microsoft Azure portal.
-
Go to the Azure Active Directory (Now Microsoft Entra ID). (If you can’t find then click More Services).

-
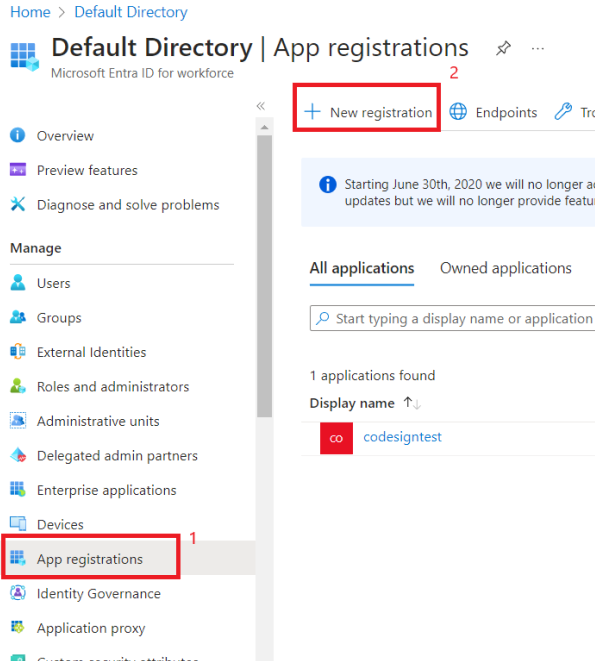
From the left column, click App Registrations.
-
Click New Registration.
-
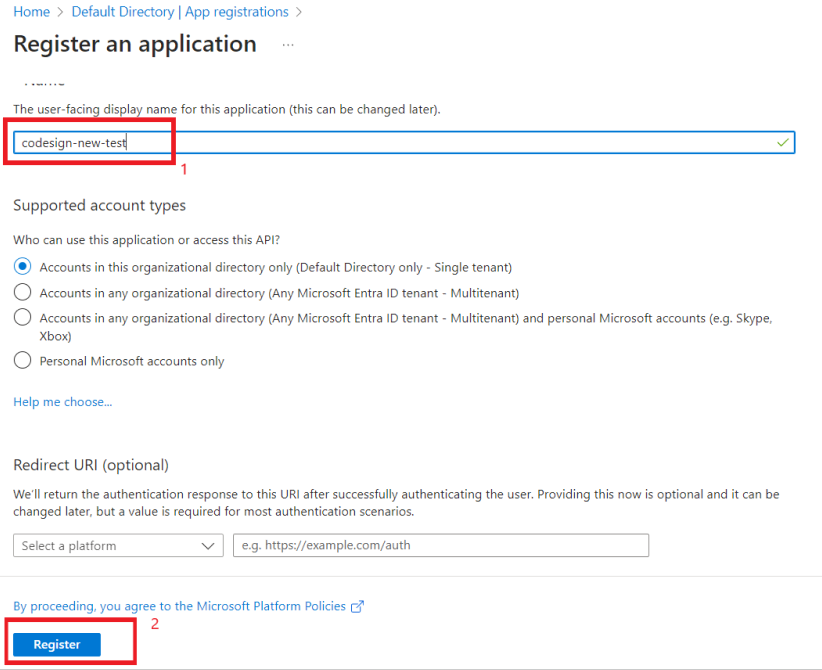
Give a Name to your application, and then click on the Register button.
-
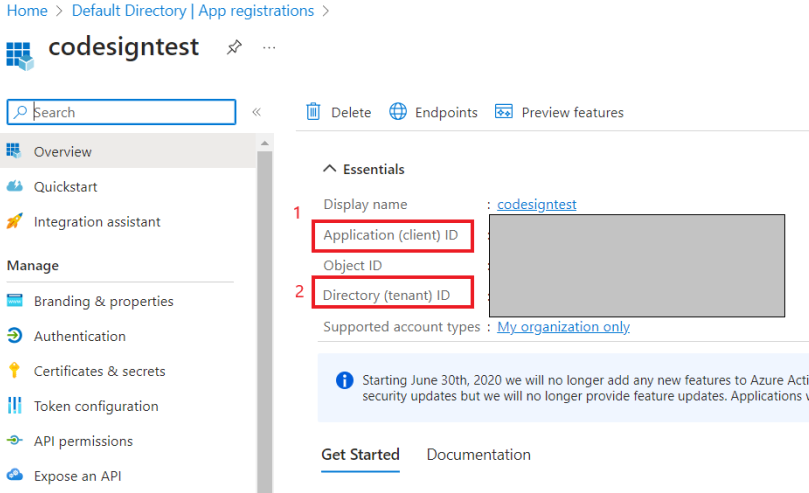
Once your Application is registered, Copy and Paste the Application (client) ID and Tenant ID somewhere as you will need it later in the process of Code Signing.
-
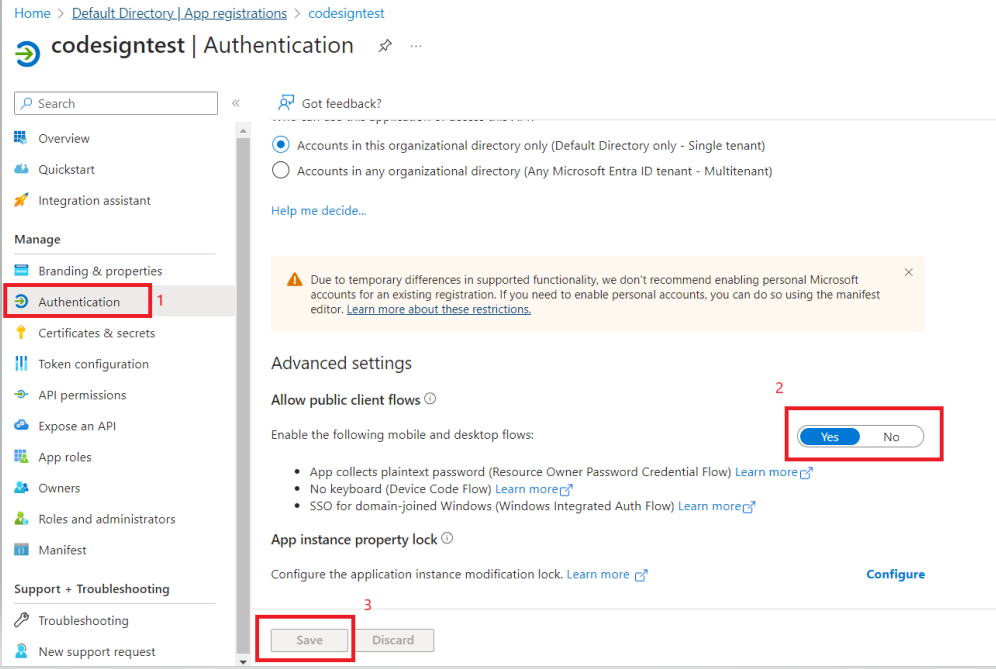
From the left sidebar, click Authentication.
-
Further, from Advanced Settings, set Yes for Allow public client flows option and click on the Save button.
Step 2: Client Secret Creation
Now, generate a client-secret, which will provide a credential at the time of code signing. For the same, follow the below steps:
-
Click on the left-hand menu option Certificates & Secrets
-
Click on the New client secret.
-
Provide a Description for your client secret, set expiry as per your need and then click the Add button.
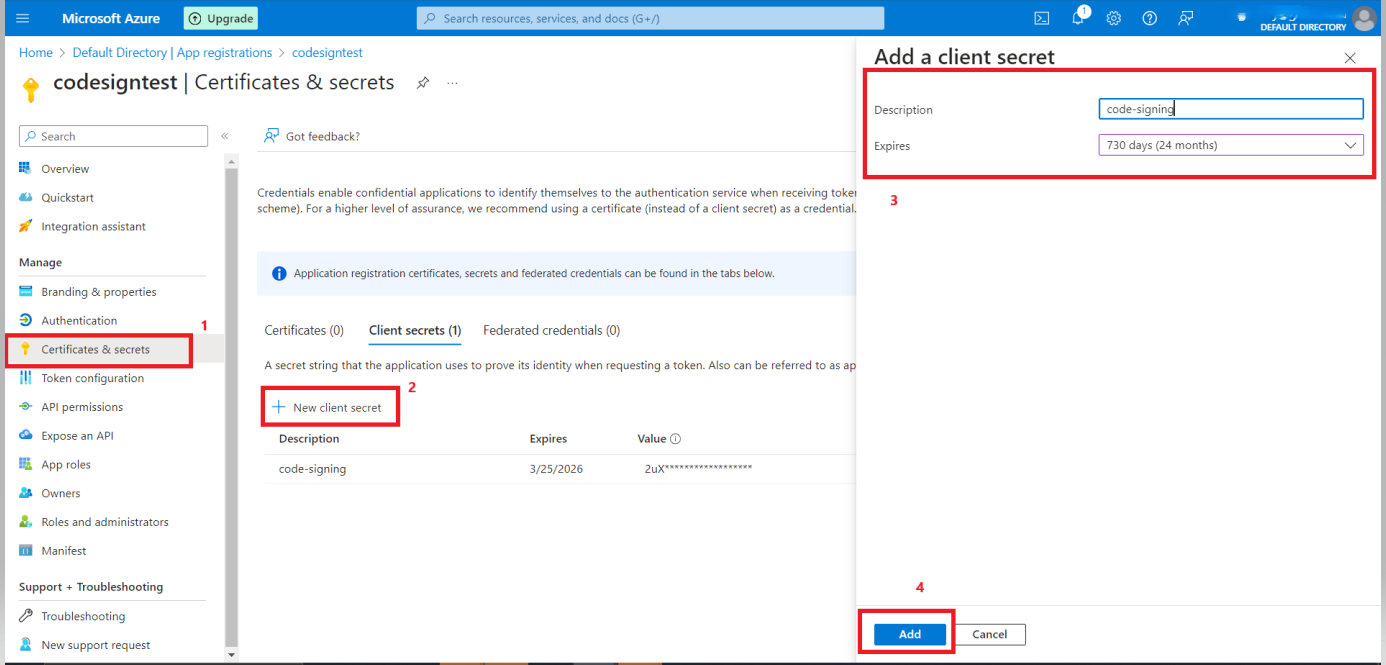
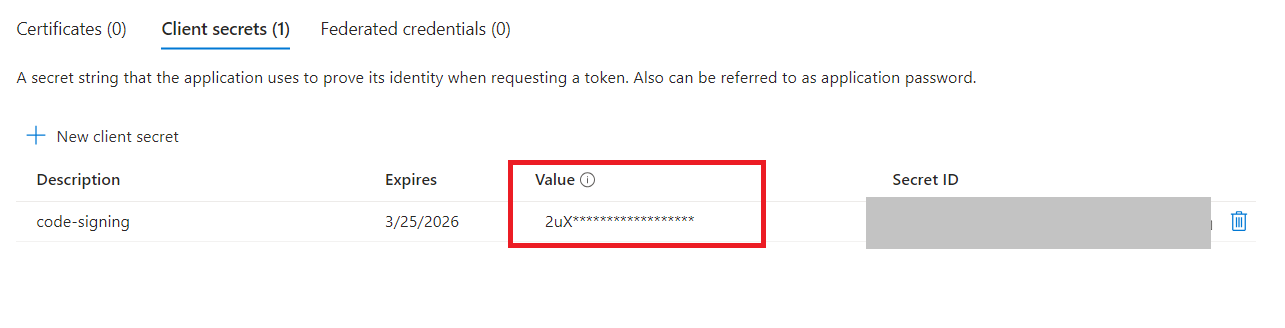
Note: Copy the Value of the new client secret and save it somewhere safely. Because it is available only once and then it is masked because of the security reasons.
Step 3: Enable Application Access in Azure Key Vault
Now, you need to enable the Access to your application within Microsoft Azure Key-vault:
-
Go to the Key Vault that contains the code signing certificate you want to use for the code signing windows file. And then click on Access policies.
-
Now Create Access Policies by Clicking on “Create”.

-
Add the following permissions:
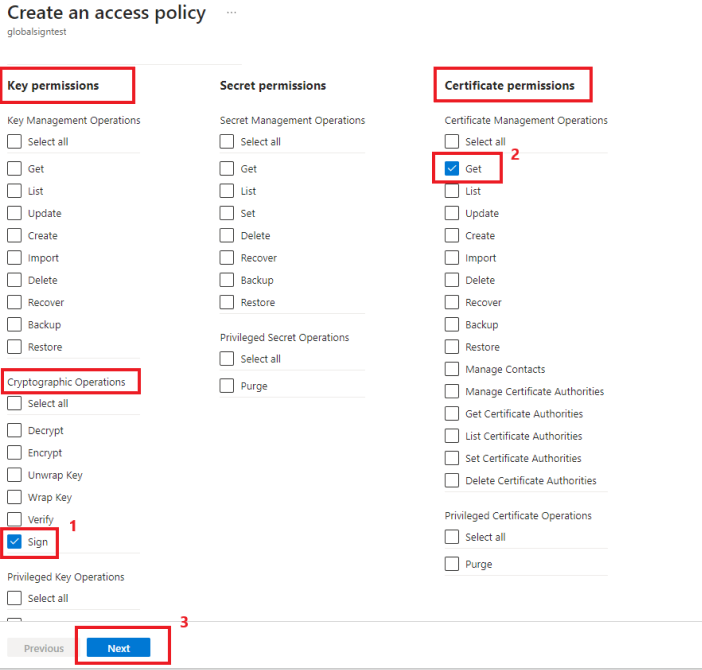
-
Select and enable the Sign option under the Key Permissions.
-
Enable the Get option under Certificate permissions.
-
-
After adding permissions, go to Principal tab. Then, search and select the application you’ve created in the above section.
-
Once the application is found, please select and click the Select button at the bottom.
- Click on the Next button.
- Click on the Create button at the end of the page.

- Now, your access policies are created and you are ready for code-signing windows files.
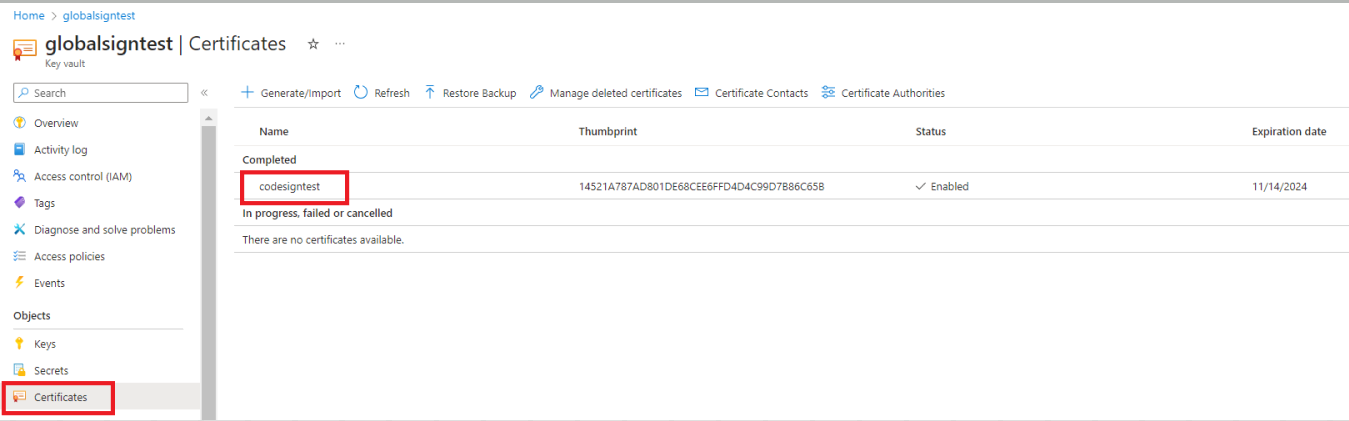
Step 4: Get & Import GlobalSign’s Codesigning Certificate in Azure Key-Vault:
Get a HSM based Code Signing Certificate from GlobalSign (Standard or EV) and then follow the below support article to generate & import GlobalSign’s Code Signing certificate on Key Vault:
Step 5: Install Azure Signtool:
- To install the Azure Signtool make sure to have the latest .NET SDK installed, then open Administrator PowerShell and use the following command:
dotnet tool install --global AzureSignTool
Note: If in case you are getting the below error while downloading Azure Signtool, follow the subsequent steps:
Error - Nuget package not found while running (dotnet tool install --global AzureSignTool)
Try these below steps to install Nuget Package
dotnet nuget add source https://api.nuget.org/v3/index.json -n http://nuget.org
Step 6: Now Sign your Executables:
- Once you complete the above steps, you can sign your windows based executable files. But before you begin code signing, ensure the below information is readily available:
- Within the Azure portal, your Key Vault URI

- The Friendly Name of the code signing certificate within Key Vault:
- The Application (client) ID & Tenant ID value from Step 1:
- The client-Secret value that you generated in the Step 2:
- Within the Azure portal, your Key Vault URI
- Using the Azure Sign tool, you’ll need to execute the following command for code signing and timestamping your Windows based executable. Replace all Quoted values in the below command with your Credentials generated in the above steps:
azuresigntool sign -kvu "KEY-VAULT-URI" -kvc CERTIFICATE-NAME -kvi "APPLICATION-CLIENT-ID" -kvs "CLIENT-SECRET" --azure-key-vault-tenant-id "tenant-ID" -tr http://timestamp.globalsign.com/tsa/advanced -td sha256 “PATH-TO-EXECUTABLE” - If you have followed the above steps correctly, you’ll be able to see the following output: -
info: AzureSignTool.Program[0]
==> File: test.exe
Signing file test.exe
info: AzureSignTool.Program[0]
==> File: test.exe
Signing completed successfully for file test.exe

Note: These steps are for signing exe, for each code command line may vary look for Microsoft article.
If in case you are getting error while downloading Azure Signtool follow below steps:
Error - Nuget package not found while running (dotnet tool install --global AzureSignTool)
Solution: Install Nuget package with below command
dotnet nuget add source https://api.nuget.org/v3/index.json -n http://nuget.org
Related Articles:
https://learn.microsoft.com/en-us/windows/msix/desktop/cicd-keyvault
https://dotnet.microsoft.com/en-us/download/dotnet/5.0
Related Articles
SSL Configuration Test
Check your certificate installation for SSL issues and vulnerabilities.