
Code Signing Windows Builds using SignTool and AWS Cloud HSM
Sep 8, 2025
Code Signing Windows Builds using SignTool and AWS Cloud HSM
Set up the prerequisites:
To use Microsoft SignTool with AWS CloudHSM, you need the following:
-
An Amazon EC2 client instances running a Windows operating system.
-
Account on GCC to get the code signing certificate.
-
An active AWS CloudHSM cluster in the same virtual public cloud (VPC) as your EC2 instance. The cluster must contain at least one HSM.
-
A crypto user (CU) to own and manage keys in the AWS CloudHSM cluster.
-
An unsigned file or executable.
-
The Microsoft Windows Software Development Kit (SDK).
-
AWS CloudHSM client as per the OS compatibility.
To set up the prerequisites for using AWS CloudHSM with Windows SignTool
-
Follow the instructions in the Getting Started section of this guide to launch a Windows EC2 instance and an AWS CloudHSM cluster.
-
Host the Windows server as a CA follow the steps 1 and 2 in Configuring Windows Server as a Certificate Authority with AWS CloudHSM.
-
Download and install the Microsoft Windows SDK on your Windows EC2 instance:
https://developer.microsoft.com/en-us/windows/downloads/windows-10-sdk
The SignTool executable is part of the Windows SDK Signing Tools for Desktop Apps installation feature. You can omit the other features to be installed if you don’t need them.
Install and configure the AWS CloudHSM client SDK3 over the Windows instances:
Follow the instructions explained in the document: Downloads for AWS CloudHSM Client SDK - AWS CloudHSM
After the installation of the client and the MS Windows SDK, Now lets create and activate the cluster:
-
Open the AWS CloudHSM console at https://console.aws.amazon.com/cloudhsm/home.
-
On the navigation bar, use the region selector to choose one of the AWS Regions where AWS CloudHSM is currently supported.
-
Choose Create cluster.

-
In the Cluster configuration section, do the following:
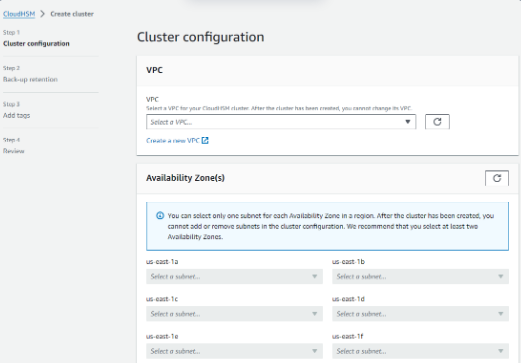
A. For VPC, select the VPC that you created in Create a virtual private cloud (VPC).
B. For Availability Zone(s), next to each Availability Zone, choose the private subnet that you created. Choose Next.
C. Specify how long the service should retain backups.
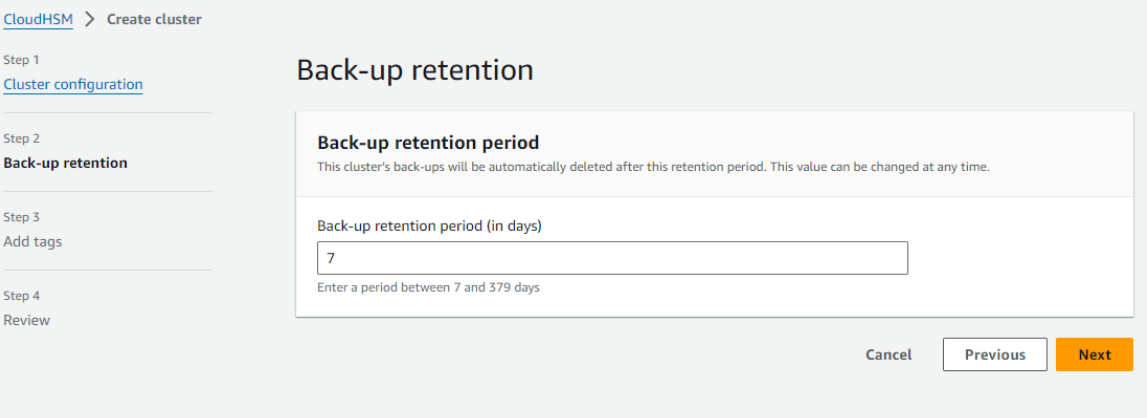
-
Choose Next.
-
(Optional) Type a tag key and an optional tag value. To add more than one tag to the cluster, choose Add tag.
-
Click Next.
-
Review your cluster configuration, and then choose Create cluster.
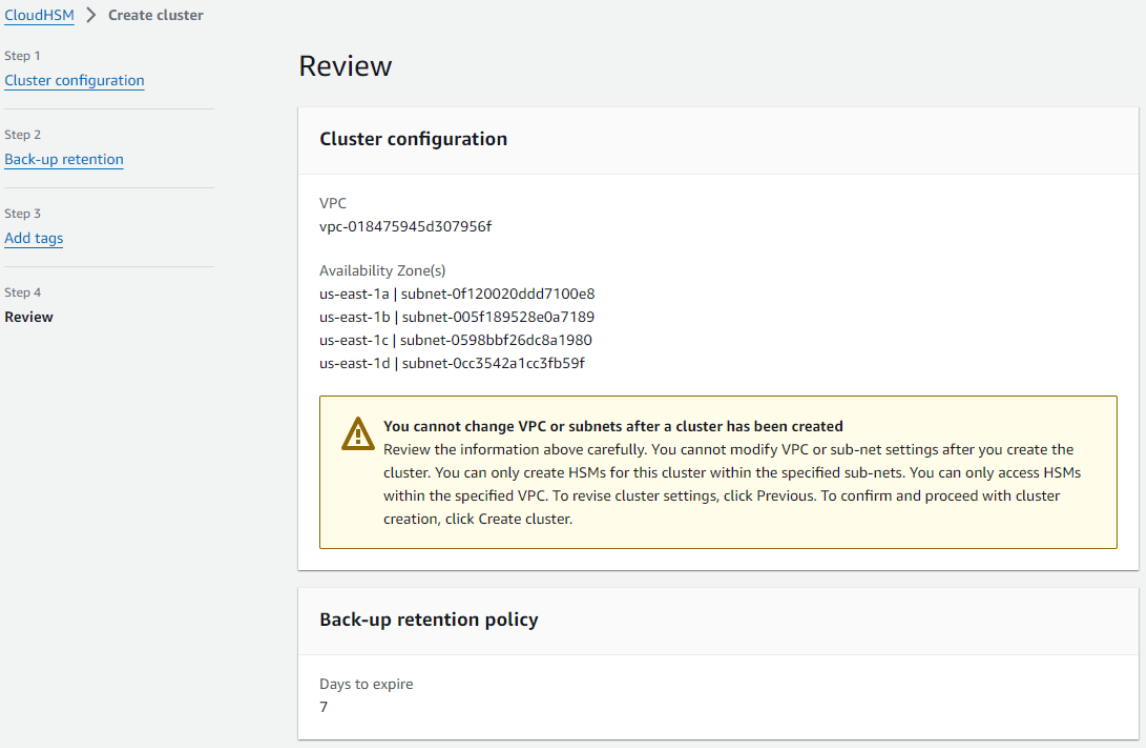
-
It would take few minutes to the cluster get created, Once the cluster has been created it would be in the un-initialized state.

-
Select the radio button next to the cluster ID and choose initialize. The initialization would take up to 10 mins.

-
To initialize the cluster, you must first create an HSM in the cluster. Choose the Availability Zone to create this HSM.
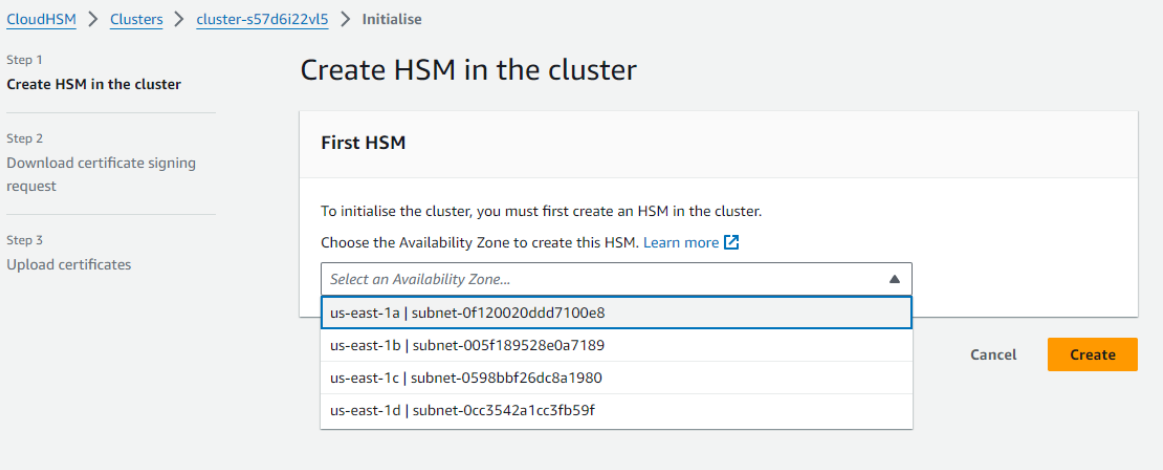
After selecting the AZ click on create. -
You would be getting the below screen showing:
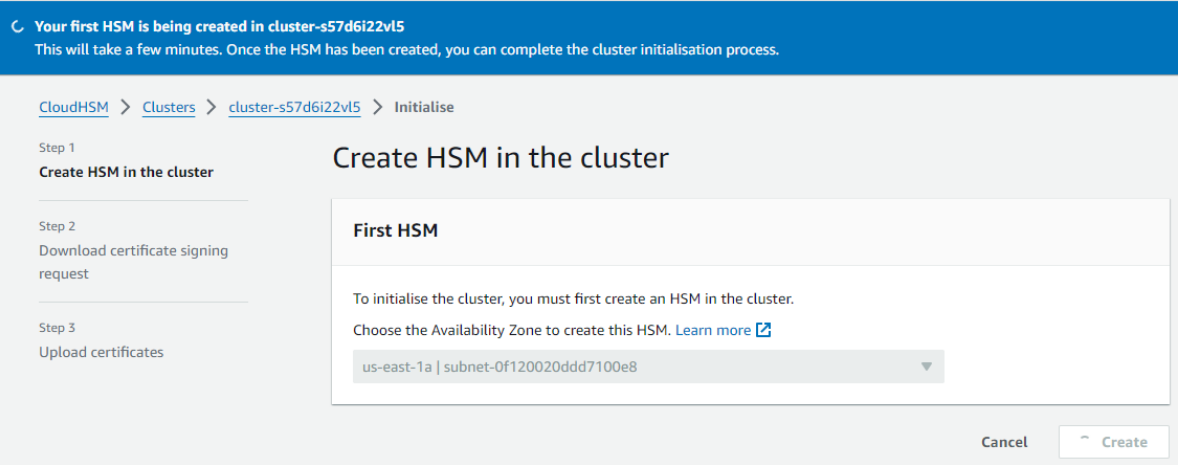
-
After the initialization is complete it would ask you to download the certificates.
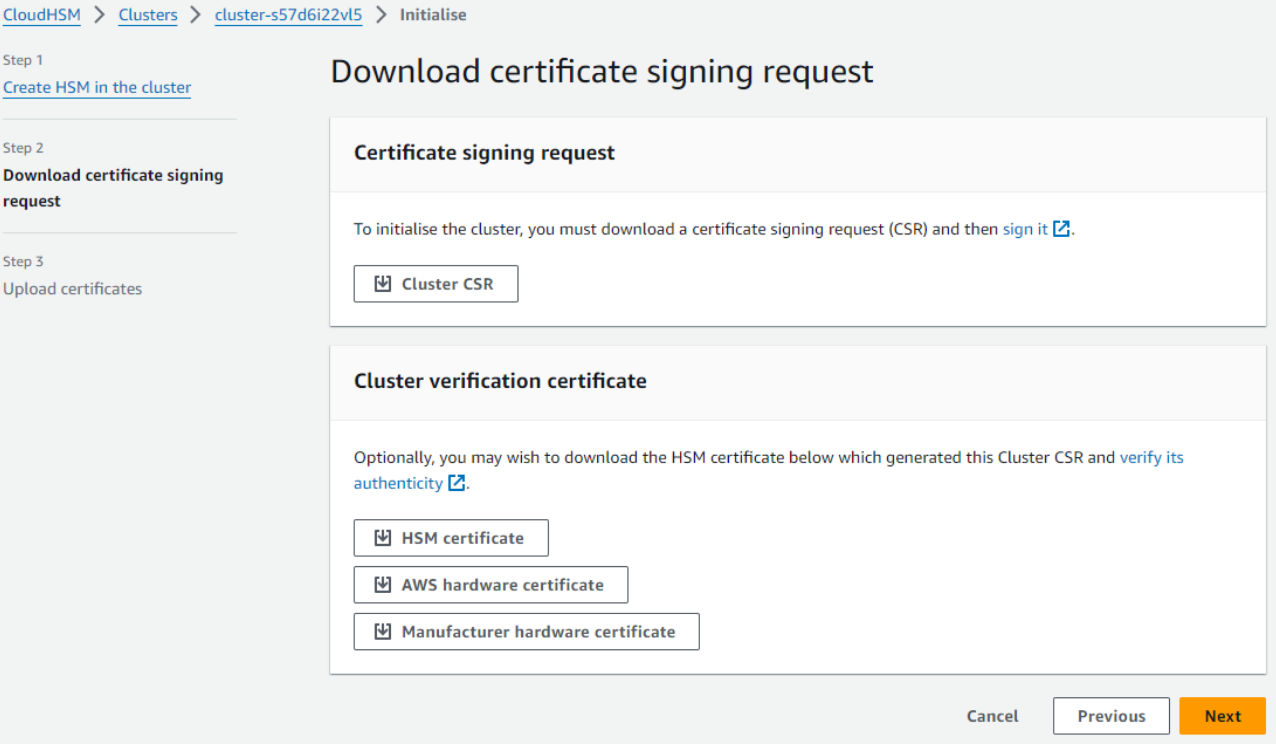
Download the Cluster CSR and then click on Next.
Now connect your one of the launched ec2 instances where you have configured the AWS CloudHSM client SDK3 and follow the further steps. -
Copy and paste the downloaded CSR over the ec2 instance.
Use the following command to create a private key. When initializing an AWS CloudHSM cluster, you must use the RSA 2048 certificate or the RSA 4096 certificate.
openssl genrsa -aes256 -out customerCA.key 4096
Use the private key to create a self-signed certificate with the system should also provide a software tool to generate a self-signed certificate using that key. The following example uses OpenSSL and the private key that you created in the previous step to create a signing certificate.
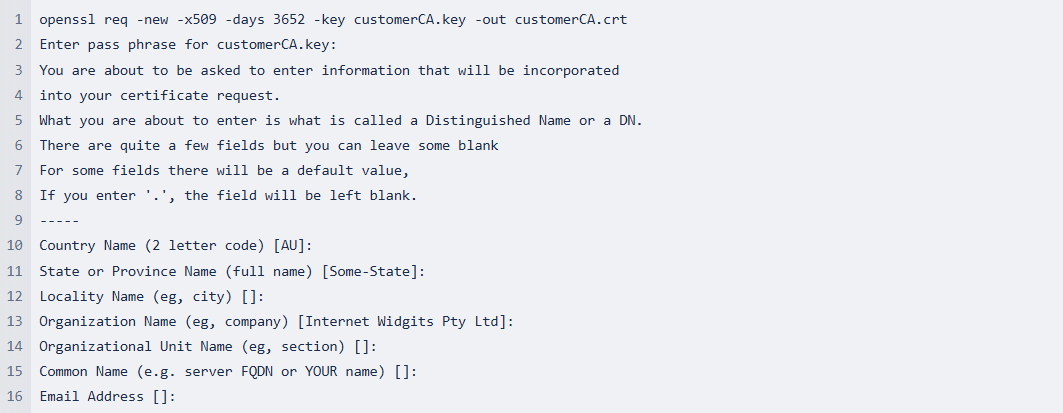
The trusted hardware that you use to create your private key for your production cluster should also provide a tool to sign the CSR using that key.
openssl x509 -req -days 3652 -in cluster-s57d6i22vl5_ClusterCsr.csr \ -CA customerCA.crt \ -CAkey customerCA.key \ -CAcreateserial \ -out cluster-s57d6i22vl5_CustomerHsmCertificate.crt
Note: Execute the above openssl command in the same directory where you have pasted the cluster CSR. -
Now, you would have the customerCA.crt and the cluster certificate with the name
_CustomerHsmCertificate.crt. Upload the certificate over the CloudHSM portal.
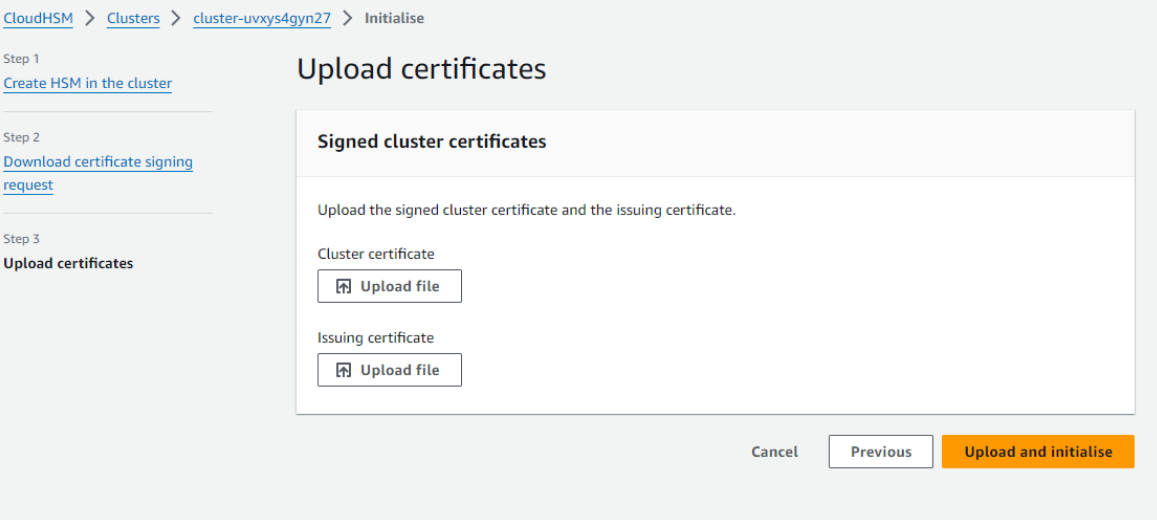
-
Click on Upload File and browse to the location where the
_CustomerHsmCertificate.crt and the customerCA.crt file is present.

-
After uploading the files click on Upload and Initialize and the initialization would start, it would take couple of minutes to initialize the cluster successfully. Once the cluster is initialised let’s activate it through the SDK3.
-
Once cluster got initialised configure the security group of the CloudHSM to the instance.
-
Activating the cluster:
Place the cluster and anchor certificate over the AWS CloudHSM to activate the cluster.
1. Add the HSM trust anchor certificate customerCA.crt to the location `C:\ProgramData\Amazon\CloudHSM\`
2. Configure Client with the HSM IP address.
$ cd C:\Program Files\Amazon\CloudHSM\
$ configure.exe -a
3. Start CloudHSM Client:
$.\cloudhsm-cli.exe interactive
4. Run the below command to actually activate cluster after connecting with the cloudhsm session.
aws-cloudhsm>activate cluster
It would ask to enter the password for the admin user by default.
5. Now the cluster would be activated, Login with the admin user with the below command
aws-cloudhsm>login --username admin --role
6. Create the CU user which is required
aws-cloudhsm>user create --username--role crypto-user
7. Logout the admin user
aws-cloudhsm>logout
8. Login to the CU user
aws-cloudhsm>login --username--role crypto-user -
The cluster is now active let’s Configure HSM credentials:
1. $ cd C:\Program Files\Amazon\CloudHSM\tools\
2. $ set_cloudhsm_credentials.exe --username--password -
Configure Client with the HSM IP address.
1. $ cd C:\Program Files\Amazon\CloudHSM\
2. $ configure.exe -a -
Stop and start the CloudHSM Client:
1. $ net.exe stop AWSCloudHSMClient
2. $ net.exe start AWSCloudHSMClient -
Verify the CSP installation:
1. ksp_config.exe -enum
2. cng_config.exe -enum -
Create request.inf file
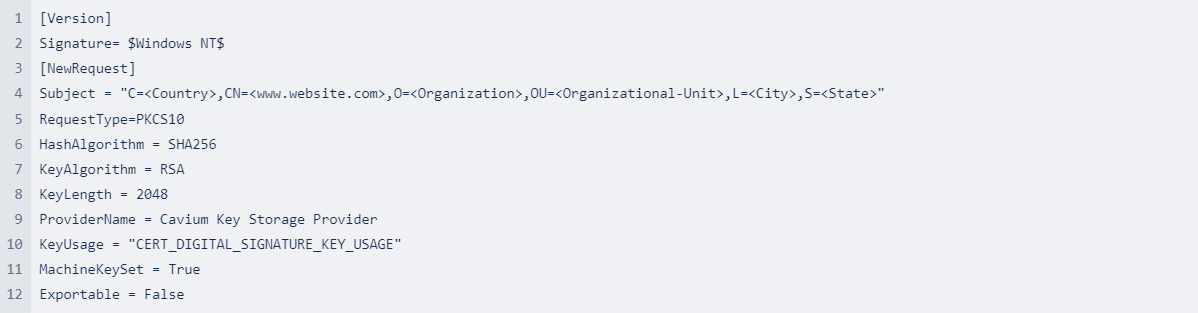
-
Generate CSR:
1. $ certreq.exe -new request.inf request.csr -
Got the CSR signed by your Management CA.
-
Once you have the signed certificate, Install it over the server.
-
Run the below command to associate the certificate with Cavium Storage Provider:
$ certutil -f -csp "Cavium Key Storage Provider" -repairstore My "" -
For signing the executable with this certificate, install SignTool
>> https://go.microsoft.com/fwlink/?linkid=2261842 -
Open Powershell and run the below commands:
$ Get-ChildItem -path cert:\LocalMachine\My
Copy the Thumbprint that is returned for your certificate. -
Navigate to the directory within PowerShell that contains SignTool.exe.
The default location is C:\Program Files (x86)\Windows Kits\10\bin\10.0.22621.0\x64. -
Sign the file by running the following command.
$ signtool.exe sign /v /fd sha256 /sha1/sm C:\Users\Administrator\Desktop\ .ps1 -
To verify the signature on the file, use the following command:
$ signtool.exe verify /v /pa C:\Users\Administrator\Desktop\.ps1
Points to remember:
-
Please ensure to configure the CloudHSM Security group to your EC2 instance.
-
Update the HSM IP on the instance when you launch a new HSM instance.
-
Once you launch the Cluster, you can keep using it. To avoid charges, just delete the HSM instance and launch one when you need it.
Related Articles
SSL Configuration Test
Check your certificate installation for SSL issues and vulnerabilities.