
Code Signing Container Image with Notation and Azure Key Vault
Sep 8, 2025
Code Signing Container Image with Notation and Azure Key Vault
Signing and verifying container images with a Code signing certificate issued by a trusted Certificate Authority like GlobalSign is a valuable security practice. This security measure will help you to responsibly identify, authorize, and validate the identity of both the publisher of the container image and the container image itself. The Trusted Certificate Authorities (CAs) play a crucial role in the validation of a user's or organization's identity, maintaining the security of digital certificates, and revoking the certificate immediately upon any risk or misuse.
Prerequisites
- Azure Key Vault
- Azure CLI
- Azure Container registry
- Notation CLI and Azure Key Vault plugin
- Docker
Guidelines
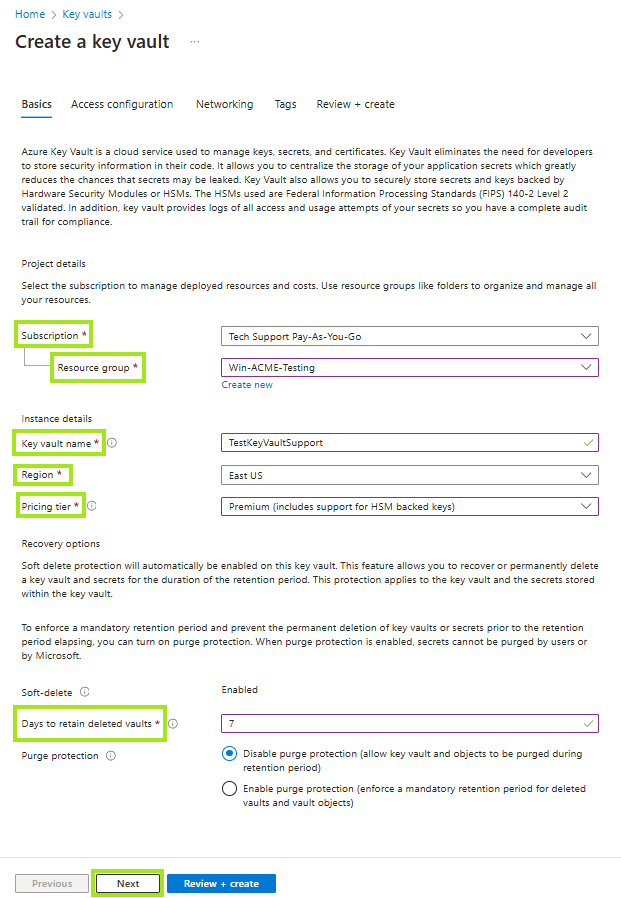
- Create or use an Azure Key Vault.
a. Login to the Azure Portal.
b. Under active services select the Key vaults.

c. Click on Create.
d. Enter the required details (i.e, the subscription ID, the key vault name), and then click on Next.
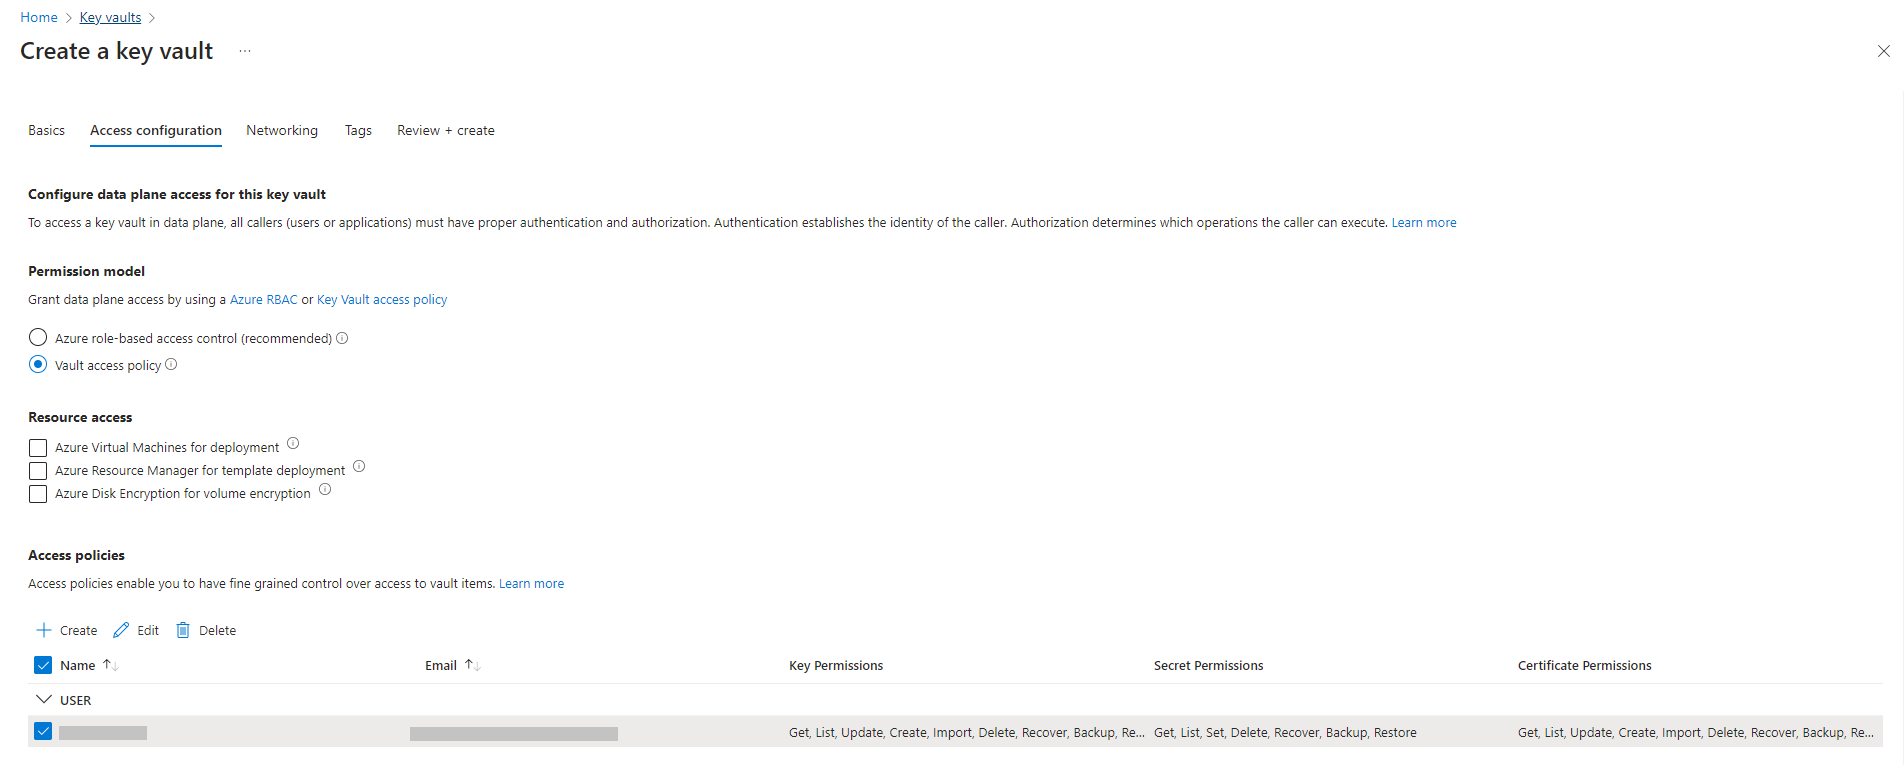
e. Configure the Access configuration, then click Next.
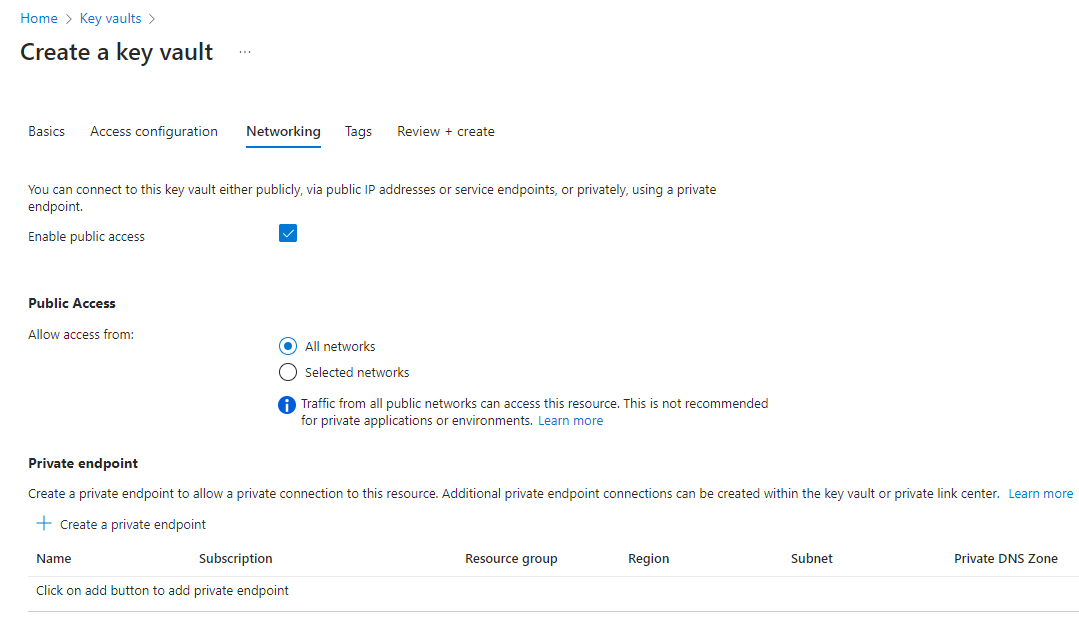
f. Configure the Network to connect to the resource with either by public or private network. Click Next.
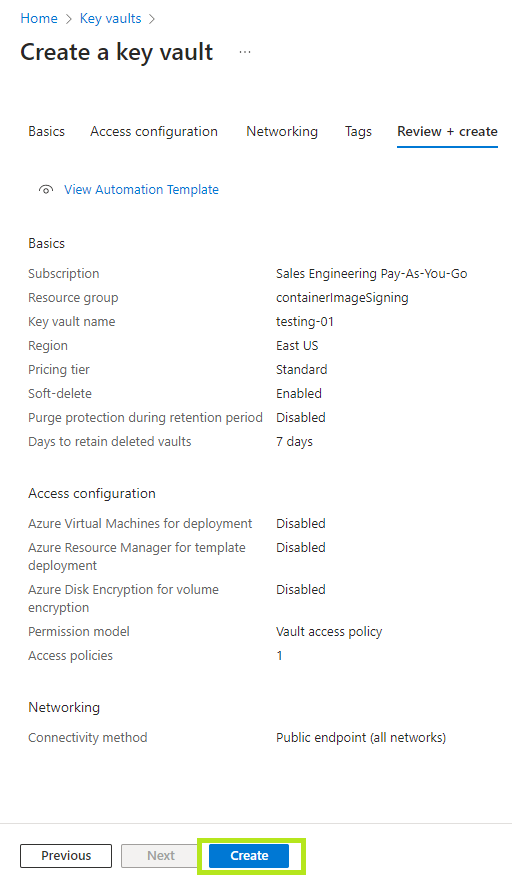
g. Review the configurations, then click Create.
-
Install and configure the latest Azure CLI.
Inspect the contents of the script yourself before executing, download the script first usingcurland inspect it in your favourite text editor.curl -sL https://aka.ms/InstallAzureCLIDeb | sudo bash
-
Create or use an Azure Container Registry for storing container images and signatures
az acr create --resource-group $RG_NAME --name $ACR_NAME --sku Basic
Before pushing and pulling container images, you must log in to the registry.
az acr login --name $ACR_NAME -
Installation of notation CLI.
# Download, extract and install
curl -Lo notation.tar.gz https://github.com/notaryproject/notation/releases/download/v1.2.0/notation_1.2.0_linux_amd64.tar.gz
tar xvzf notation.tar.gz

# Copy the notation cli to the desired bin directory in your PATH, for example
cp ./notation /usr/local/bin
-
Install the Notation Azure Key Vault plugin.
notation plugin install --url https://github.com/Azure/notation-azure-kv/releases/download/v1.2.0/notation-azure-kv_1.2.0_linux_amd64.tar.gz --sha256sum 06bb5198af31ce11b08c4557ae4c2cbfb09878dfa6b637b7407ebc2d57b87b34
-
Verify the plugin installation.
notation plugin ls -
Docker installation.
# Add Docker's official GPG key:
sudo apt-get update
sudo apt-get install ca-certificates curl
sudo install -m 0755 -d /etc/apt/keyrings
sudo curl -fsSL https://download.docker.com/linux/ubuntu/gpg -o /etc/apt/keyrings/docker.asc
sudo chmod a+r /etc/apt/keyrings/docker.asc

# Add the repository to Apt sources:
echo \
  "deb [arch=$(dpkg --print-architecture) signed-by=/etc/apt/keyrings/docker.asc] https://download.docker.com/linux/ubuntu \
  $(. /etc/os-release && echo "$VERSION_CODENAME") stable" | \
  sudo tee /etc/apt/sources.list.d/docker.list > /dev/null
sudo apt-get update
sudo apt-get install docker-ce docker-ce-cli containerd.io docker-buildx-plugin docker-compose-plugin
- Configure the environment variables.
- Configure environment variables for AKV and certificates.
AKV_SUB_ID=myAkvSubscriptionId
AKV_RG=myAkvResourceGroup
AKV_NAME=myakv

# Name of the certificate created or imported in AKV
CERT_NAME=GlobaSign

# X.509 certificate subject
CERT_SUBJECT="CN=SecureBuilder,O=SecureBuilder,L=Seattle,S=WA,C=US"
-
Configure environment variables for ACR and images.

ACR_SUB_ID=myAcrSubscriptionId
ACR_RG=myAcrResourceGroup
# Name of the existing registry example: myregistry.azurecr.io
ACR_NAME=myregistry
# Existing full domain of the ACR
REGISTRY=$ACR_NAME.azurecr.io
# Container name inside ACR where image will be stored
REPO=net-monitor
TAG=v1
# Source code directory containing Dockerfile to build
IMAGE_SOURCE=https://github.com/iamantil/codeSigning.git
- Configure environment variables for AKV and certificates.
- Sign in with Azure CLI.
az login --use-device-code
Open the given URL https://microsoft.com/devicelogin in the browser and enter the code for authentication to login with Azure CLI.

- Create a certificate issued by GlobalSign.
Create a certificate signing request (CSR) by following the instructions in Code Signing certificate setup in Azure Key vault
a. Import the certificate in the AKV resource, From the home of Azure go to the created AKV resource.
b. Go to Objects > select Certificates > Generate/Import
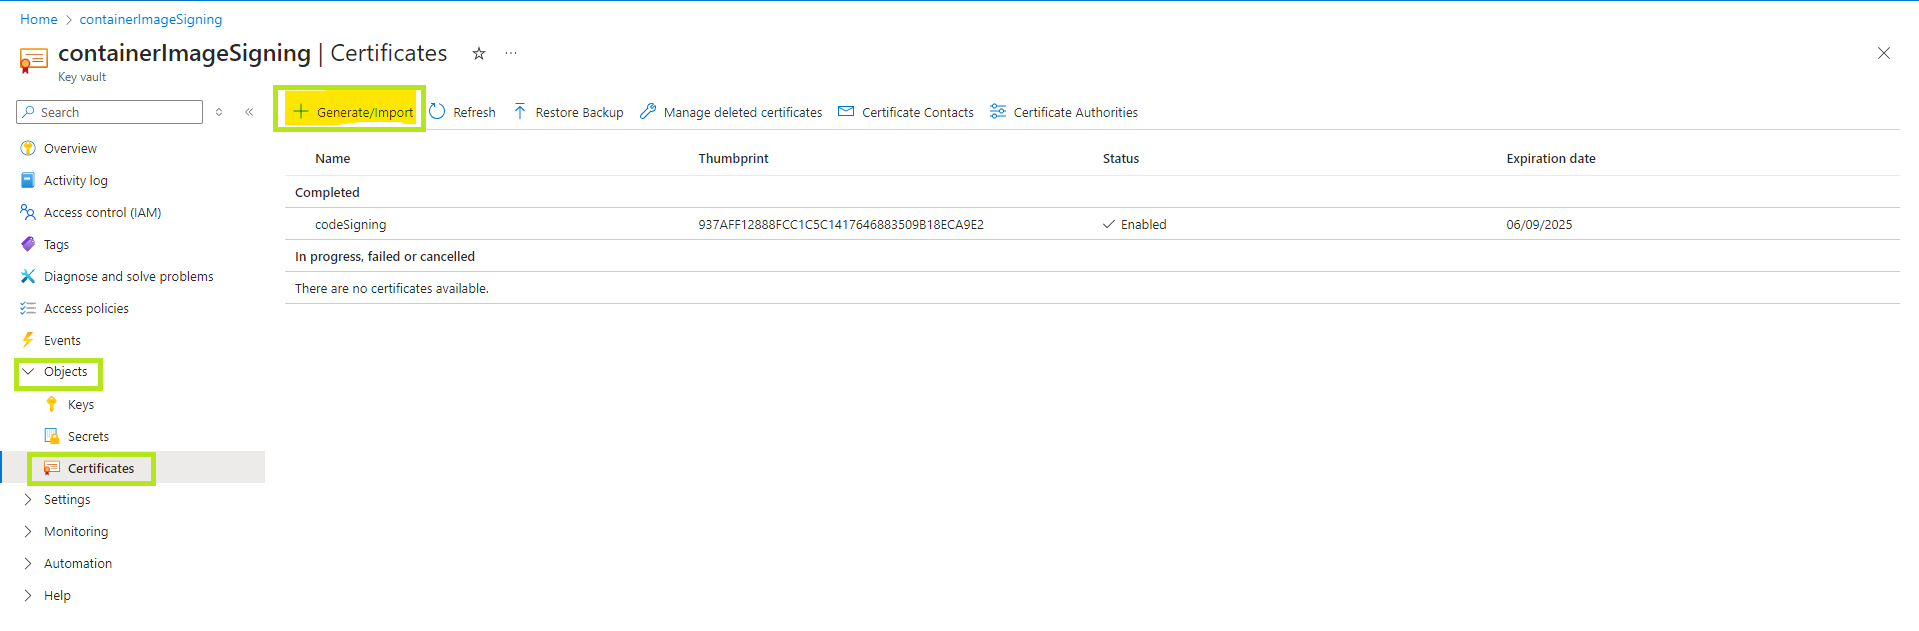
c. Enter the details that are required for the CSR and then click on create.
Note: For more details you can follow Code Signing certificate setup in Azure Key vault
d. Now click on the Certificate > Certificate Operation > Download CSR.

e. Share the CSR with the GS support team in order to get the code signing certificate.
f. Once you have the certificates create the ca bundle following the below format in .cer or .crt.
> Leaf cert
> Intermediate cert
> Root cert - Sign the container image with Notation CLI and AKV plugin.
When working with ACR and AKV, it’s essential to grant the appropriate permissions to ensure secure and controlled access. You can authorize access for different entities, such as user principals, service principals, or managed identities, depending on your specific scenarios. In this tutorial, the access are authorized to a signed-in Azure user. - Authoring access to ACR.
TheAcrPullandAcrPushroles are required for building and signing container images in ACR.- Set the subscription that contains the ACR resource
az account set --subscription $ACR_SUB_ID
- Assign the roles.
USER_ID=$(az ad signed-in-user show --query id -o tsv)
az role assignment create --role "AcrPull" --role "AcrPush" --assignee $USER_ID --scope "/subscriptions/$ACR_SUB_ID/resourceGroups/$ACR_RG/providers/Microsoft.ContainerRegistry/registries/$ACR_NAME"
- Set the subscription that contains the ACR resource
- Build and push container images to ACR.
Authenticate to your ACR by using your individual Azure identity.
az acr login --name $ACR_NAME
DIGEST=$(az acr build -r $ACR_NAME -t $REGISTRY/${REPO}:$TAG $IMAGE_SOURCE --no-logs --query "outputImages[0].digest" -o tsv)
IMAGE=$REGISTRY/${REPO}@$DIGEST

- Authoring access to AKV.
- Set the subscription that contains the AKV resource.
az account set --subscription $AKV_SUB_ID
- Assign the roles.
USER_ID=$(az ad signed-in-user show --query id -o tsv)
az role assignment create --role "Key Vault Secrets User" --role "Key Vault Certificates User" --role "Key Vault Crypto User" --assignee $USER_ID --scope "/subscriptions/$AKV_SUB_ID/resourceGroups/$AKV_RG/providers/Microsoft.KeyVault/vaults/$AKV_NAME"
- Set the subscription that contains the AKV resource.
- Use access policy (Legacy).
The certificate contains the entire certificate chain, the principal must be granted key permissionSign, secret permissionGet, and certificate permissionsGet. To grant these permissions to the principal:
USER_ID=$(az ad signed-in-user show --query id -o tsv)
az keyvault set-policy -n $AKV_NAME --key-permissions sign --secret-permissions get --certificate-permissions get --object-id $USER_ID - Sign container images using the certificate in AKV
- Get the Key ID for a certificate. A certificate in AKV can have multiple versions, the following command gets the Key ID for the latest version of the
$CERT_NAMEcertificate.
KEY_ID=$(az keyvault certificate show -n $CERT_NAME --vault-name $AKV_NAME --query 'kid' -o tsv)
- Sign the container image with the COSE signature format using the Key ID.
notation sign --signature-format cose $IMAGE --id $KEY_ID --plugin azure-kv

- Get the Key ID for a certificate. A certificate in AKV can have multiple versions, the following command gets the Key ID for the latest version of the
- Verify a container image with Notation CLI.
- Add the root certificate to a named trust store for signature verification. If you do not have the root certificate, you can obtain it from your CA. The following example adds the root certificate
$ROOT_CERTto the$STORE_NAMEtrust store.
STORE_TYPE="ca"
STORE_NAME="GlobalSIgn"
notation cert add --type $STORE_TYPE --store $STORE_NAME $ROOT_CERT
- List the root certificate to confirm the
$ROOT_CERTis added successfully.
notation cert ls
- Configure trust policy before verification.
{
"version": "1.0",
"trustPolicies": [
{
"name": "GlobalSign",
"registryScopes": [ "containerimagesigning.azurecr.io/code-signed-images" ],
"signatureVerification": {
"level" : "strict",
"override" : {
"revocation" : "skip"
}},
"trustStores": [ "ca:GlobalSign" ],
"trustedIdentities": [
"x509.subject: C=US, ST=WA, L=Seattle, O=SecureBuilder, OU=Finance, CN=SecureBuilder"
]
}
]
}
-
Use
notation policyto import the trust policy configuration fromtrustpolicy.json.
notation policy import ./trustpolicy.json
-
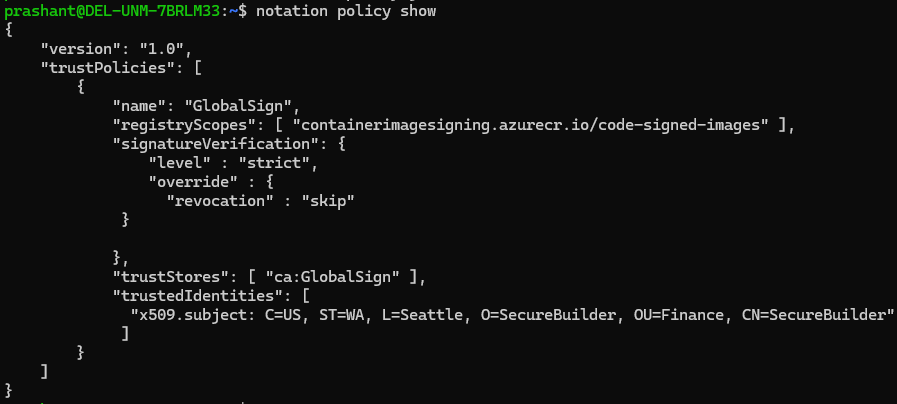
Show the trust policy configuration to confirm its successful import.
notation policy show
-
Use
notation verifyto verify the integrity of the image:
notation verify $IMAGE

- List the root certificate to confirm the
- Add the root certificate to a named trust store for signature verification. If you do not have the root certificate, you can obtain it from your CA. The following example adds the root certificate
SSL Configuration Test
Check your certificate installation for SSL issues and vulnerabilities.