
Create New Profile in EPKI
Dec 1, 2025
Create New Profile in EPKI
|
OVERVIEW: This page walks you through the process creating a new profile in EPKI. At the completion of this procedure, you will be able create a new profile in EPKI. Can't find what you're looking for? Get in touch for assistance. |
For New Customers
|
IMPORTANT: This process is for new GlobalSign customers who wish to purchase new licenses and create a new profile. If you are an existing customer and you wish to add a new profile, please refer to this guidelines. |
-
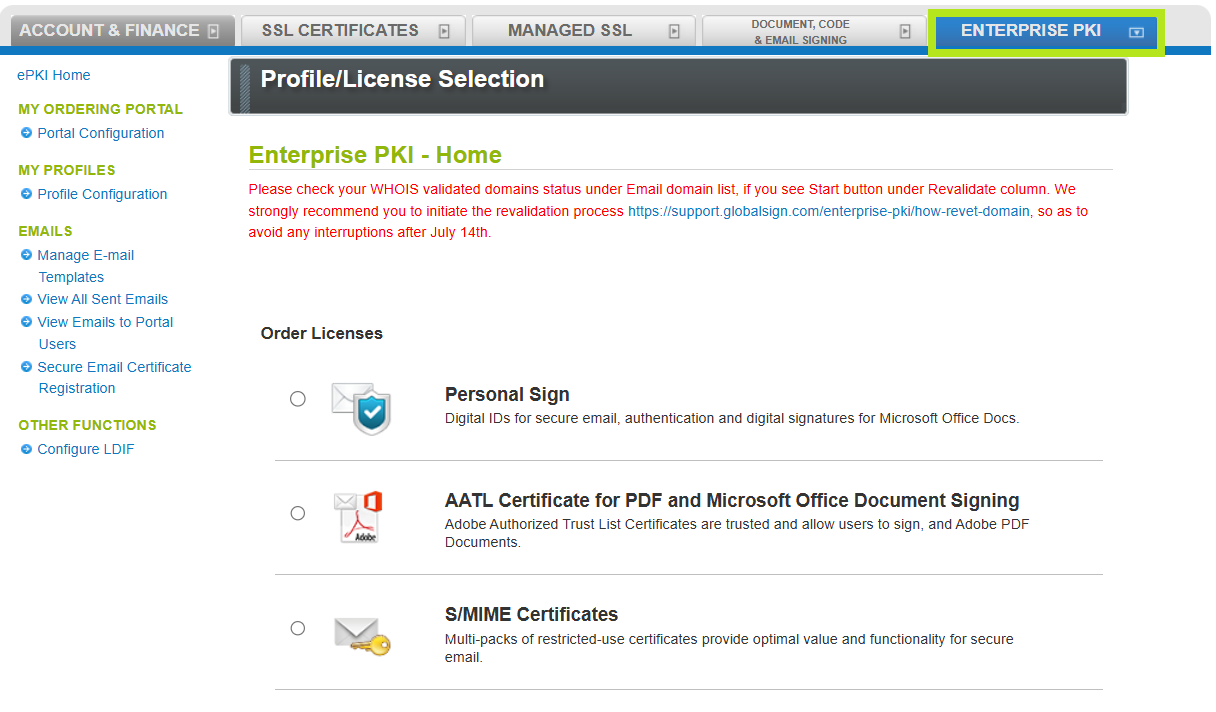
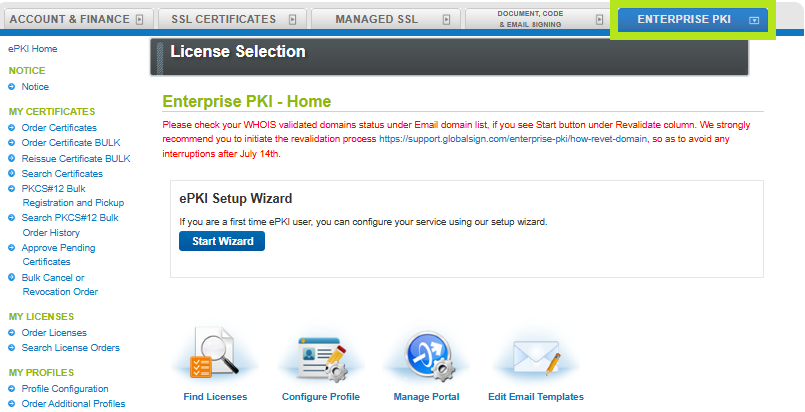
Once done creating your GCC account, log in to your account and go to Enterprise PKI tab.
-
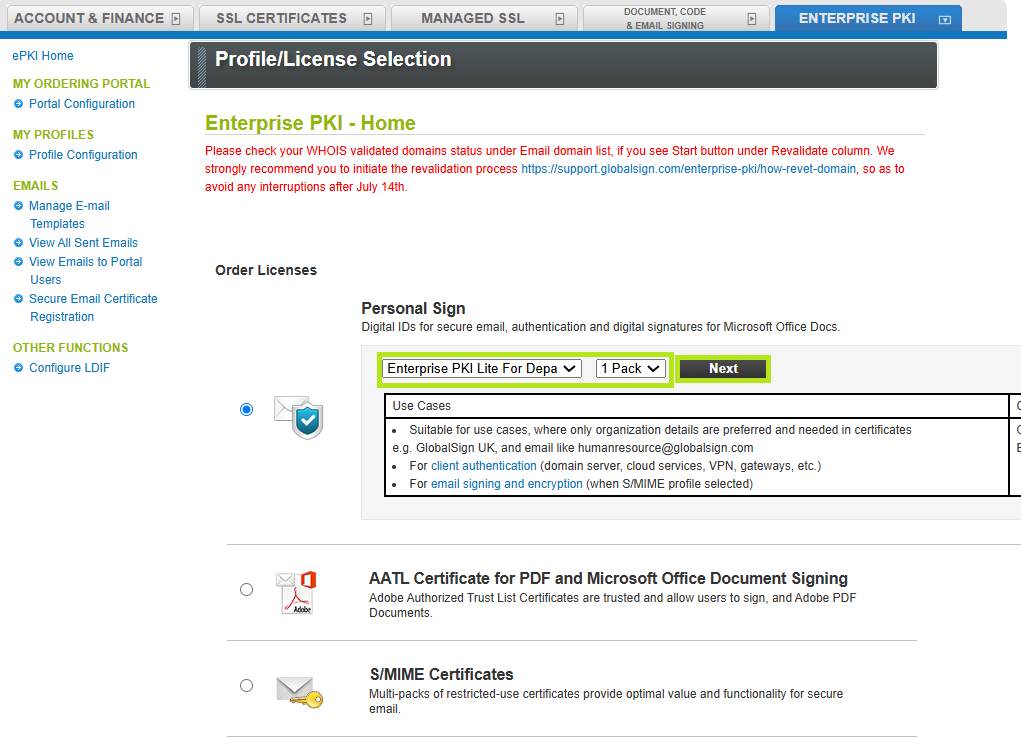
In the same page, select the product you wish to purchase and the number of packs you prefer. Then, click Next.
INFORMATION: In this example, Personal Sign product is selected. The following steps and images may vary depending on the product you wish to purchase. However, the standard ordering procedure remains the same. If you have questions or clarifications, contact your Account Manager or contact support for assistance.
-
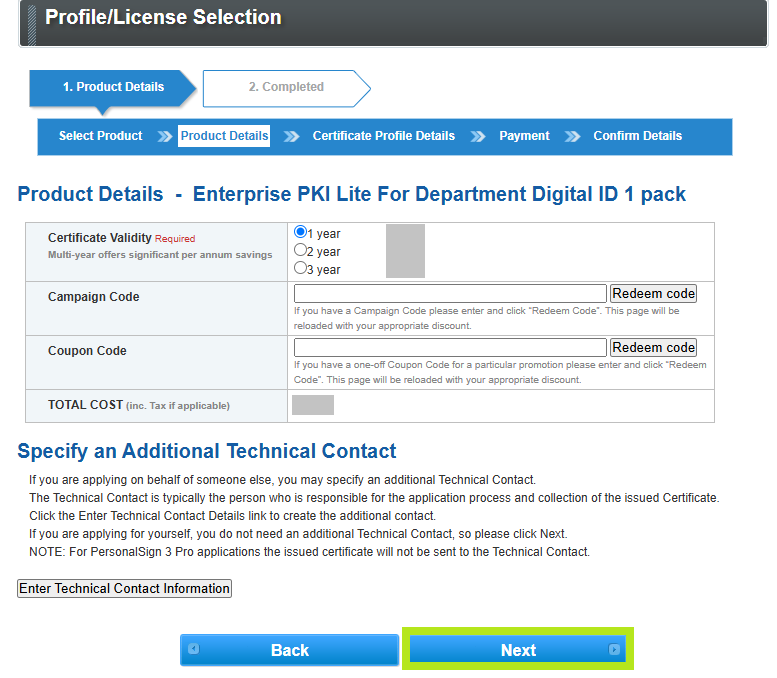
In the Profile/License Selection window, select your preferred Certificate Validity. Then, click Next.
-
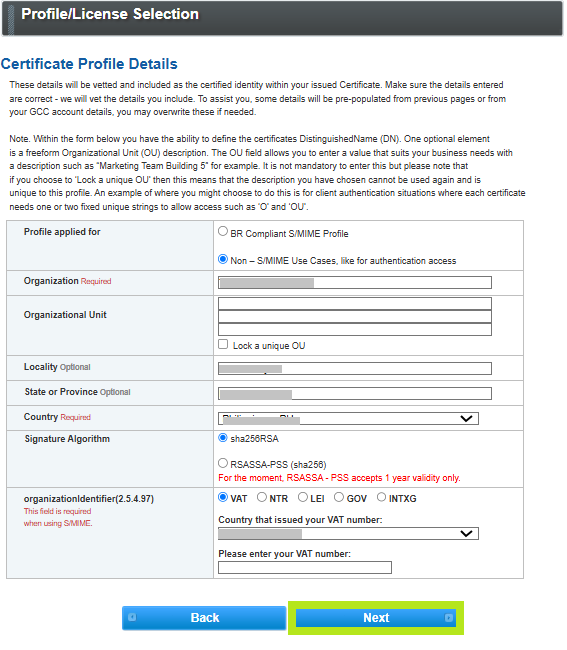
In the Certificate Profile Details, select a profile to apply and enter your details. Then, click Next.
-
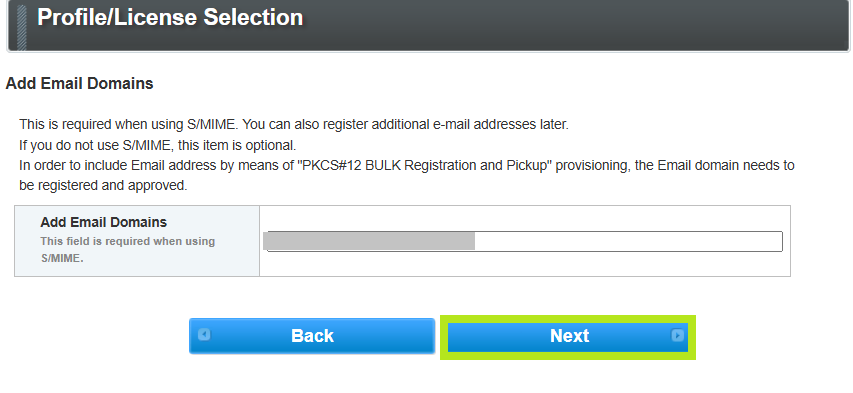
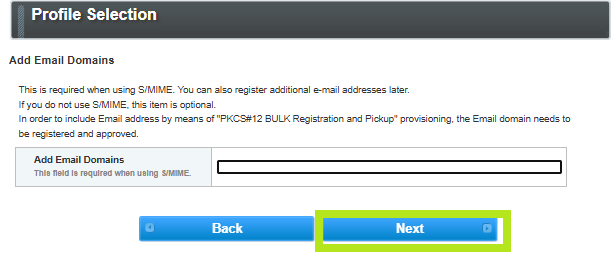
Enter your email domains and click Next.
-
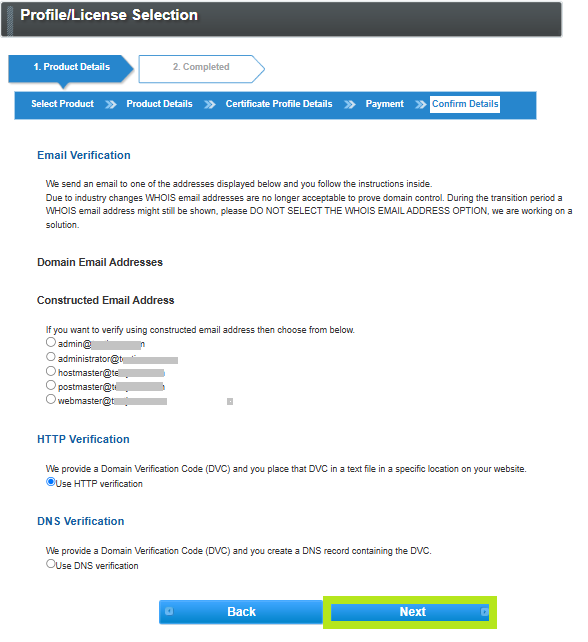
Select your preferred Domain Verification Method (i.e Approver Email, HTTP Verification Method, or DNS TXT Record), then click Continue.
IMPORTANT: Ensure that you have the selected the domain verification method that meets your requirements. Otherwise, you need to cancel your current order and reorder to change your selection. Learn how to perform domain verification process in EPKI here.
-
In the Payment Details window, select your preferred payment method. Then, click Next.
IMPORTANT: If you will order a license in EPKI using credit card as payment method, a link will be provided at the end of the process to proceed with your payment. If you will use Payment in arrears as payment method, your license will require approval from the account manager once you completed placing the license.
-
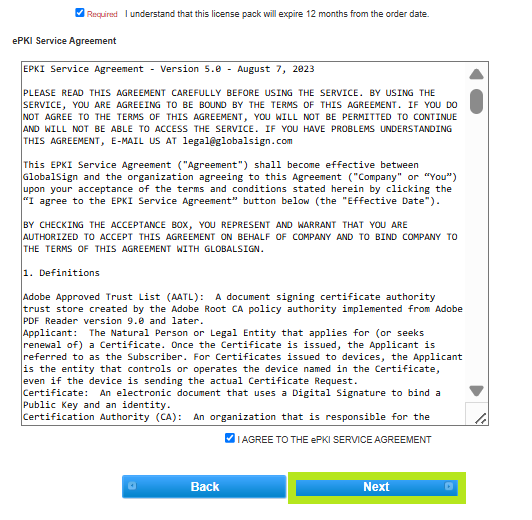
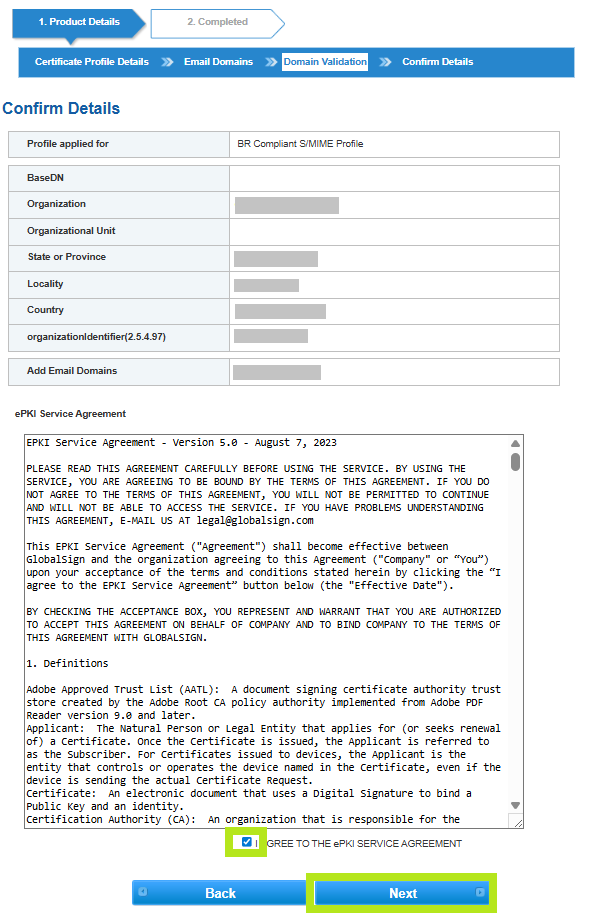
Review all the information you supplied, then tick "I agree to the Subscriber Agreement," and click Next.
-
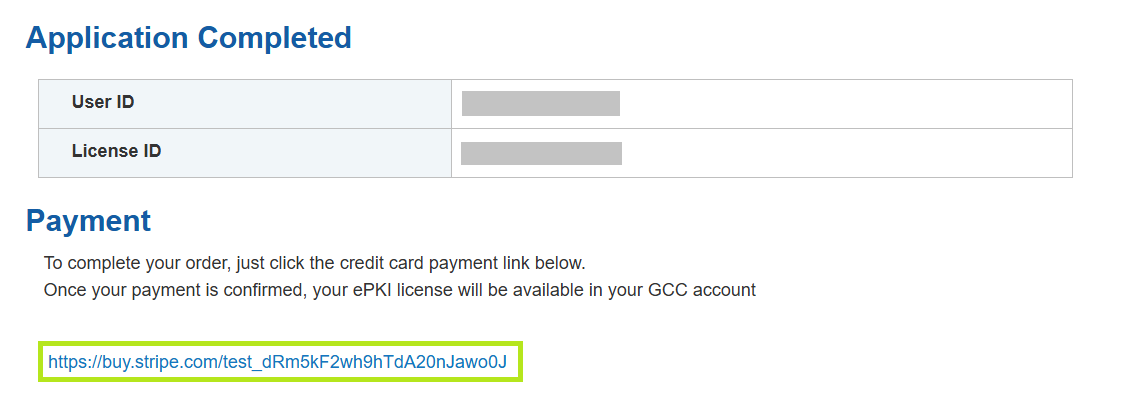
If you choose credit card as payment, there is a link provided at confirmation page to process payment. Open the link and complete the payment in the Stripe page.
INFORMATION: The Stripe page view might differ depending on the credit card and where you are paying from.
-
Once the payment is processed, your EPKI license will be available in your GCC account.
For Existing Customers
|
IMPORTANT: This process is for existing customers who wish to order additional profile. If you are a new customer, please follow the guidelines above. |
-
Log in to your GCC account and go to Enterprise PKI tab.
-
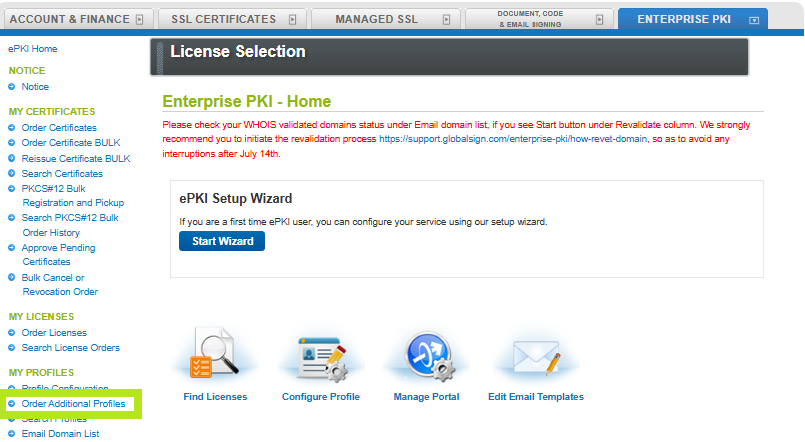
Under My Profiles, click the Order Additional Profiles option.
-
In the Certificate Profile Details, fill out the required fields with your organization information. Then, click Next to continue.
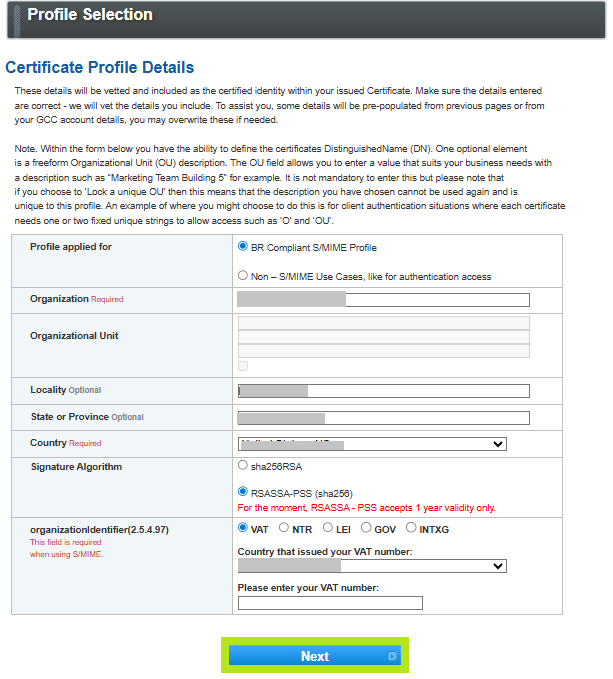
Field Description Profile applied for
BR Compliant S/MIME Profile
If you select this option the Organization Unit field will be disabled for use, and the Organization Identifier will be mandatory.
Note: If you fail to select this option, the email domain won't be validated for SMIME use. It will have to be re-validated through Email Domain List using the settings button on the wanted domain.Non – S/MIME Use Cases, like for authentication access
If select this option, you will have to provide the Organization Unit.Note: In consideration of the restricted usage of Organizational Unit to only a legal organization name, after July 31st 2023, Profiles for SMIME cannot provide Organizational Unit, and we recommend not using this field while creating new profiles for the purpose of SMIME Certificates.
Organization
Name of your organization as registered with your registration authority.
Locality, State or Province, Country
The address where your organization is registered.
Organizational Identifier
An Organization Identifier is a unique identifier assigned to an organization. Usually the identifier is a number given to your organization by the registration authority or tax office when you created your organization, but the Organizational Identifier differs from country to country.
To help you find the Organizational Identifier for your organization, GlobalSign identified 5 potential registration schemes that can be used. For your order of an S/MIME Certificate, please select one of the options below. IMPORTANT: Not all options will be available in all countries.
VAT
VAT number or Value Added Tax number, is the number given to your organization by the Federal Tax Authority of the country where you register. This number needs to be unique for your organization.
Example: GB812441268.
A VAT number is a registered tax identification number for tax systems that use Value-Added Tax.
A VAT number is not the same as a local number or tax ID; it is exclusively for the Value-Added Tax scheme. A VAT number has between 4 and 15 digits, starting with the two-digit country code.NTR
A National Trade Registration number (NTR number) is a unique number assigned to a Private Organization by the Incorporating Agency (or National Trade Registry) in the organization's jurisdiction.
This number needs to be unique for your organization at the State or Province level.
The format is NTR, followed by the ISO country code and then the number.
Example: NTRBE-0459.134.256 (Belgium) or NTR followed by the ISO country code followed by a + and the ISO State/Province code, and then the number. Example: NTRUS+NH-578611 (US+New Hampshire).LEI
An LEI number (A Legal Entity Identifier that is unique on a global level) is a 20-character code format: LEIXG-xxxxxxxxxxxxxxxxxxxxxx (20 digits).
Check here if your company already has an LEI or how to apply for an LEI: https://search.gleif.org/#/search/simpleSearch=
Example: LEIXG353800KCIOO2YWF3VP62GOV
If you are a government entity and do not have a VAT, NTR, or LEI. GlobalSign uses the Registration Scheme identifier ‘GOV’ followed by the 2-character ISO 3166 country code for the nation in which the Government Entity is located.
Example: GOVUS or entities verified at a subdivision, GOVUS+CAINT
This scheme is available for international organizations founded by a constituent document. GlobalSign uses the Registration Scheme identifier ‘INT’ followed by the ISO 3166 code “XG”. E.g. INTXG. (Additional checks and approval from GlobalSign are required). -
Enter your domain name in the Add Email Domain box, then click Next.
-
Review all the information you supplied and tick the I Agree to the EPKI Service Agreement box. Then, click Next to proceed.
-
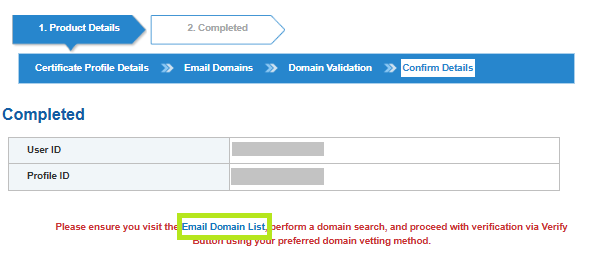
You have now completed the ordering process for your Additional Profile.
|
WHAT'S NEXT: You can now verify your domain. You can either click on the Email Domain List in the acknowledgement screen or refer to this page to proceed with Domain Verification Process in EPKI. |
SSL Configuration Test
Check your certificate installation for SSL issues and vulnerabilities.