
Configure PersonalSign Certificate - Microsoft Outlook in Office 365
Apr 17, 2026
Configure PersonalSign Certificate - Microsoft Outlook in Office 365
|
OVERVIEW: This page provides a walkthrough of instructions in setting up S/MIME email encryption and digital signing in Microsoft 365 (Office 365). After completing the steps, the certificate will be available in Outlook so you can digitally sign emails. For more PersonalSign Certificate Configuration guides, please refer to this page. |
Prerequisite
Before you can install the certificate in Microsoft 365 (Office 365), you must first download it and import it into the Windows Certificate Store.
NOTE: The new Outlook does not automatically import digital certificates. You must install the certificate manually or request that your administrator configure policies for automatic certificate deployment.
STEP 1: Download Your Certificate
STEP 2: Locate and Install Your Certificate
Guidelines
- Click the Windows (W) icon from the Taskbar.
- Enter Outlook in the search bar menu, then click on the
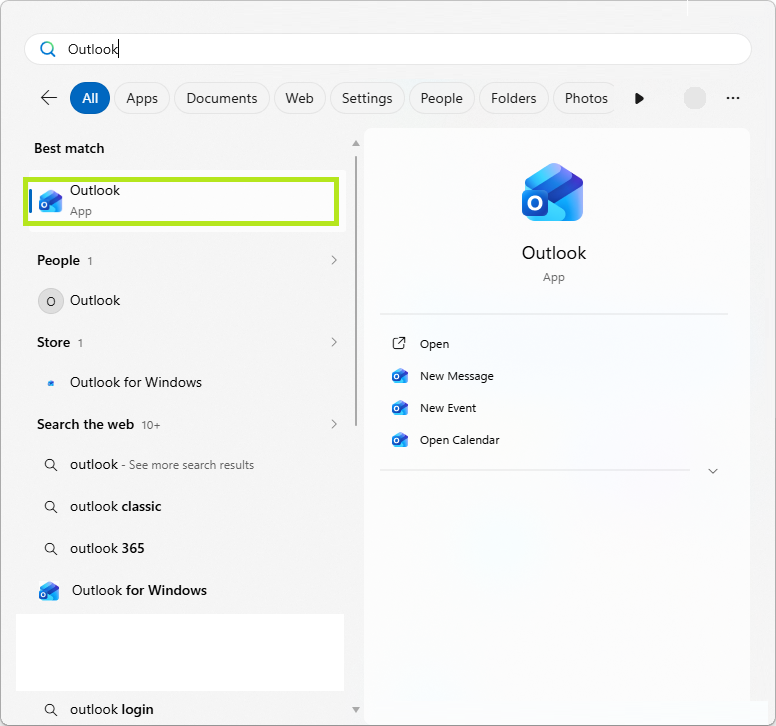
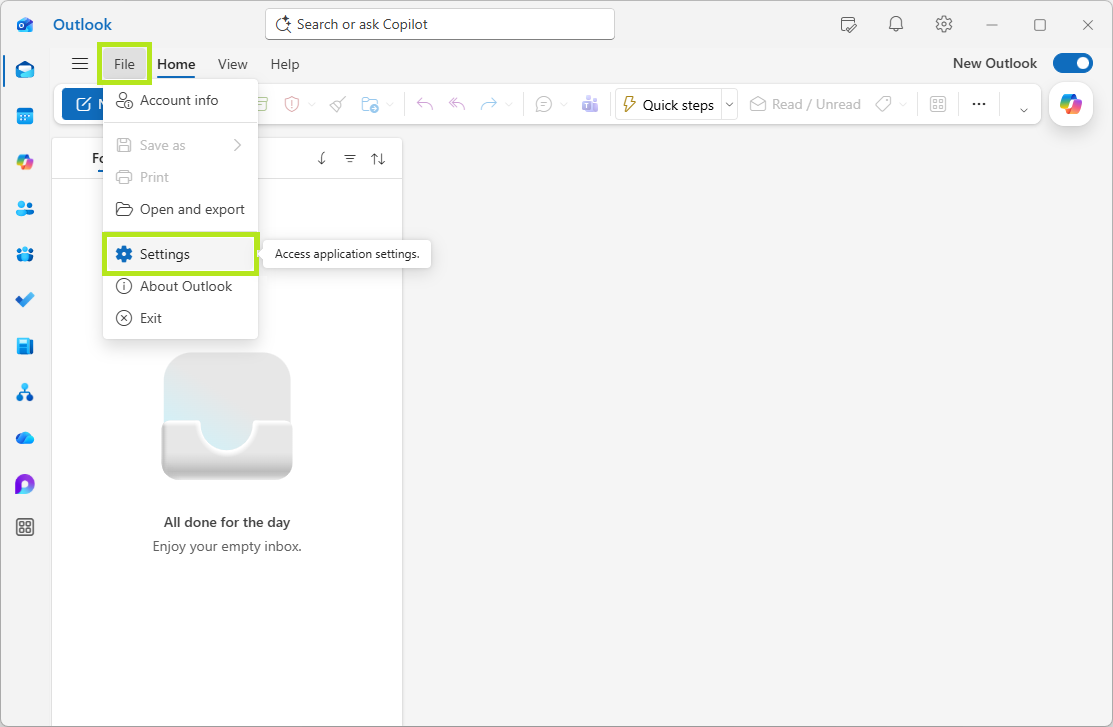
NOTE: The Outlook application opens on your default browser if it is not installed in your device. - Go to Settings, then, click View all Outlook settings.
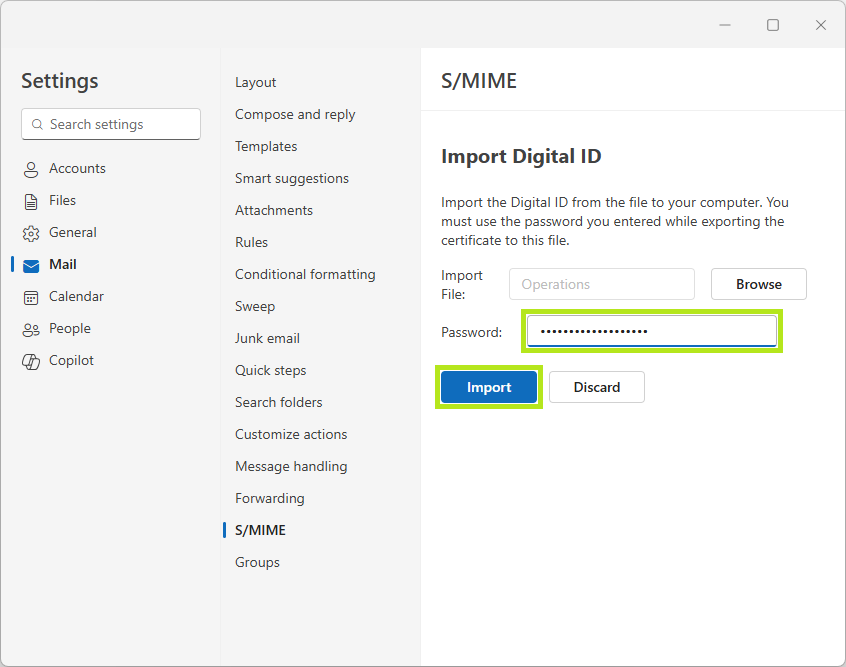
- Go to Mail > S/MIME, then click the Import button.
NOTE: Select the appropriate S/MIME option for your PersonalSign certificate.
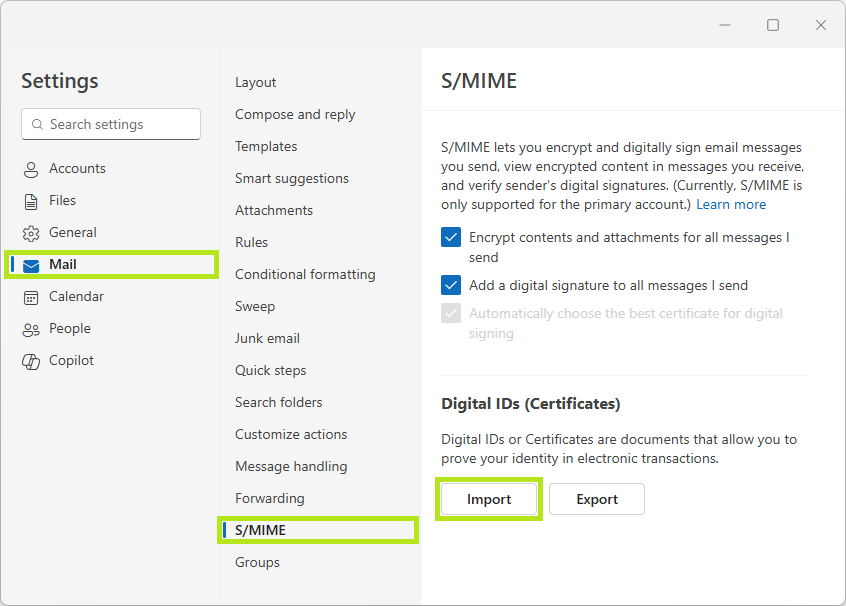
OPTION DESCRIPTION Encrypt contents and attachments for all messages I send
Protects all outgoing emails and attachments so only recipients with the required private key can read them.
WARNING: Use this with caution. If you turn this on, only recipients with a valid S/MIME setup can read your emails. Anyone else will be locked out. Only use this if you know your contacts are ready for encrypted mail.
This option is recommended when sending confidential or sensitive information to recipients who are known to have S/MIME capabilities configured.Add a digital signature to all messages I send
When enabled, a digital signature is automatically added to every email you send. This allows recipients to verify:
- the authenticity of the sender, and
- the integrity of the message (that it has not been altered in transit).
This option is recommended when you want recipients to trust the origin of your emails without restricting their ability to read them.
- Click on the Browse button and search for the specific .PFX certificate for this email client.
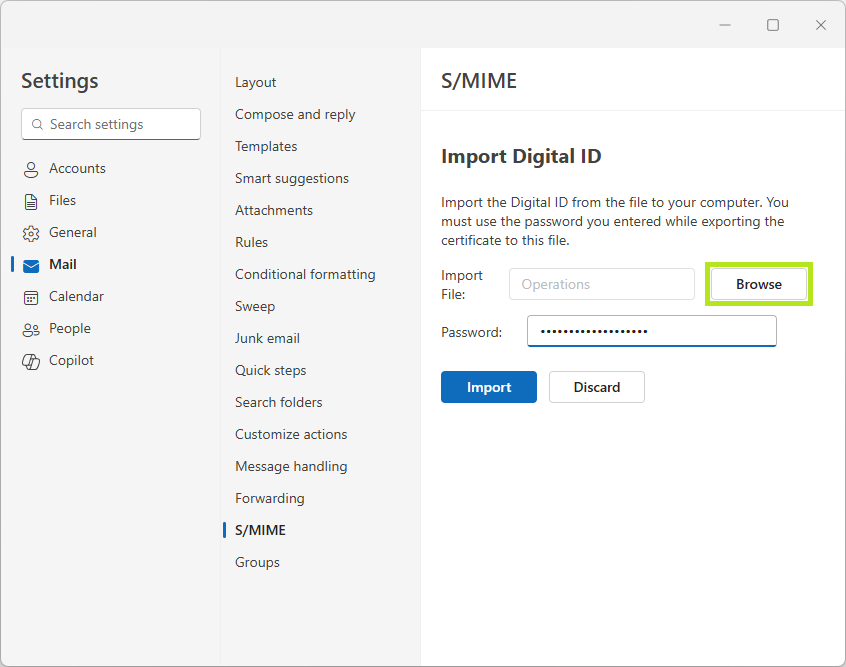
- Enter the nominated certificate password in the space provided, then click Import.
Digitally Sign Messages in the new Outlook
-
Digitally Sign a Single Message
- In the message window, select the Options tab.
- Under More options, select Digitally sign this message.
- Compose your message, and then select Send.
NOTE: If you do not see the Sign message option, your PersonalSign certificate may not be configured for signing or may not be enabled for your account.
-
Digitally Sign all Messages in new Outlook
- Select Settings.
- Go to Mail > S/MIME.
- Select Add a digital signature to all messages I send.
NOTE: The settings in new Outlook and Outlook on the web are synchronized. This means that any changes made in new Outlook will be reflected in Outlook on the web and vice versa.
SSL Configuration Test
Check your certificate installation for SSL issues and vulnerabilities.