
Download and Install PersonalSign 3 Pro Certificate
Jun 4, 2026
Download and Install PersonalSign 3 Pro Certificate
OVERVIEW: This page provides step-by-step instructions on how to download and install a PersonalSign 3 Pro Certificate. After completing these steps, you can use it to digitally sign and authenticate Belgian government–compliant documents. For more information about PersonalSign Certificates, please refer to this page.
Prerequisites
-
You must install your digital certificate within the next 30 days after receiving the download link, otherwise your order will be automatically cancelled.
NOTE: If your certificate is a reissue, it must be installed within the next 7 days after receiving the download link. -
Complete this process on the machine from which you intend to use the Certificate.
-
Temporary password refers to the Pickup Password created during the order process which will be used to download the certificate. If you forgot or lost this password, you will have to cancel and reorder your certificate.
If you do not remember this password:-
Direct Customer: Cancel and reorder the certificate. See reference: Order Cancellation - GlobalSign Certificate Center (GCC).
-
Chamber of Commerce / Dairiten (MARKTCONCURRENT): Place a new order and email the GlobalSign Support Team (support@globalsign.com) with both the new and existing order numbers. The order does not require cancellation.
NOTE: The GlobalSign Support Team will assist you in expediting the new vetting process once both orders have been received.
-
Download Guidelines
Select the appropriate tab to view download instructions.
If you selected Download as .pfx (PKCS12) as your Key Generation Option in the Certificate Application process, use this platform.
-
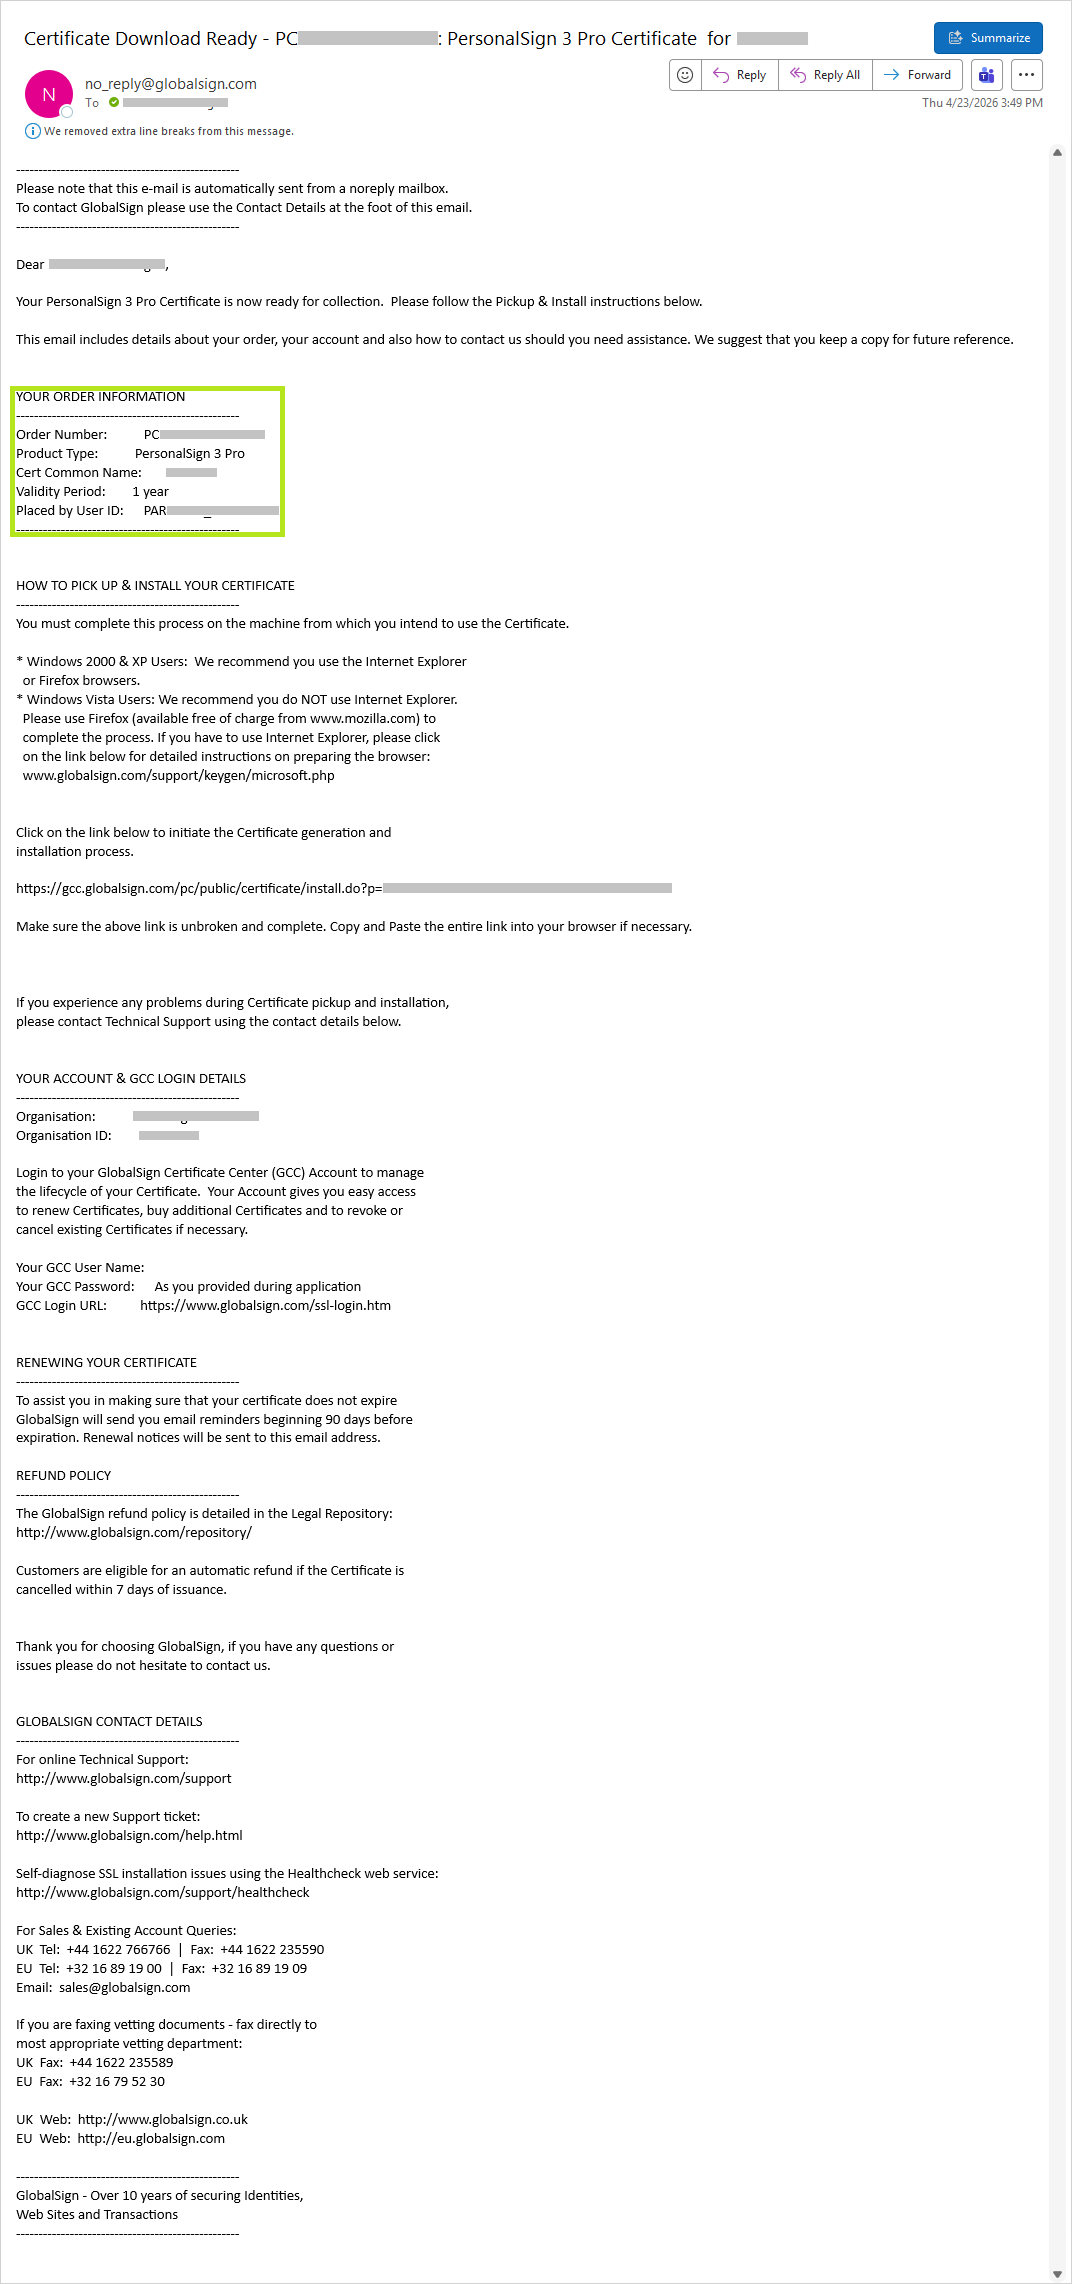
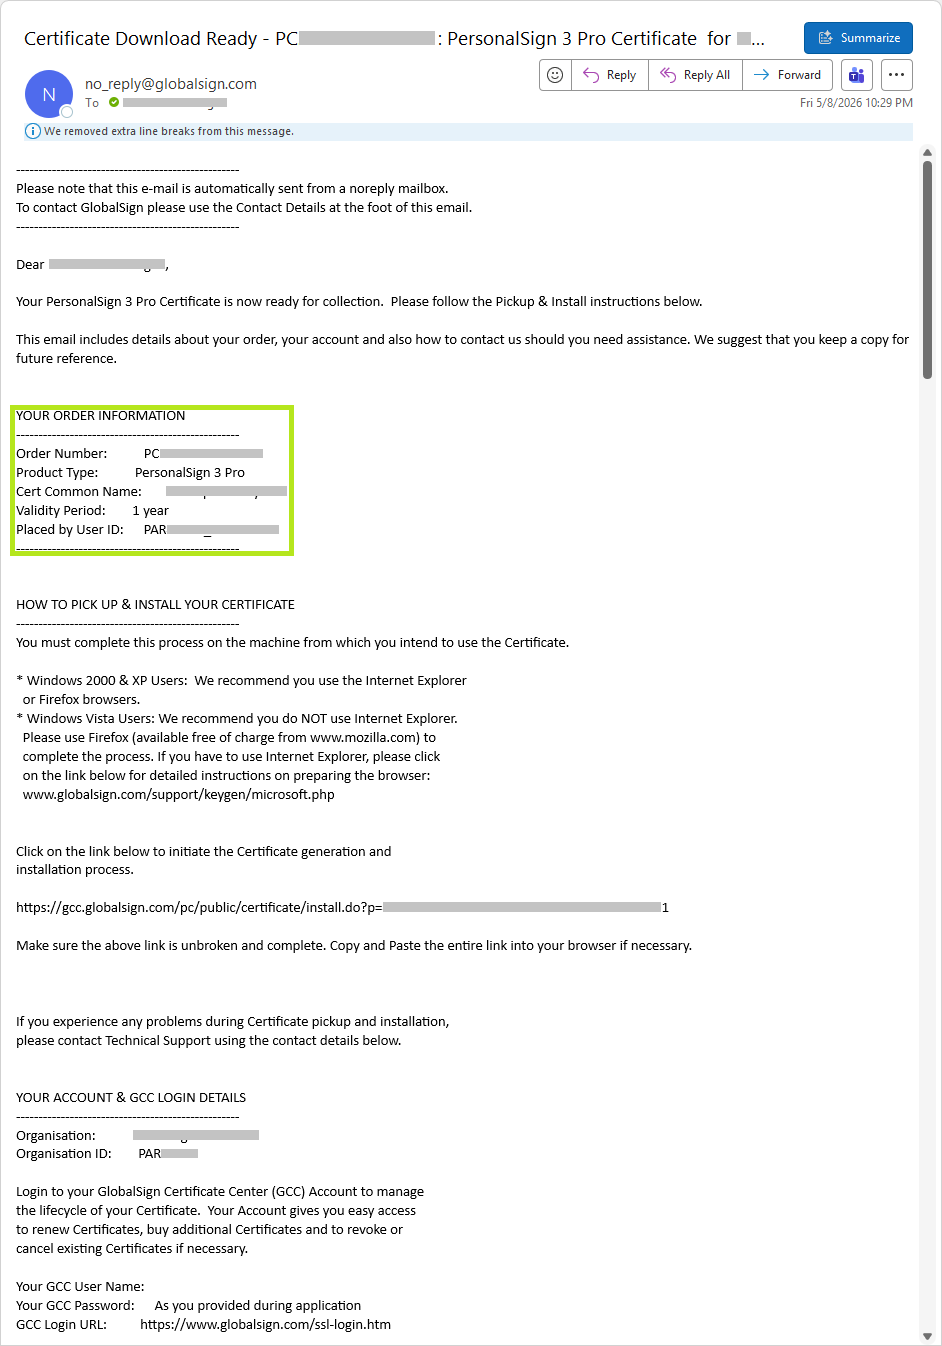
Check the nominated email address for the certificate download link (subject prefix: Certificate Download Ready). See reference: Ordering a PersonalSign 3 Pro Certificate, STEP 1, Email Address.
-
Review Your Order Information.
-
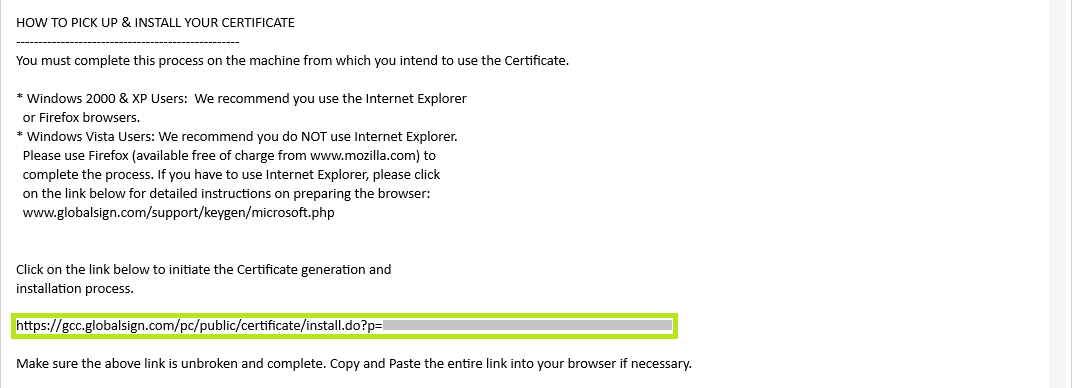
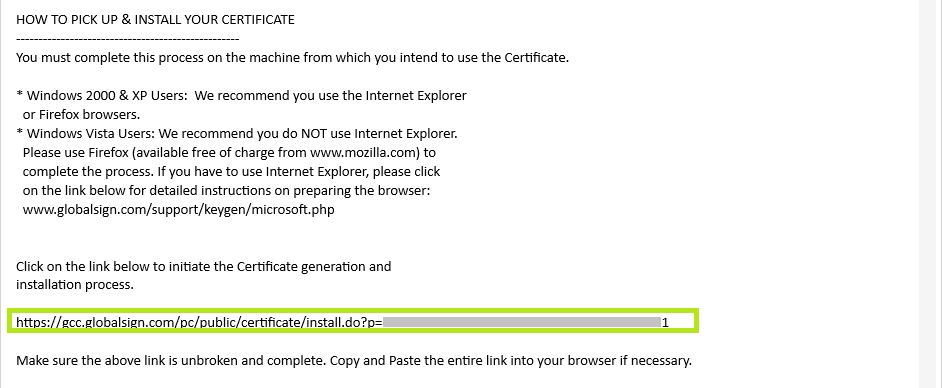
Copy the Certificate Generation and Installation link and paste it in your browser address bar, then press ENTER.
WARNING: Before you start, make sure that this is the computer or device you want to install your certificate on. Otherwise, an error would occur.
NOTE: If you have to use Internet Explorer, please click on the link below for detailed instructions on preparing the browser: Enable IE Compatibility in Microsoft Edge.
-
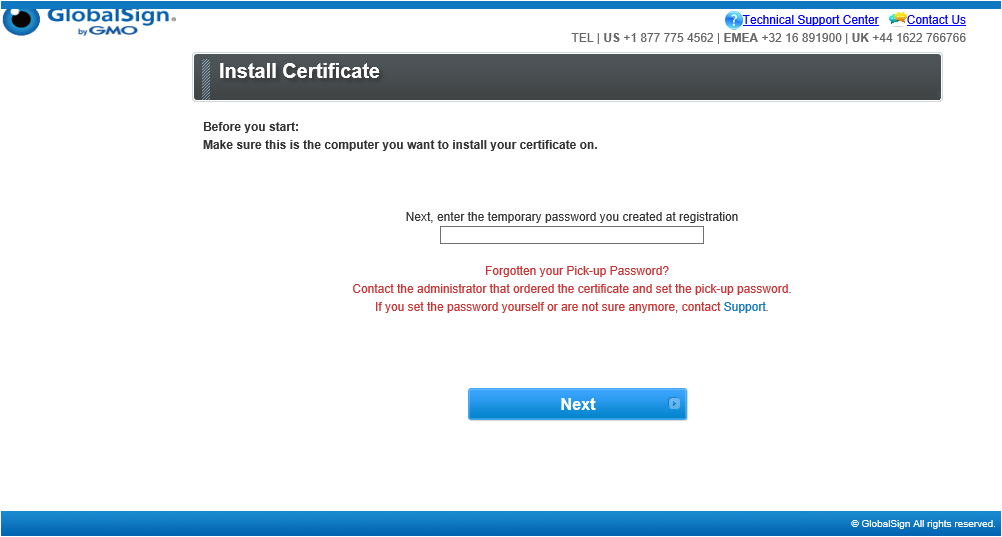
Enter your nominated Pickup Password that was set in the ordering process in the space provided then click Next. See reference: Ordering a PersonalSign 3 Pro Certificate, Pickup Password.
WARNING: Due to GlobalSign's strict security policy, we do not have access to your passwords. If you have forgotten the Pickup password for your order(s) through the Chamber of Commerce or Dairiten (MARKTCONCURRENT), DO NOT CANCEL YOUR ORDER. Follow the steps below.
INFORMATION: If you forgot the Pickup password for an order placed through the Chamber of Commerce or Dairiten (MARKTCONCURRENT), follow these steps:
1. Place a new PersonalSign 3 Pro Certificate order.
2. Create your email request:
a. Address this email to the GlobalSign Support Team (support@globalsign.com).
b. In the subject line, enter: Reissue Request Due to Forgotten PersonalSign 3 Pro Pickup Password.
c. In the body of the email, provide the following information:
i. New PersonalSign 3 Pro order number/s
ii. Exisiting PersonalSign 3 Pro order number/s
NOTE: The Reissue Request email will be reviewed by the GlobalSign Support Team. The GlobalSign Support Team will then conduct a verification call and assist you with the reissuance of your certificate.
See Reissue Client Certificate for reference. -
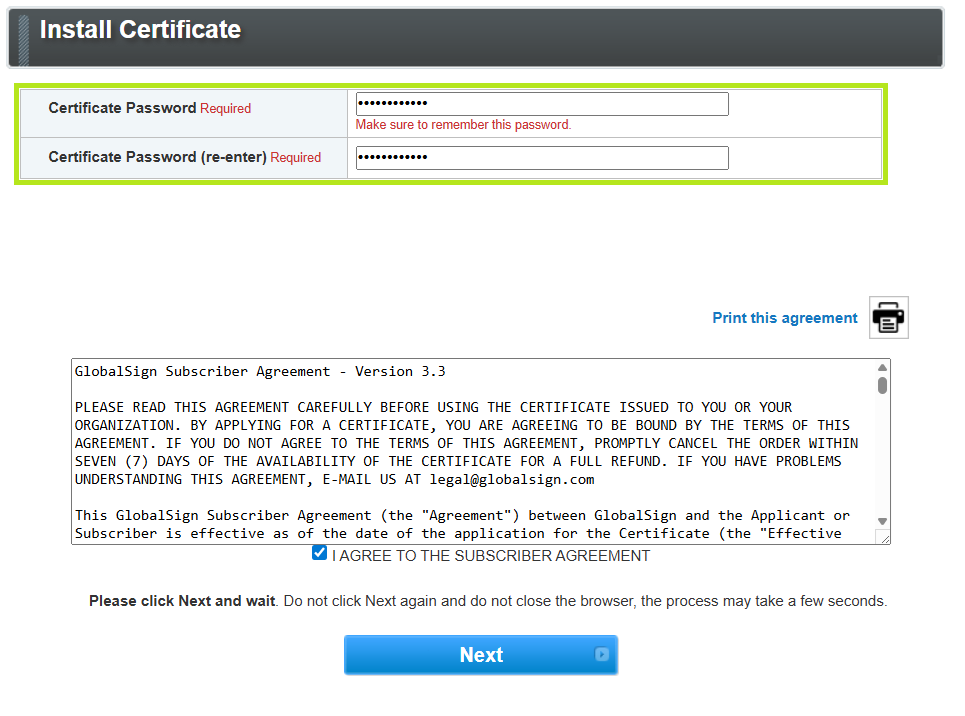
Create a Certificate password that is at least 12 characters long. Alphanumeric characters only (A–Z, 0–9).
IMPORTANT: For security reasons, please specify a Certificate Password that will be required to install your PersonalSign3 digital certificate after downloading. For more information on the Password Specifications and Requirements, refer to this page .
Please do not confuse the Certificate password with the Pickup password created during the ordering process.WARNING: You must remember this Certificate password in order to install your PersonalSign 3 Pro Certificate. IT IS A MUST THAT YOU SECURE YOUR PASSWORD!
Forgotten Certificate passwords prior to installation will require that the order be cancelled and resubmitted. If the certificate has been installed and you forgot your Certificate password, you need to reissue through your GlobalSign Certificate Center (GCC) account. -
Read the GlobalSign Subscriber Agreement and tick the I AGREE TO THE SUBSCRIBER AGREEMENT to confirm, then click Next.
-
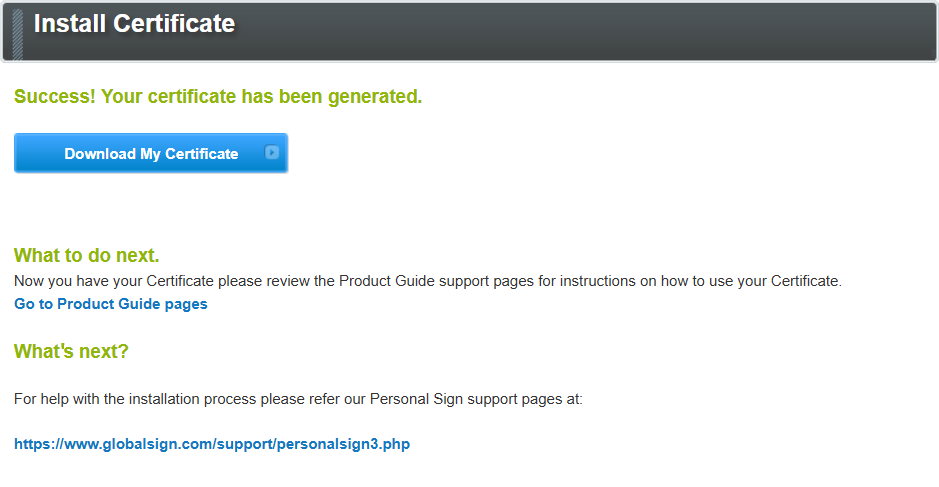
Click the Download My Certificate button.
-
Proceed to the Install Guidelines below.


If you selected Download using Internet Explorer (IE) Compatibility Mode as your Key Generation Option in the Certificate Application process, use this installation platform.
-
Check the nominated email address for the certificate download link (subject prefix: Certificate Download Ready). See reference: Ordering a PersonalSign 3 Pro Certificate, STEP 1, Email Address.
-
Review Your Order Information.
-
Copy the Certificate Generation and Installation link and paste it in your browser address bar, then press ENTER.
NOTE: Your Microsoft Edge browser MUST be in IE Compatibility mode. To Enable IE Compatibility in Microsoft Edge, refer to this page.
WARNING: Before you start, make sure that this is the computer or device you want to install your certificate on. Otherwise, an error would occur.
-
Enter your nominated Pickup Password that was set in the ordering process in the space provided then click Next. See reference: Ordering a PersonalSign 3 Pro Certificate, Pickup Password.
WARNING: Due to GlobalSign's strict security policy, we do not have access to your passwords. If you have forgotten the Pickup password for your order(s) through the Chamber of Commerce or Dairiten (MARKTCONCURRENT), DO NOT CANCEL YOUR ORDER. Follow the steps below.
INFORMATION: If you forgot the Pickup password for an order placed through the Chamber of Commerce or Dairiten (MARKTCONCURRENT), follow these steps:
1. Place a new PersonalSign 3 Pro Certificate order.
2. Create your email request:
a. Address this email to the GlobalSign Support Team (support@globalsign.com).
b. In the subject line, enter: Reissue Request Due to Forgotten PersonalSign 3 Pro Pickup Password.
c. In the body of the email, provide the following information:
i. New PersonalSign 3 Pro order number/s
ii. Exisiting PersonalSign 3 Pro order number/s
NOTE: The Reissue Request email will be reviewed by the GlobalSign Support Team. The GlobalSign Support Team will then conduct a verification call and assist you with the reissuance of your certificate.
See Reissue Client Certificate for reference. -
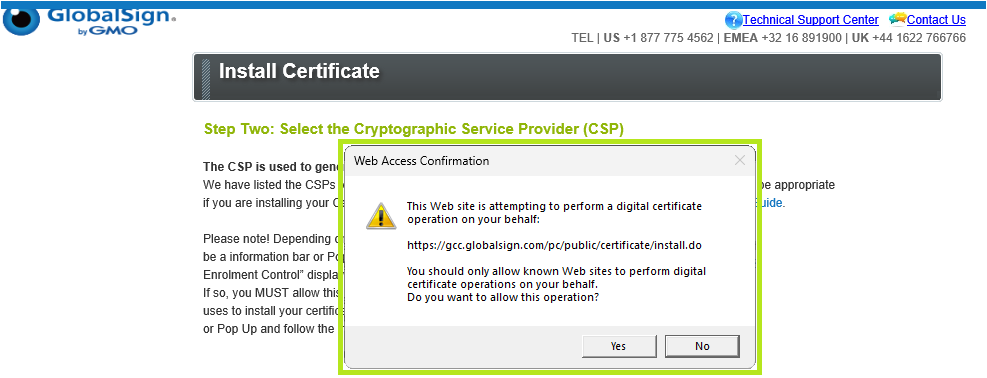
Depending on your browser / Operating System setup, there may be a information bar or Pop Up asking you to install "Microsoft Certificate Enrolment Control" displayed at the top of this page.
If so, click Yes to continue.
-
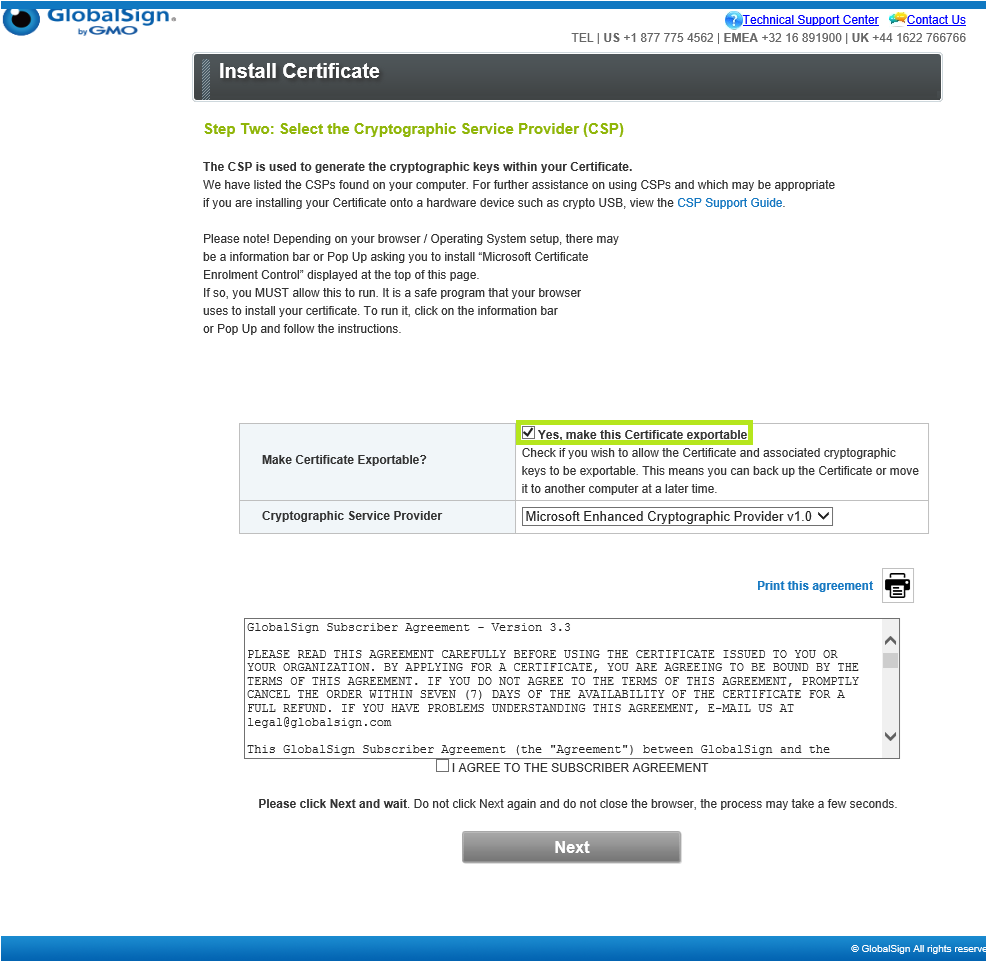
Put a tick mark in Yes, make this Certificate exportable.
-
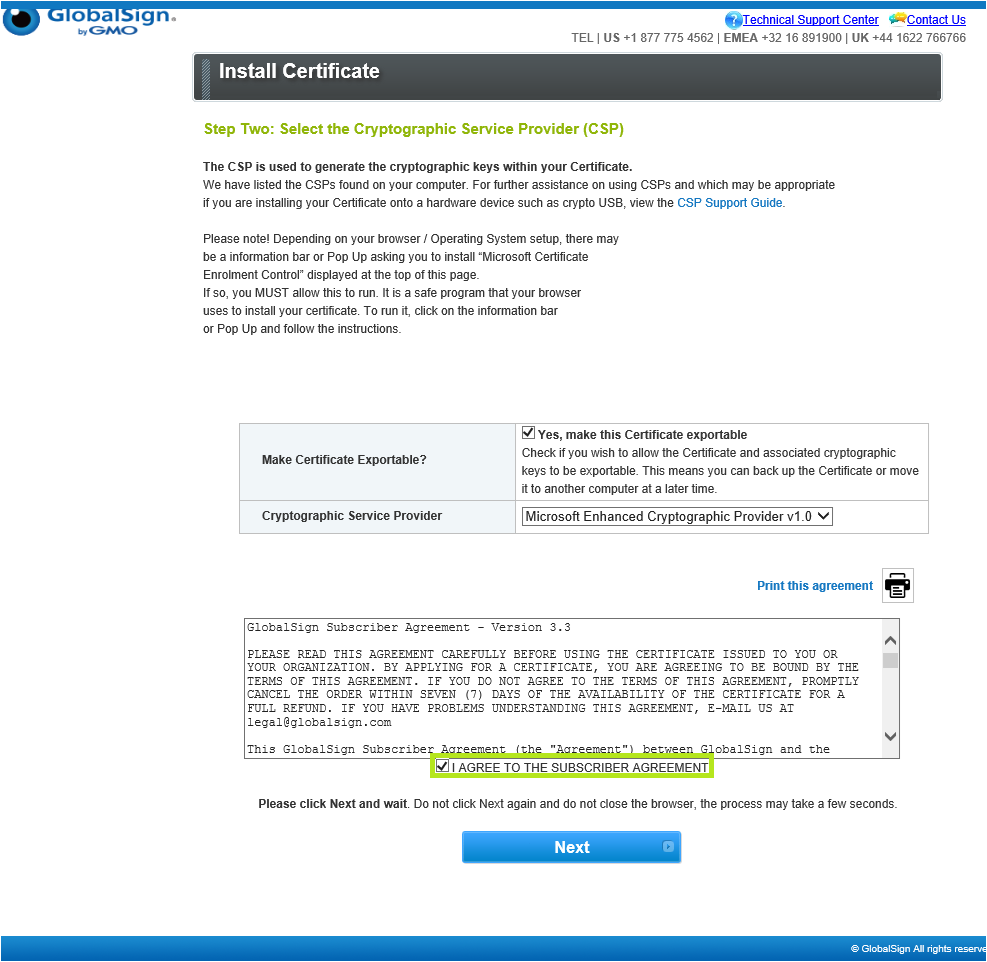
Read the GlobalSign Subscriber Agreement and tick the I AGREE TO THE SUBSCRIBER AGREEMENT to confirm, then click Next.
-
The screen will refresh and prompt you to install your certificate. Click Install my Certificate, then proceed to the Install Guidelines below.


Install Guidelines
Select the appropriate tab to view installation instructions.
If you selected Download as .pfx (PKCS12) as your Key Generation Option in the Certificate Application process, select the installation platform based on your preference.
-
Access Your File:
-
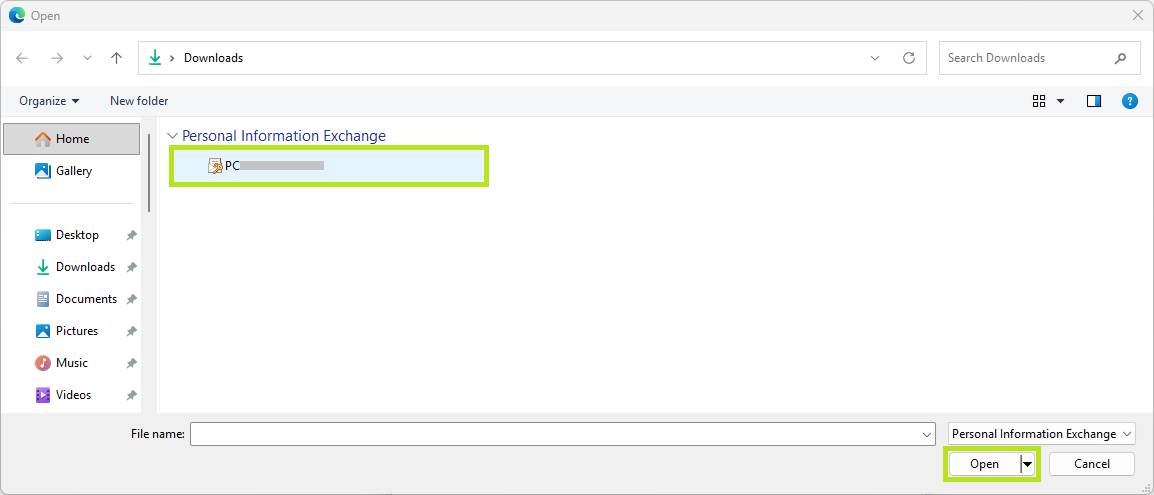
Browse and navigate to your PKCS12 certificate .pfx file.
-
Select your PKCS12 certificate .pfx file and click Open.

-
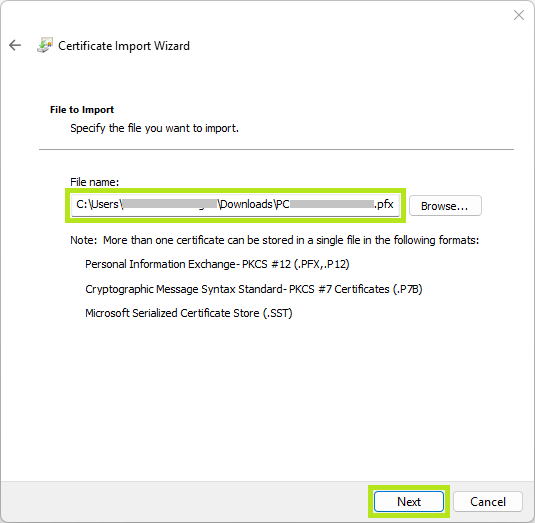
After the file PKCS12 certificate file name is loaded to the Certificate Import Wizard, click on Next.
-
-
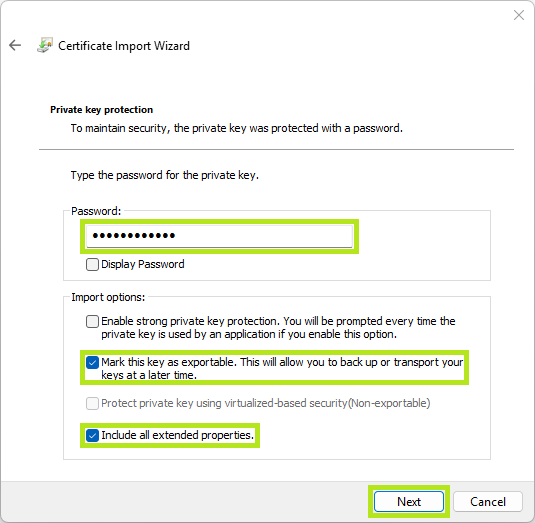
Enter Security Details:
-
Enter your nominated Certificate password (see Download PersonalSign 3 Pro Certificate, Create a Certificate Password) in the space provided.
-
Select the recommended Import options, then click Next.
IMPORT OPTION
DESCRIPTION
Mark this key as exportable.
This will allow you to back up or transport your
keys at a later time.Include all extended properties.
This will carry over all the certificate details during import.
-
-
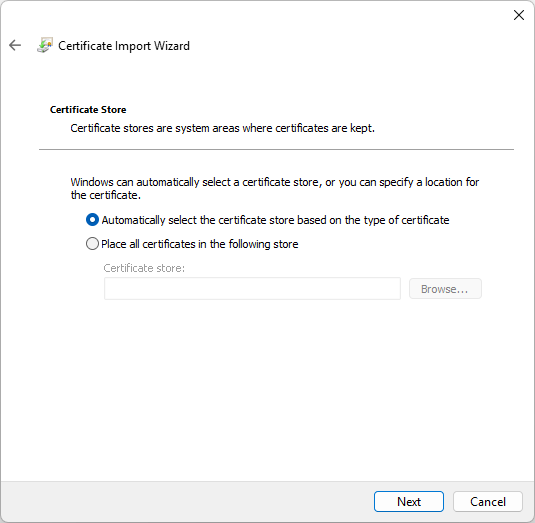
Choose the Certificate Store:
NOTE: Certificate stores are system areas where certificates are kept.
OPTION
DESCRIPTION
Automatically select the certificate store based on the type of certificate
Recommended. This works for most scenarios.
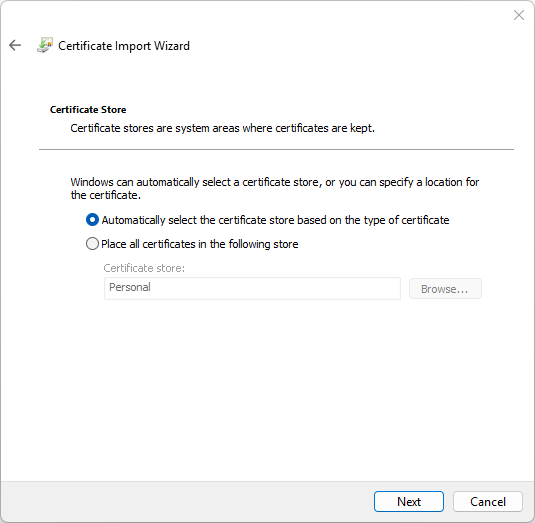
Place all certificates in the following store
Use this if the certificate is not recognized.
Click Browse to select "Personal" or "Trusted Root Certification Authorities".IMPORTANT: If the certificate does not function, rerun the wizard, select the certificate, and manually choose the store.
-
Finish:
-
Click Next.
-
Click Finish to confirm, else, click Cancel to terminate installation.
-


Congratulations! You have successfully installed your PersonalSign 3 Pro Certificate.

IMPORTANT:
-
Verify Trust: Some certificates (like self-signed ones) may show a red "X." Double-click the certificate in Keychain Access, expand the Trust section, and change "When using this certificate" to Always Trust.
-
Browser Use: Once installed in Keychain Access, the certificate is automatically available for Safari and Chrome. Firefox requires a separate import within its own internal certificate manager.
-
Double-click the .pfx or .p12 file on your Mac.
-
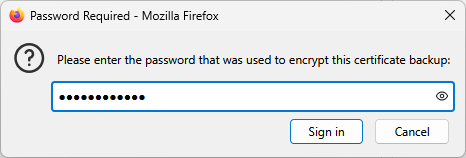
Keychain Access will open automatically and prompt you for the certificate password.
-
Enter your nominated Certificate password (see Download PersonalSign 3 Pro Certificate, Create a Certificate Password) in the space provided.
If double-clicking doesn't work, follow these steps:
-
Open Keychain Access (found in Applications > Utilities or via Spotlight).
-
Select the login keychain from the left sidebar to make it available for your user account.
-
Go to File > Import Items....Browse to your .pfx file, then click Open.
-
Enter your nominated Certificate password (see Download PersonalSign 3 Pro Certificate, Create a Certificate Password) in the space provided.
For advanced users, you can use the security command in Terminal:
sudo security import /path/to/your/file.pfx -k ~/Library/Keychains/login.keychain
You will be prompted for your Mac's admin password and then the nominated Certificate password (see Download PersonalSign 3 Pro Certificate, Create a Certificate Password) in the space provided.
-
Open Certificate Settings:
-
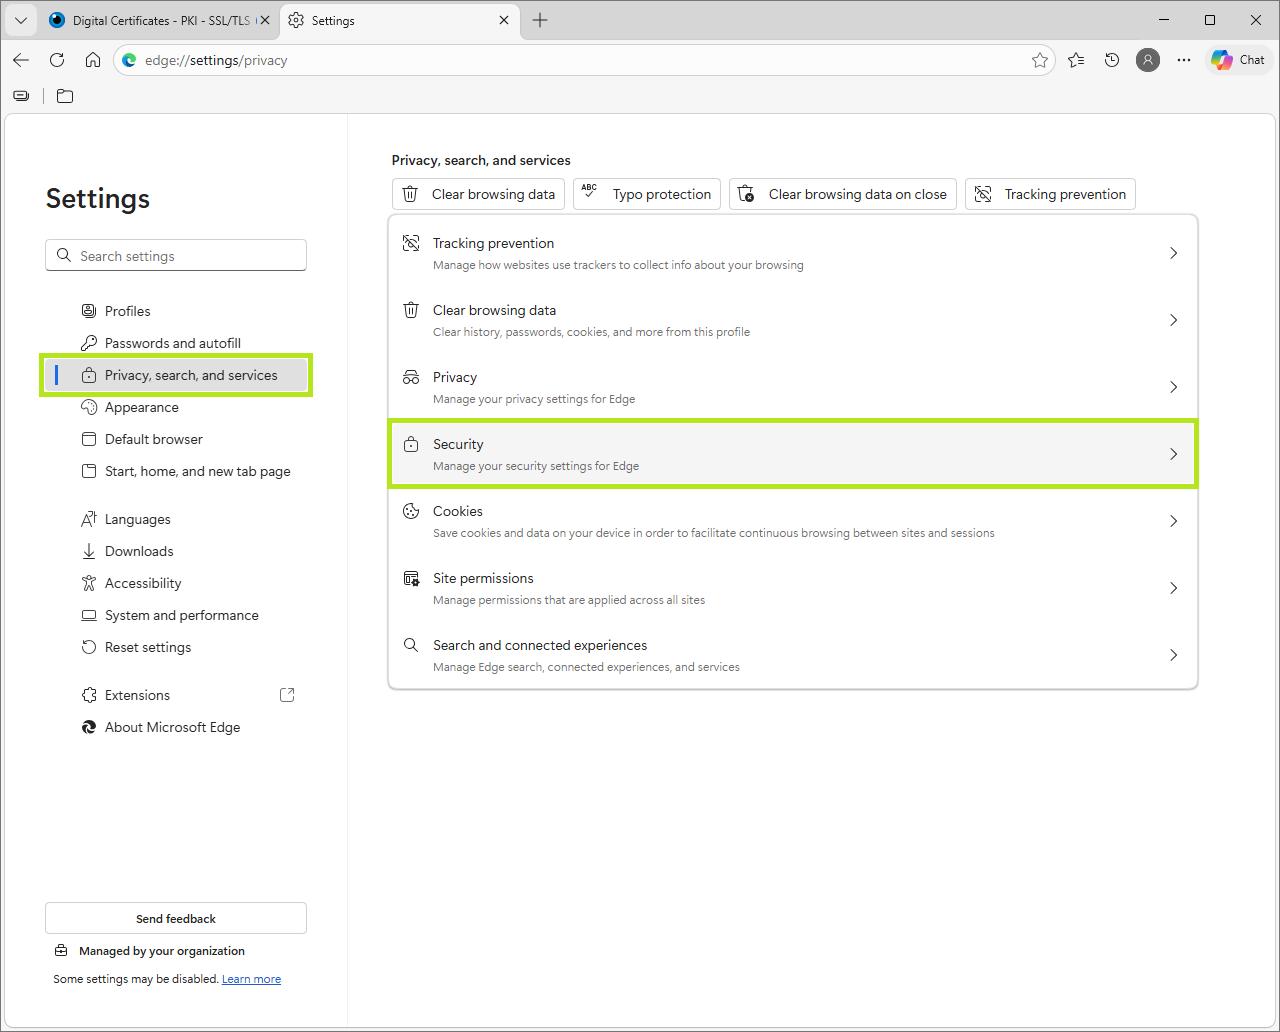
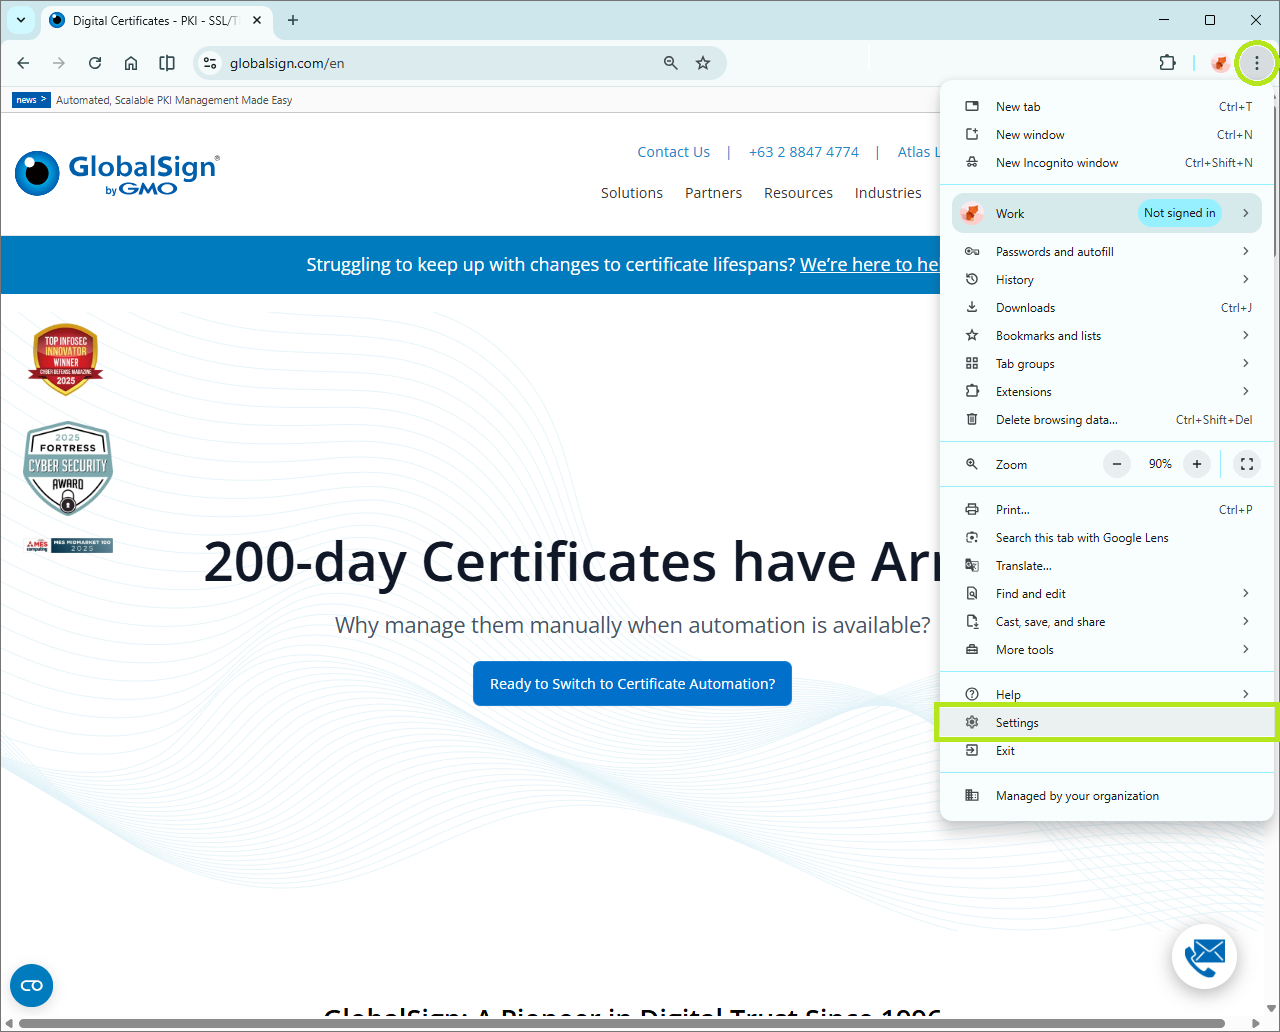
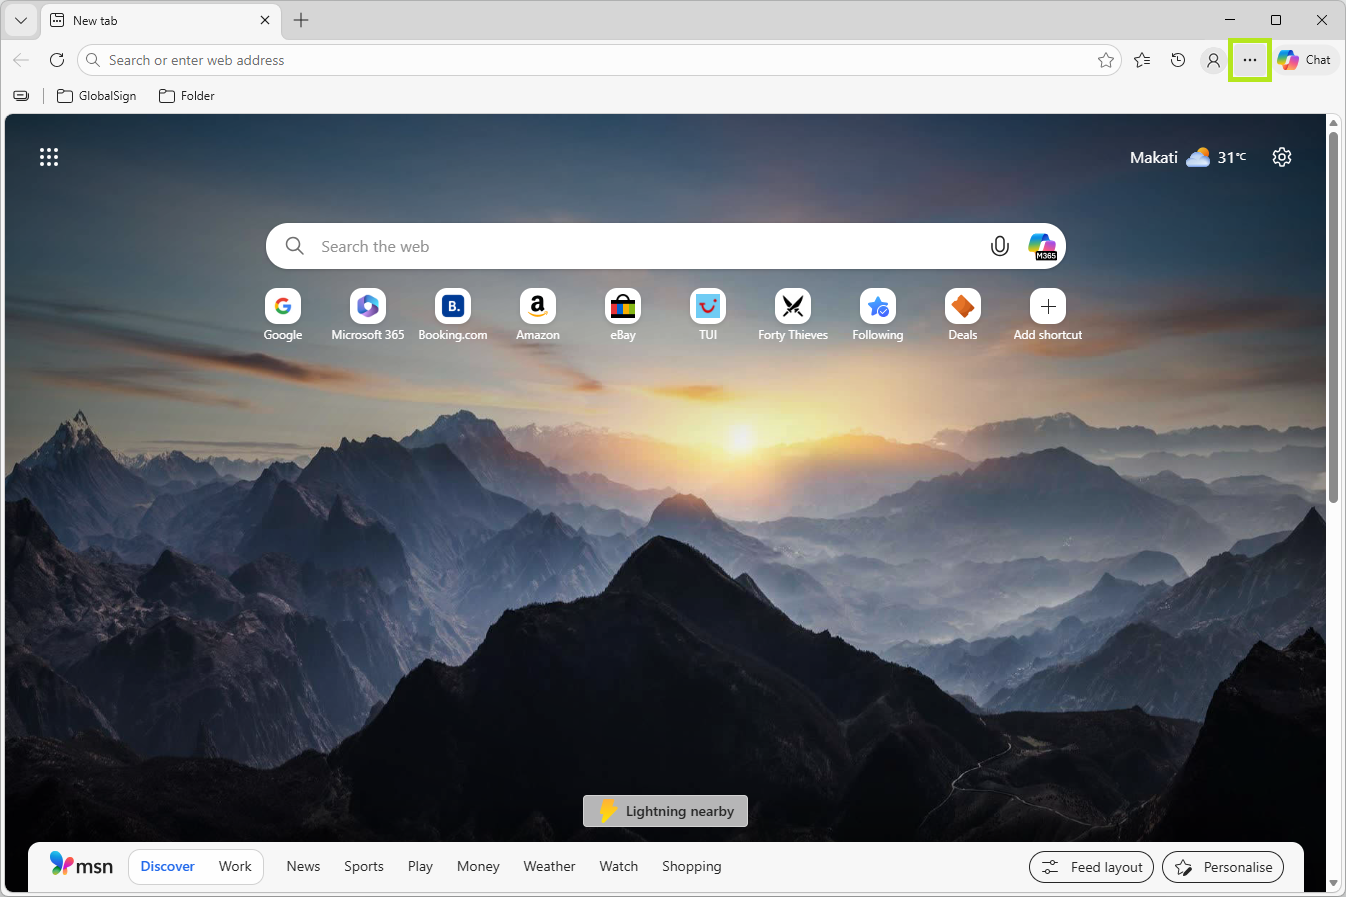
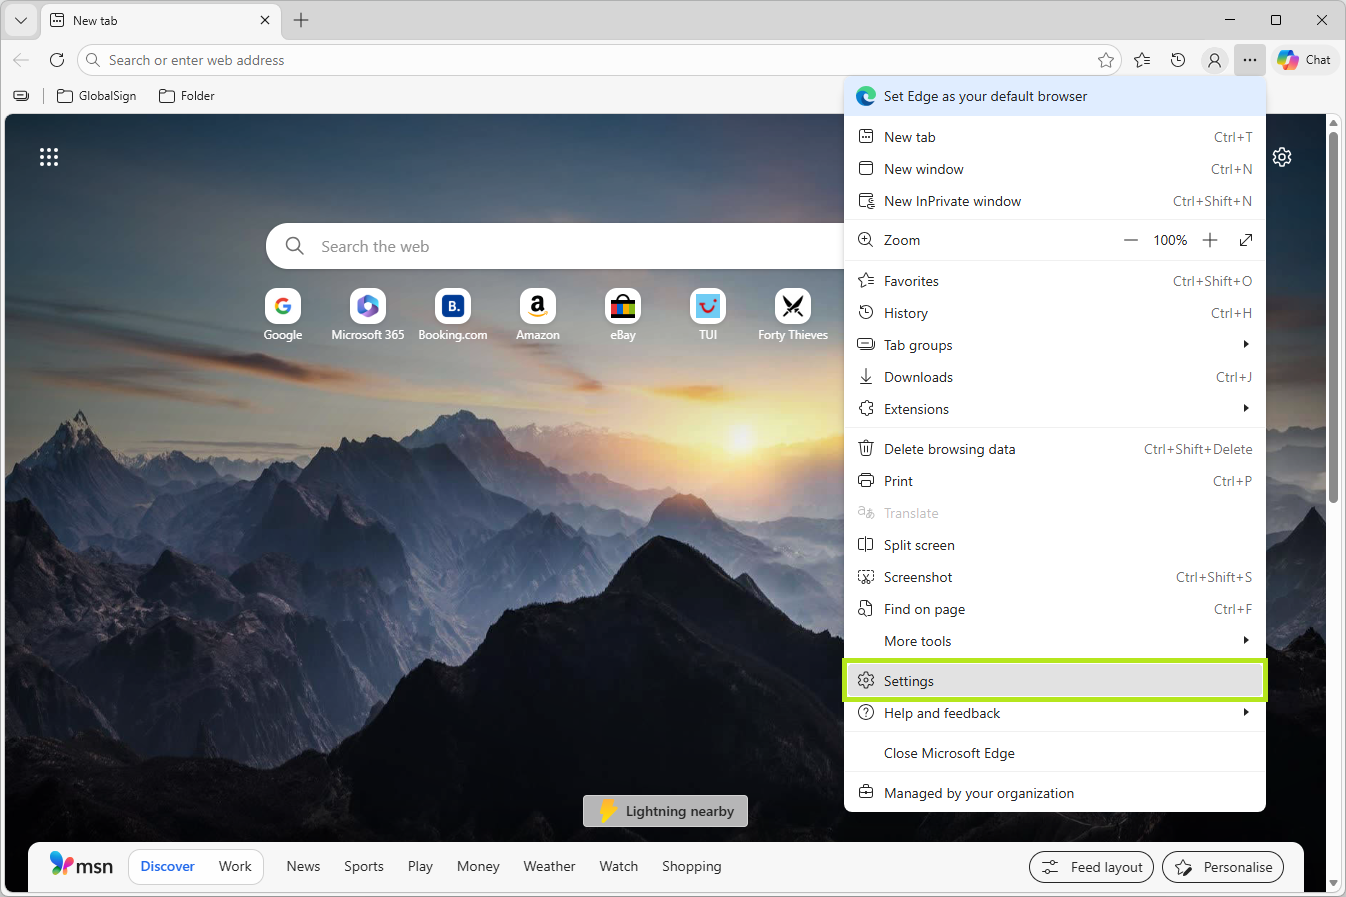
On the upper right hand corner of your browser, click on the three dots (⋯), then click on Settings.
-
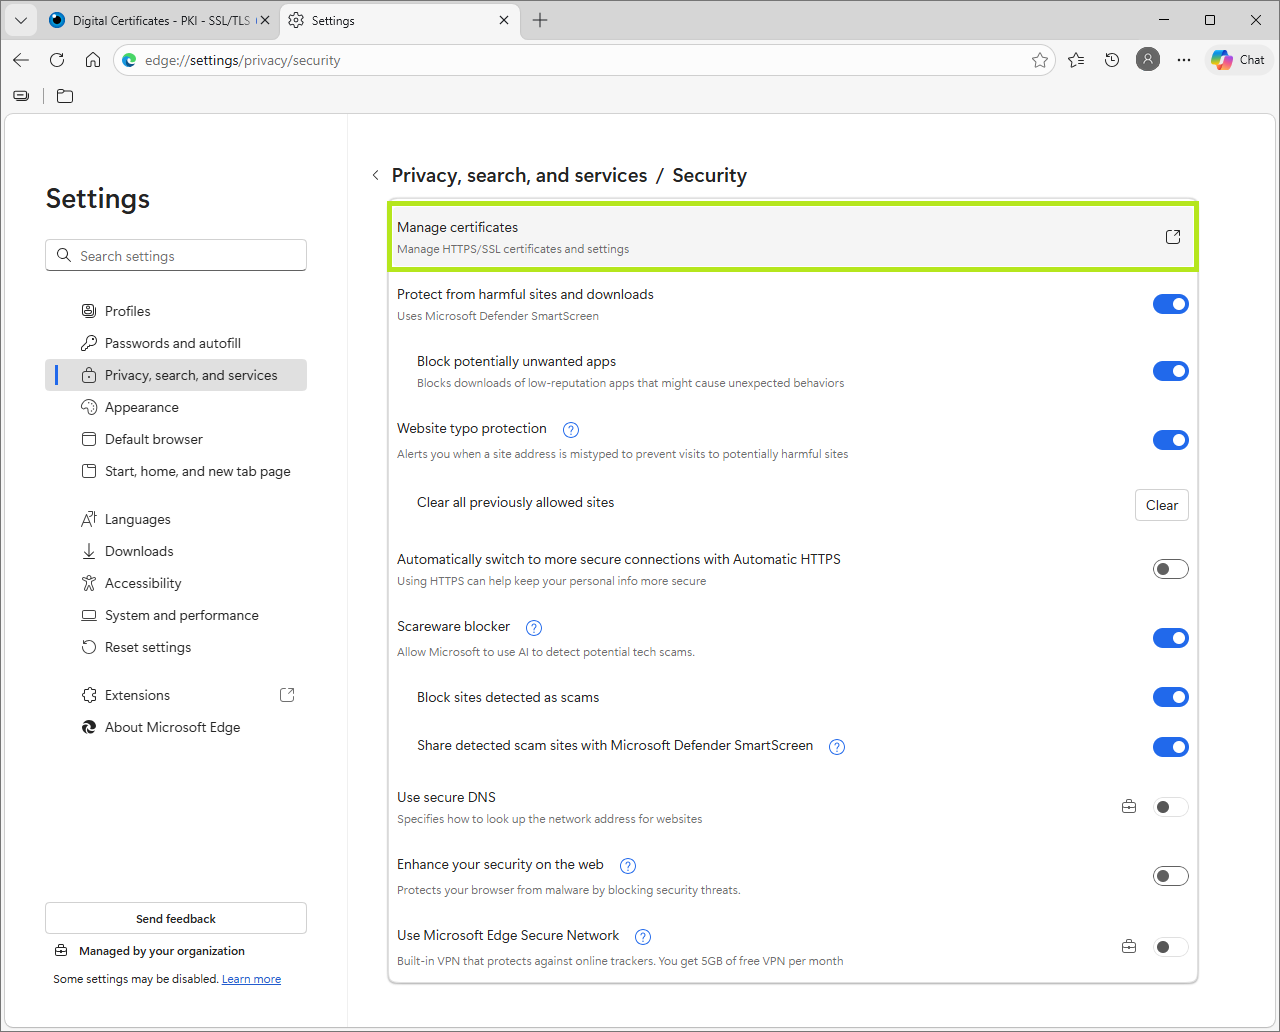
In the Settings bar, click on Privacy, search and services, then click Security.
-
In the Privacy, search and services screen, click on Manage certificates.
-
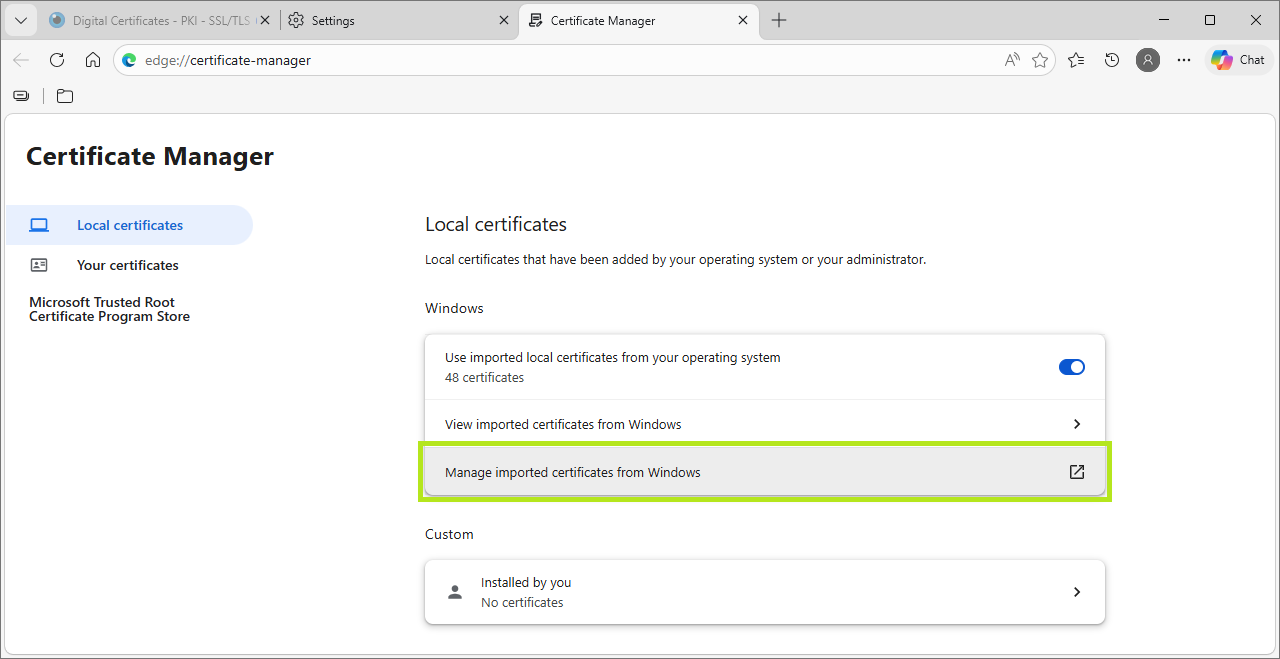
In the Certificate Manager window, click on Manage Certificates.
This action opens Import Wizard: Certificates screen.
-
-
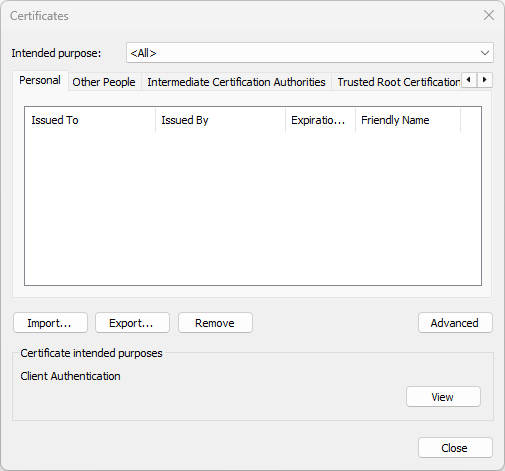
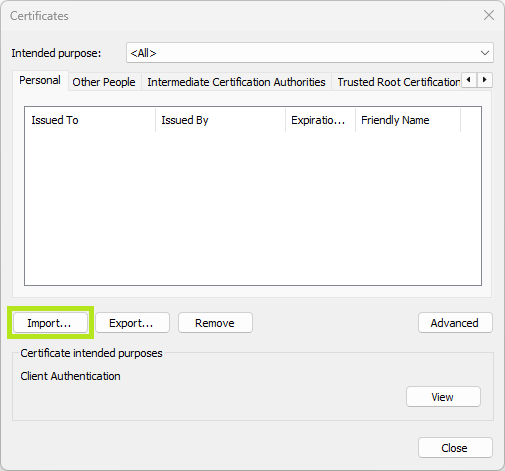
Start the Import Wizard:
-
In the Certificates window, click on the Import button to launch the Certificate Import Wizard.
-
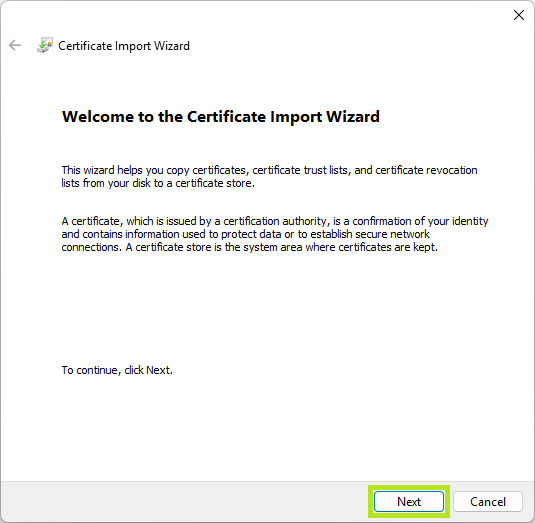
In the Certificate Import Wizard, click Next.
-
-
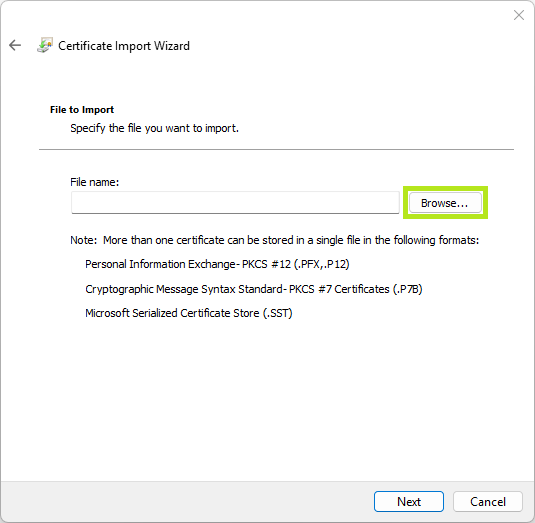
Select Your File:
-
Click Browse and navigate to your PKCS12 certificate .pfx file.
IMPORTANT: In the file type drop down (bottom-right corner of the browse window), select Personal Information Exchange (*.pfx; *.p12), to view files.
-
Select your PKCS12 certificate .pfx file and click Open.
-
After the file PKCS12 certificate file name is loaded, click on Next.
-
-
Enter Security Details:
-
Enter your nominated Certificate password (see Download PersonalSign 3 Pro Certificate, Create a Certificate Password) in the space provided.
-
Select the recommended Import options, then click Next.
IMPORT OPTION
DESCRIPTION
Mark this key as exportable.
This will allow you to back up or transport your
keys at a later time.Include all extended properties.
This will carry over all the certificate details during import.
-
-
Choose the Certificate Store:
NOTE: Certificate stores are system areas where certificates are kept.
OPTION
DESCRIPTION
Automatically select the certificate store based on the type of certificate
Recommended. This works for most scenarios.
Place all certificates in the following store
Use this if the certificate is not recognized.
Click Browse to select "Personal" or "Trusted Root Certification Authorities".IMPORTANT: If the certificate does not function, rerun the wizard, select the certificate, and manually choose the store.
-
Finish:
-
Click Next.
-
Click Finish to confirm, else, click Cancel to terminate installation.
-

Congratulations! You have successfully installed your PersonalSign 3 Pro Certificate.
-
Open Chrome Settings: Click the three vertical dots (⋮) from the top-right hand corner, then click Settings.
-
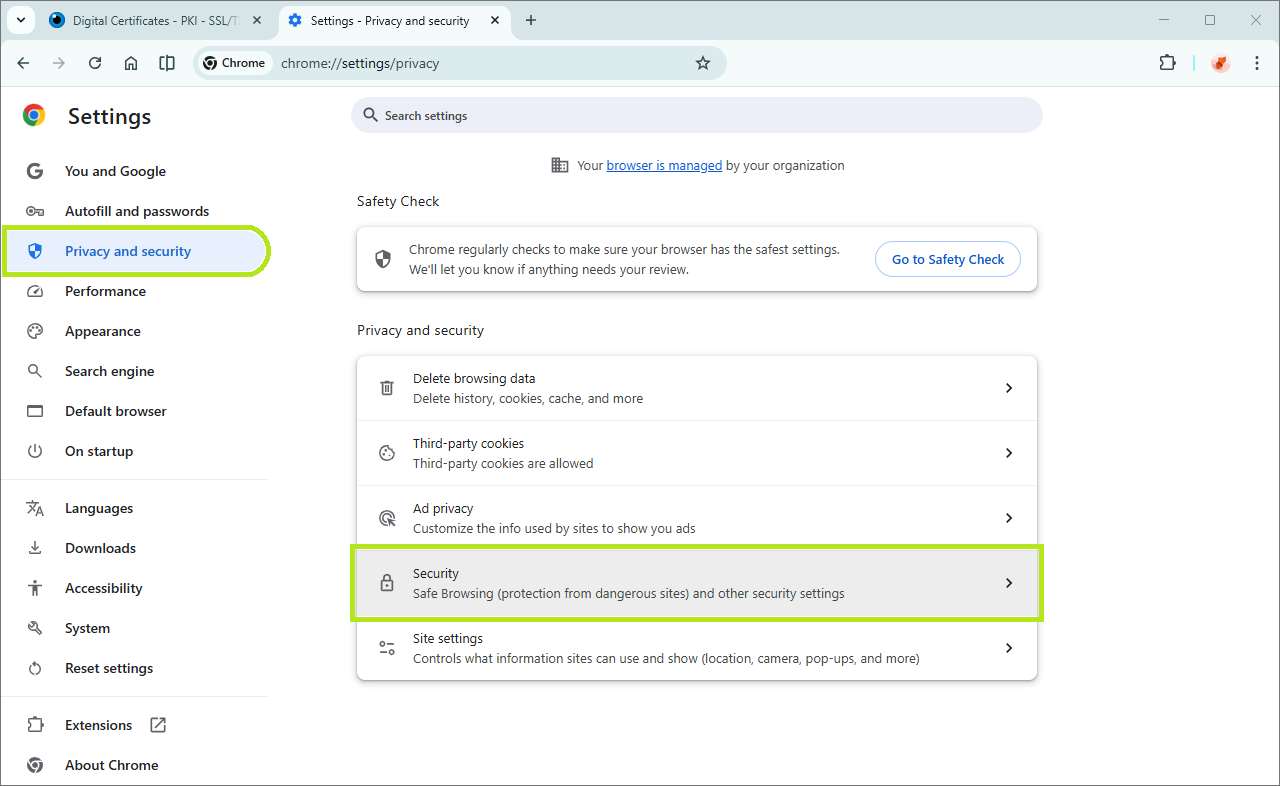
Navigate to Security: On the left sidebar, click Privacy and security, then click Security.
-
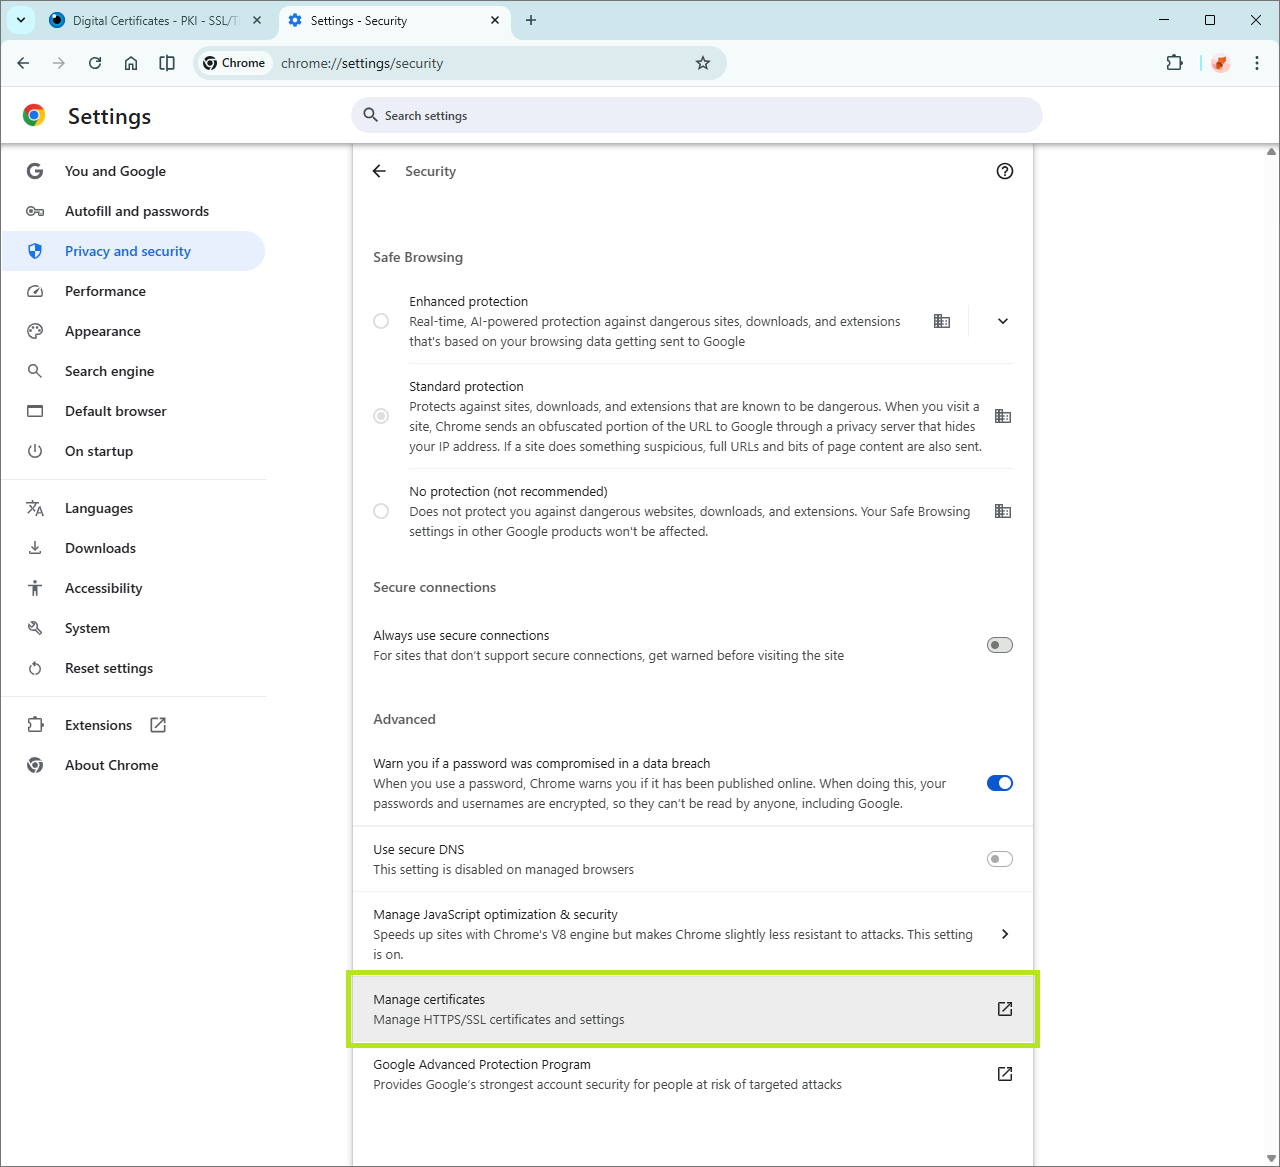
Manage Certificates: Scroll down to the Advanced section and click Manage certificates.
NOTE: On newer versions of Windows/Chrome, you may need to click Manage imported certificates from Windows to open the OS certificate manager.
-
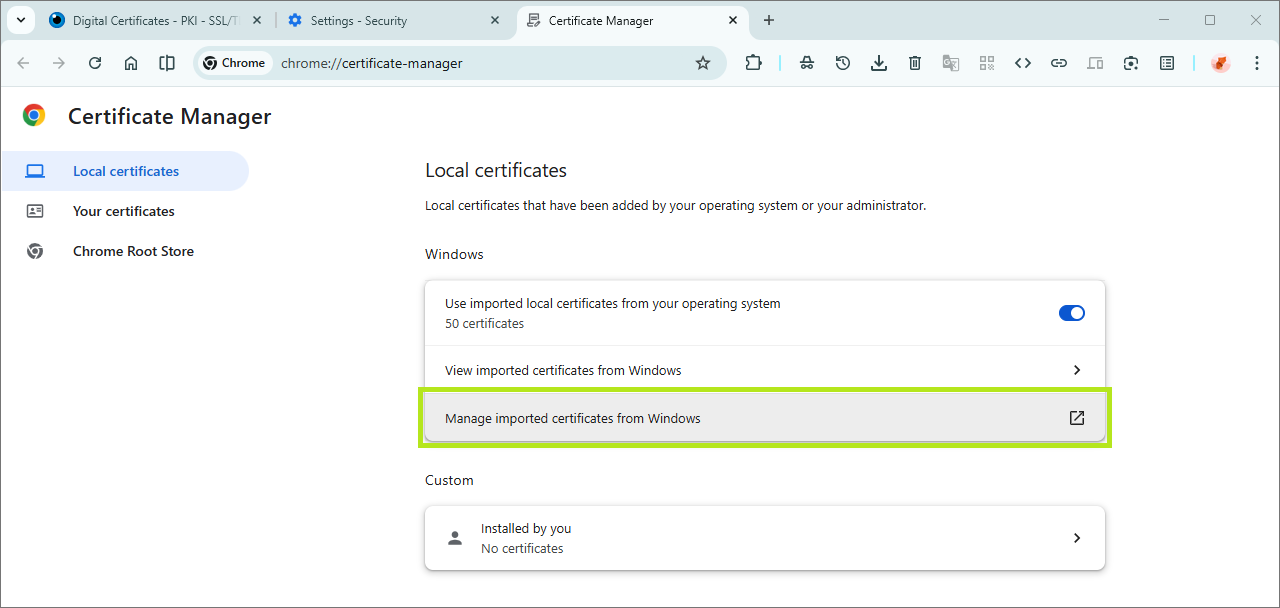
In the Certificate Manager window, click on Manage Certificates.
This action opens Import Wizard: Certificates screen.
-
Start the Import Wizard:
-
In the Certificates window, click on the Import button to launch the Certificate Import Wizard.
-
In the Certificate Import Wizard, click Next.
-
-
Select Your File:
-
Click Browse and navigate to your PKCS12 certificate .pfx file.
IMPORTANT: In the file type drop down (bottom-right corner of the browse window), select Personal Information Exchange (*.pfx; *.p12), to view files.
-
Select your PKCS12 certificate .pfx file and click Open.
-
After the file PKCS12 certificate file name is loaded, click on Next.
-
-
Enter Security Details:
-
Enter your nominated Certificate password (see Download PersonalSign 3 Pro Certificate, Create a Certificate Password) in the space provided.
-
Select the recommended Import options, then click Next.
IMPORT OPTION
DESCRIPTION
Mark this key as exportable.
This will allow you to back up or transport your
keys at a later time.Include all extended properties.
This will carry over all the certificate details during import.
-
-
Choose the Certificate Store:
NOTE: Certificate stores are system areas where certificates are kept.
OPTION
DESCRIPTION
Automatically select the certificate store based on the type of certificate
Recommended. This works for most scenarios.
Place all certificates in the following store
Use this if the certificate is not recognized.
Click Browse to select "Personal" or "Trusted Root Certification Authorities".IMPORTANT: If the certificate does not function, rerun the wizard, select the certificate, and manually choose the store.
-
Finish:
-
Click Next.
-
Click Finish to confirm, else, click Cancel to terminate installation.
-
Congratulations! You have successfully installed your PersonalSign 3 Pro Certificate.
-
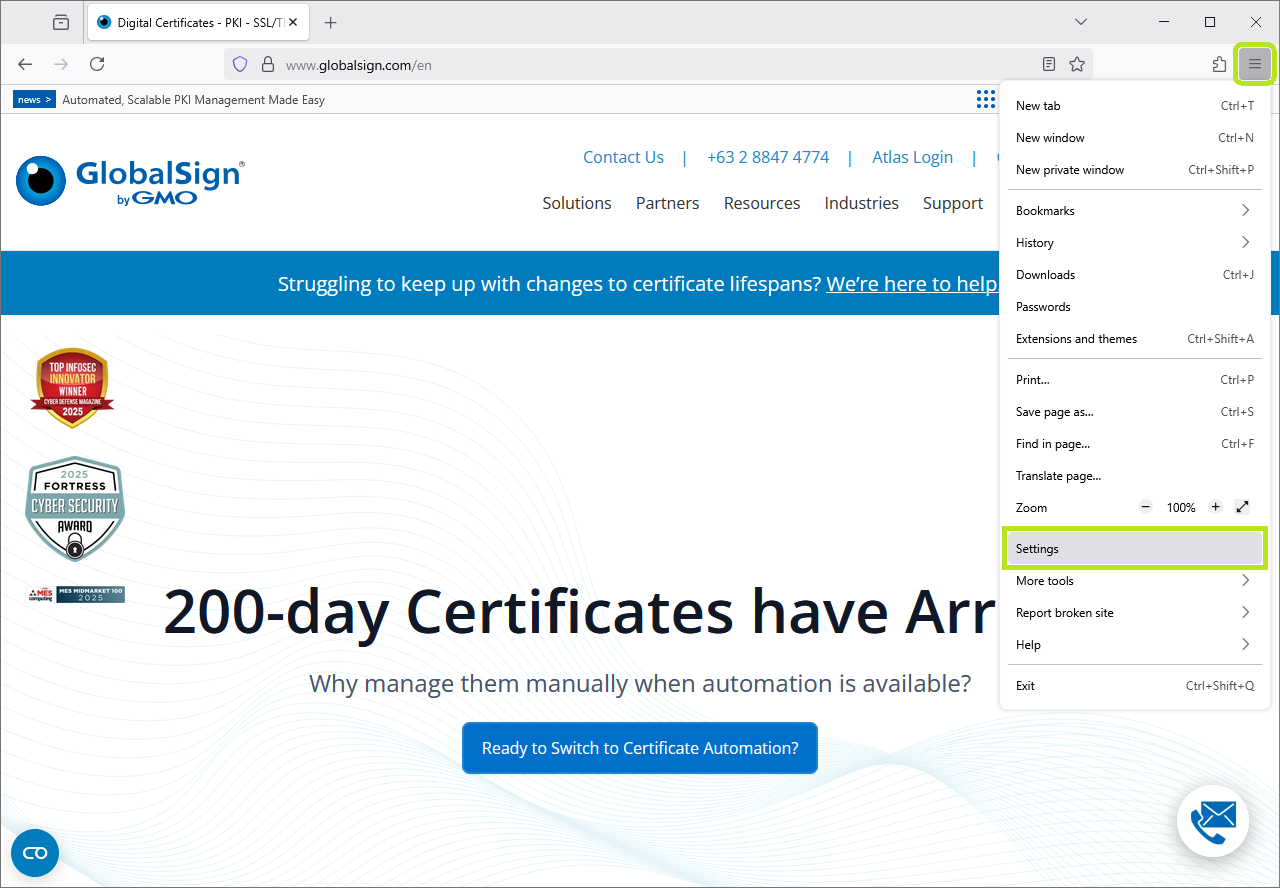
Open Firefox Settings: Click the three horizontal lines (≡) from the top-right hand corner, then click Settings.
-
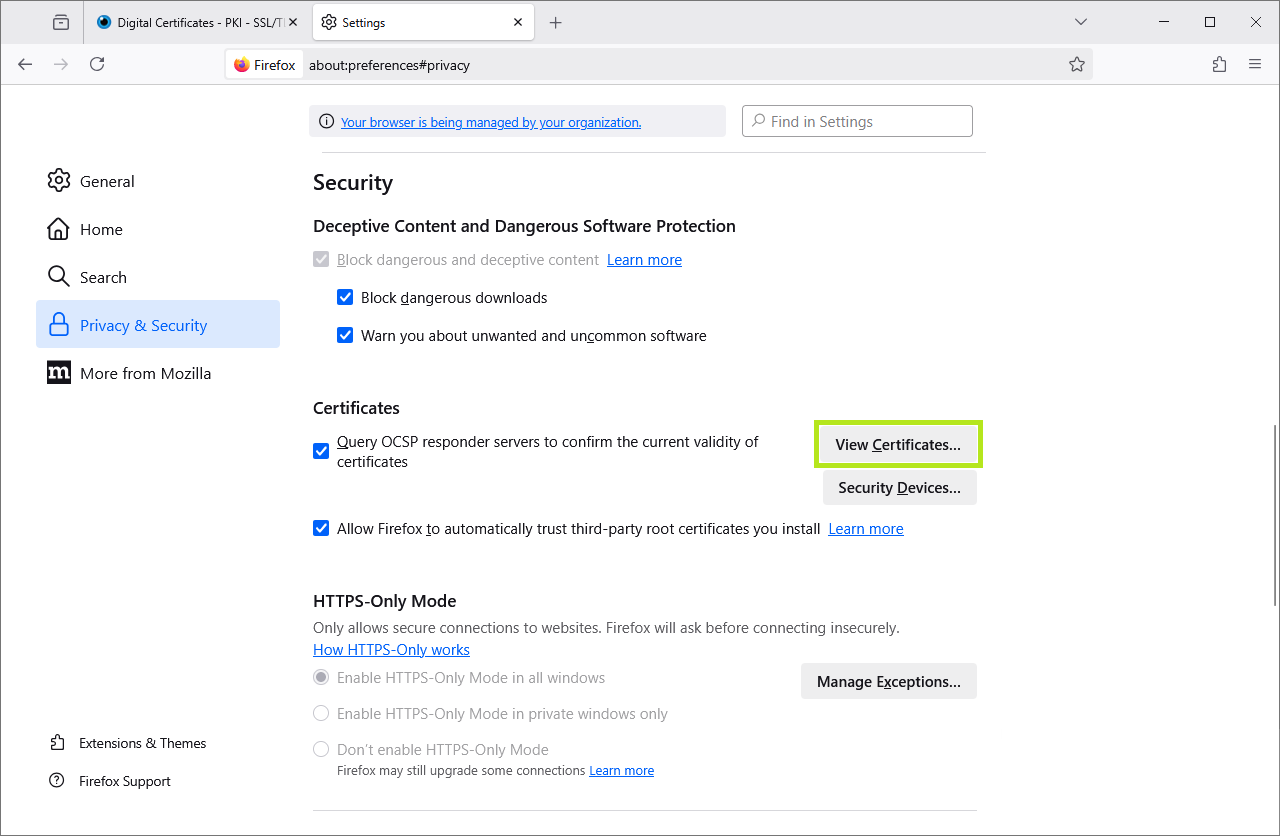
Go to Privacy & Security: On the left sidebar, click Privacy & Security. Scroll all the way to the bottom of the page to the Certificates section, then click View Certificates.
-
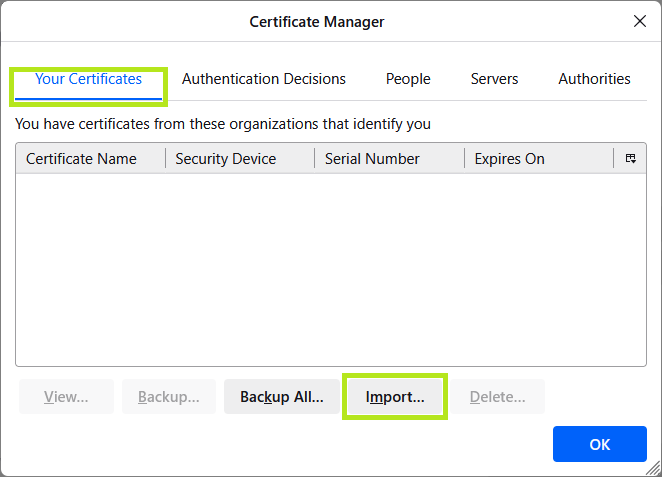
Open the Manager: Click the View Certificates button, then click Import....
-
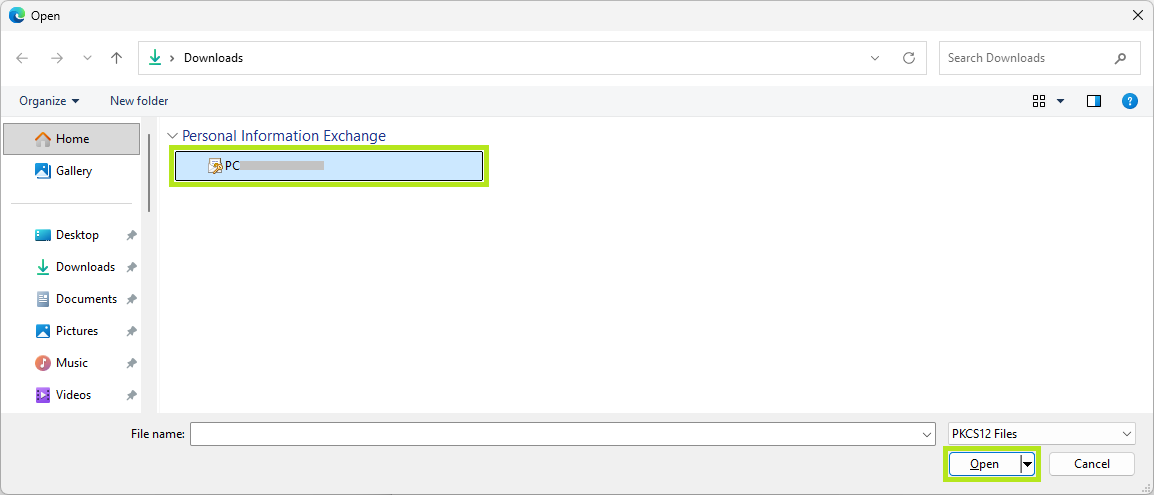
Select Your File:
- Navigate to your PKCS12 certificate .pfx file.
IMPORTANT: In the file type drop down (bottom-right corner of the browse window), select Personal Information Exchange (*.pfx; *.p12), to view files.
- Select your PKCS12 certificate .pfx file and click Open.
- Navigate to your PKCS12 certificate .pfx file.
-
Enter Security Details: Enter your nominated Certificate password (see Download PersonalSign 3 Pro Certificate, Create a Certificate Password) in the space provided.
-
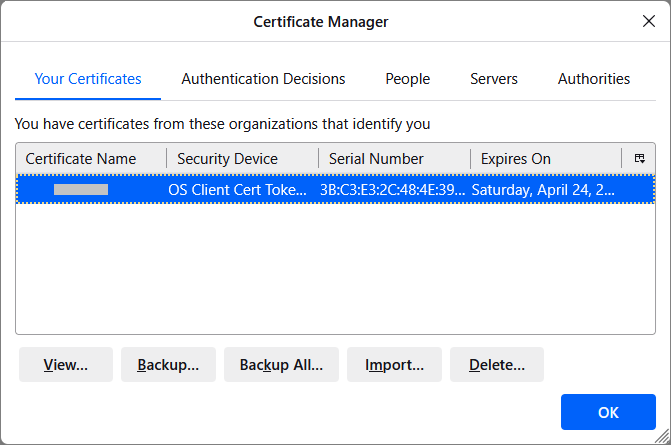
Finish: Congratulations! You have successfully installed your PersonalSign 3 Pro Certificate. Click the OK button to exit the Certificate Manager.
If you selected Download using Internet Explorer (IE) Compatibility Mode as your Key Generation Option in the Certificate Application process, use this installation platform.
To Enable IE Compatibility in Microsoft Edge, refer to this page.
-
On the upper right corner of Microsoft Edge, click the ellipsis (three horizontal dots) to open the browser menu bar.
-
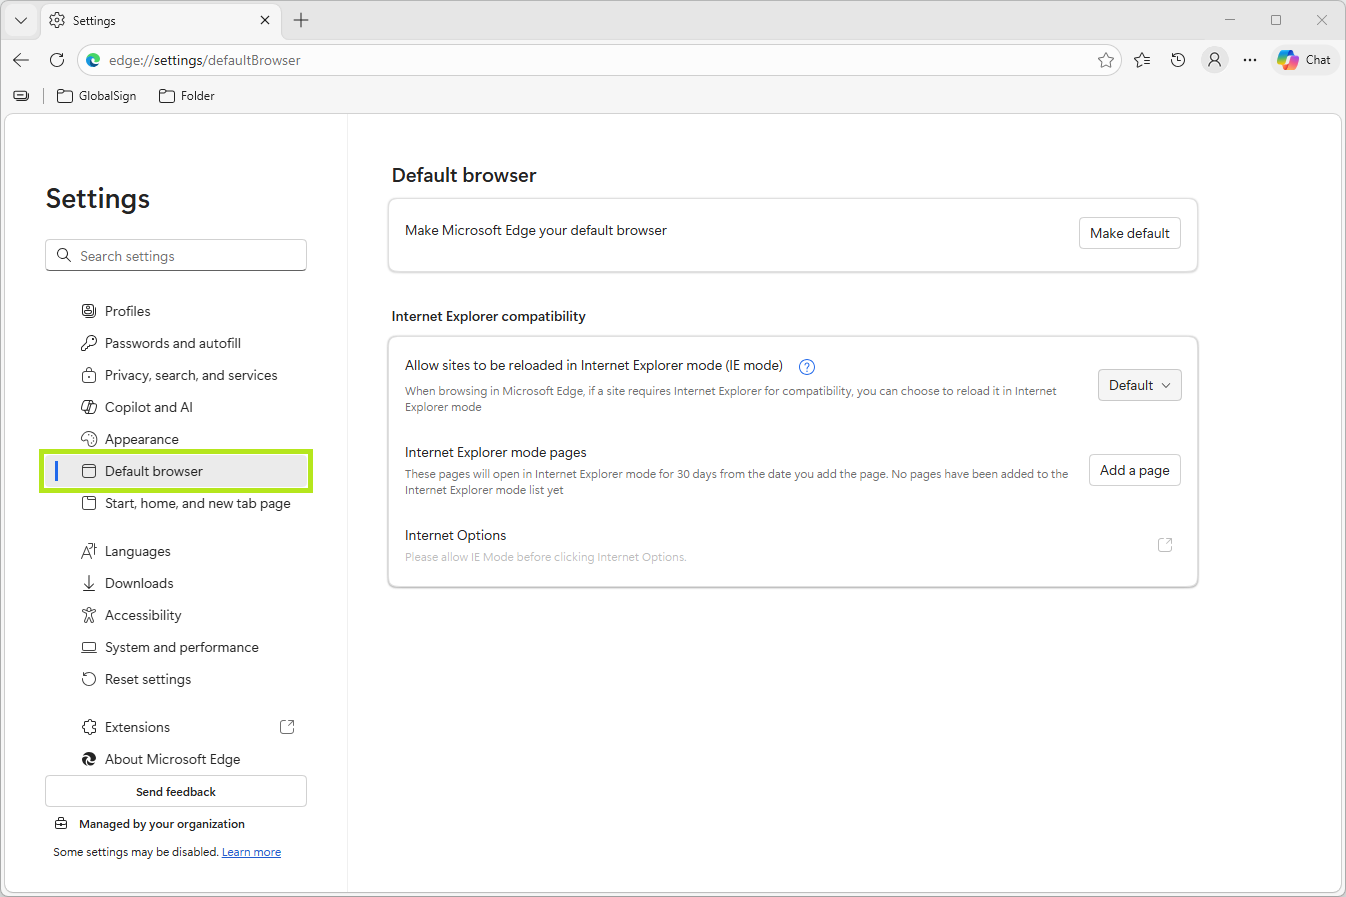
In the menu bar, scroll down near the bottom of this list, then click on Settings.
-
In the configuration page settings area, click Default browser.
-
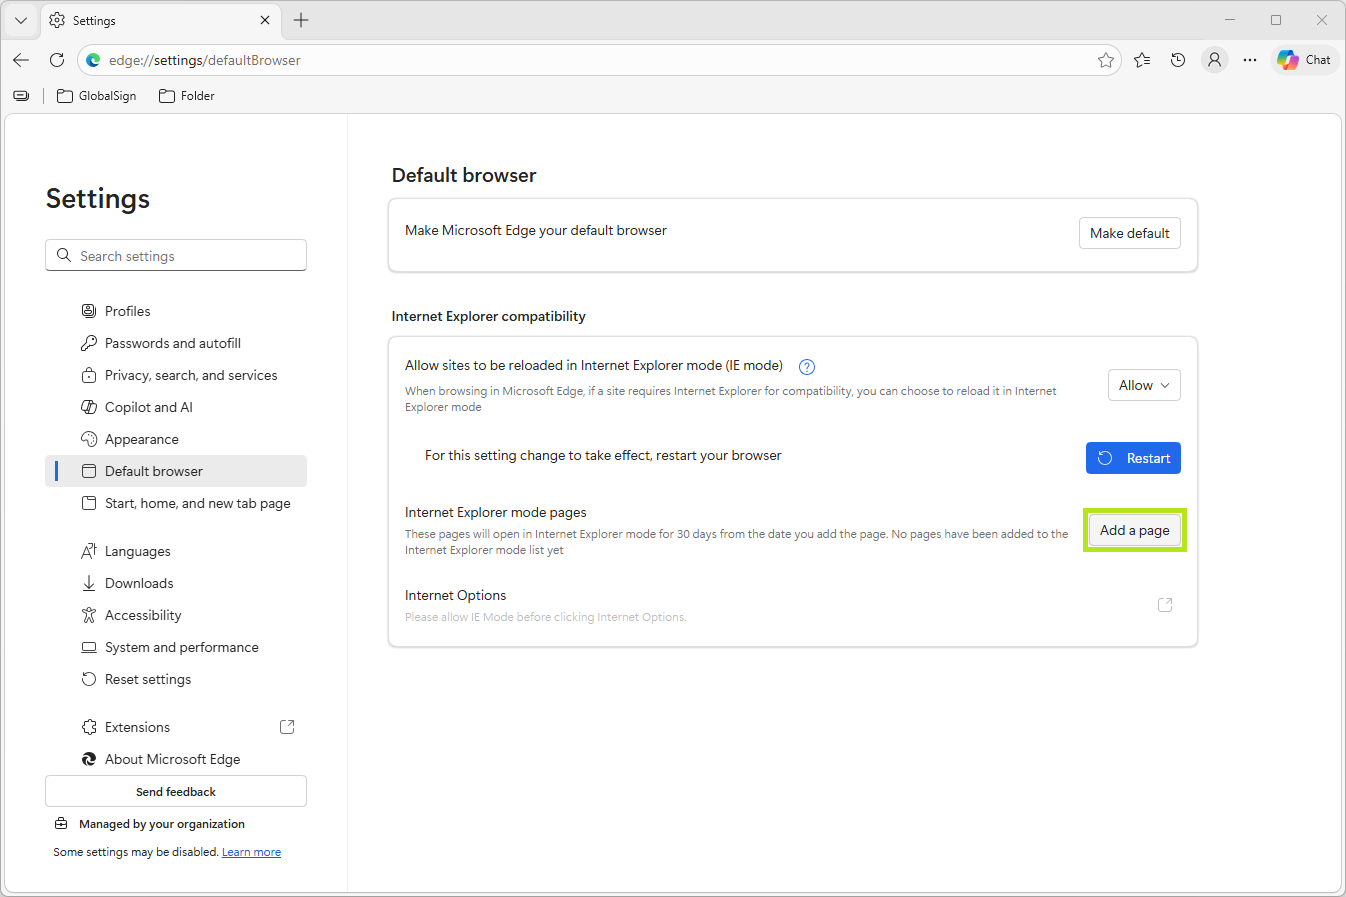
In the Internet Explorer Compatibility section. Click on Add a page.
NOTE: Copy the certificate pickup link sent to your email into your clipboard.
-
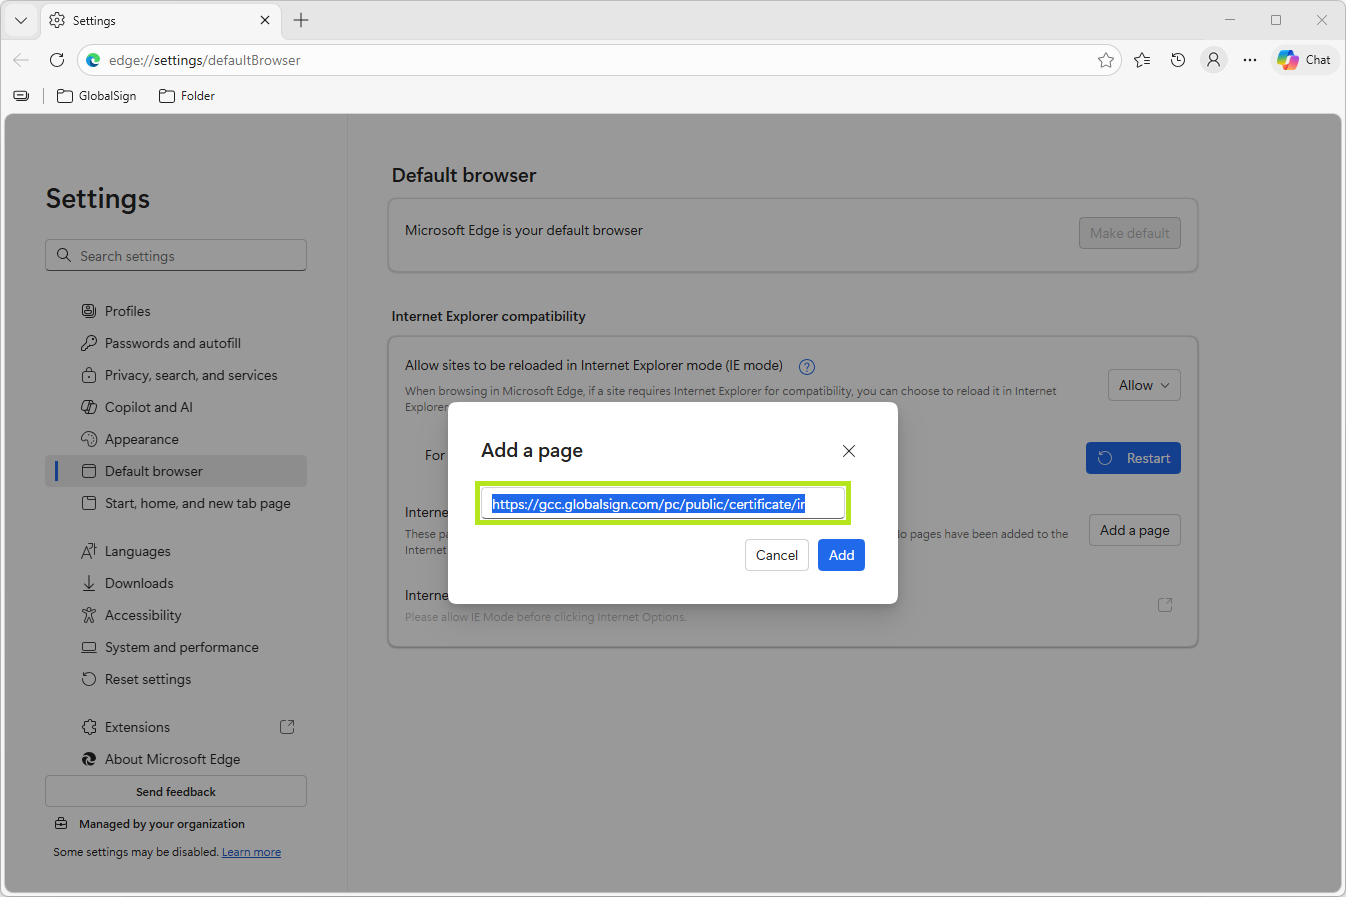
In the Add a page popup window, paste the certificate pickup link URL sent to your email into the space provided, then click Add.
-
Paste the certificate pickup link URL copied from your email into the space provided, then click Enter.
-
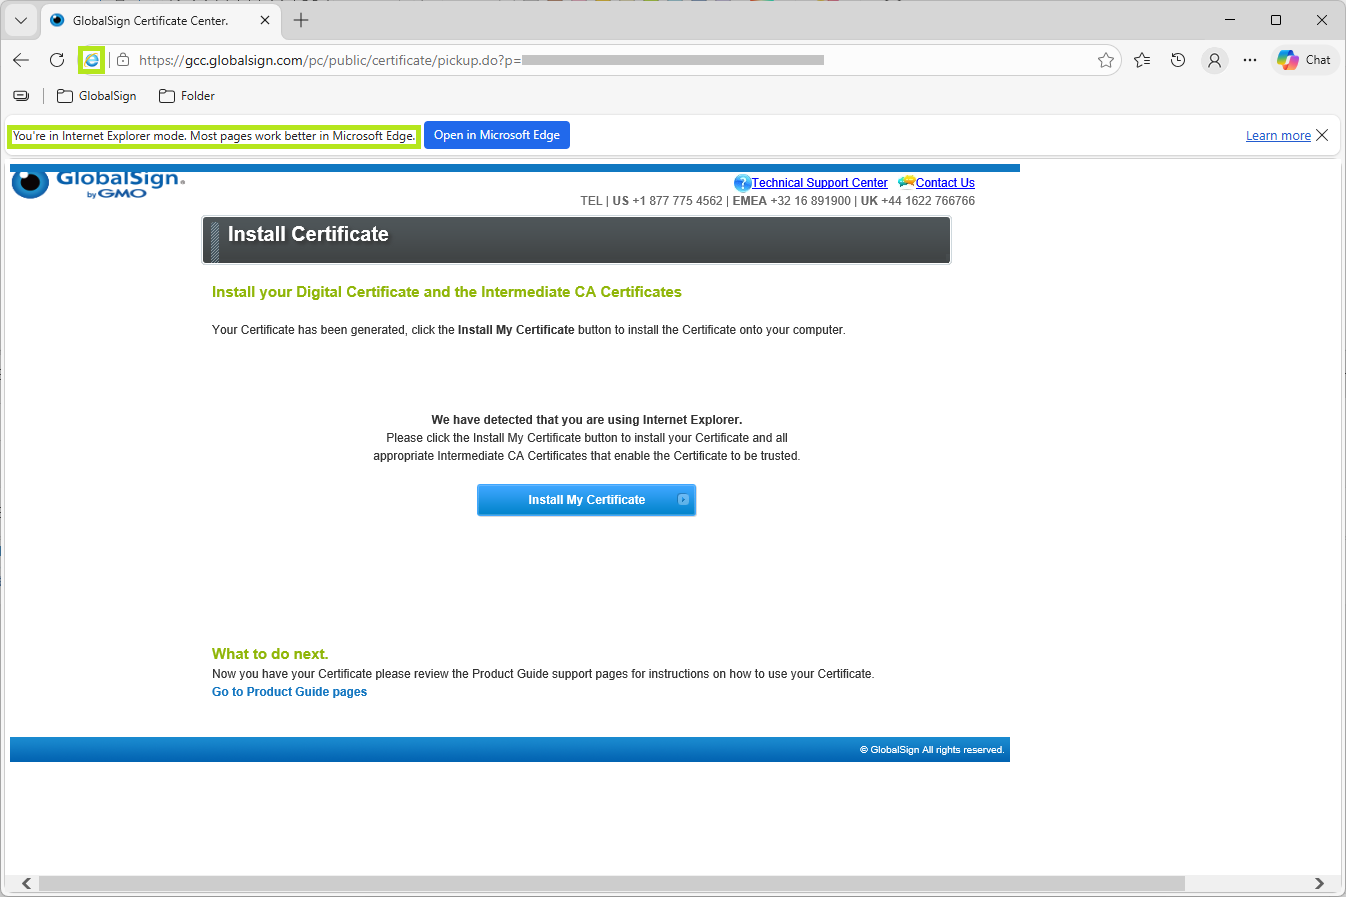
Once the page loads, the blue Internet Explorer icon is displayed next to the address bar, and a notification banner confirms that the page is running in IE mode.
-
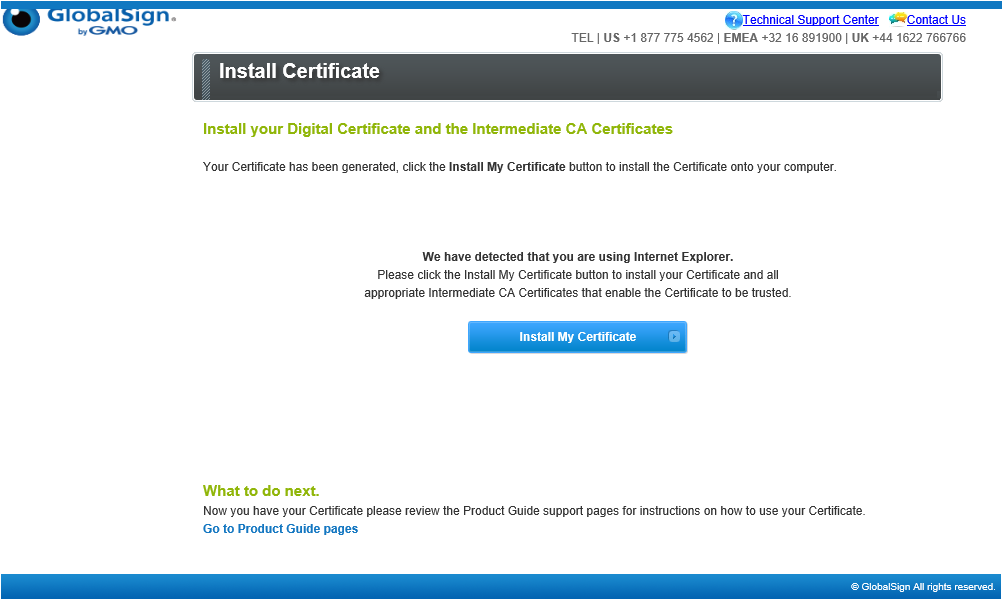
Click on Install My Certificate.
-
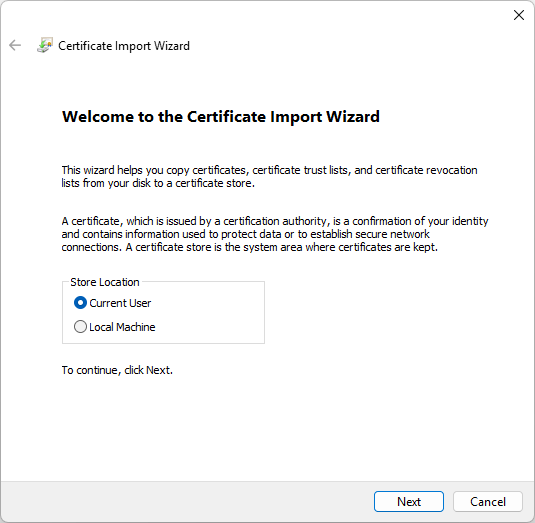
This action opens the Certificate Import Wizard, click Next to continue.
- Click on Automatically select the certificate store based on the type of certificate.
-
Finish:
-
Click Next.
-
Click Finish to confirm, else, click Cancel to terminate installation.
-

Congratulations! You have successfully installed your PersonalSign 3 Pro Certificate.
WHAT'S NEXT: Now that you have successfully installed your PersonalSign 3 Pro Certificate, you may now configure it on your desired platform, email client. For information on PersonalSign Certificate Configuration, see this page.
Related Articles
SSL Configuration Test
Check your certificate installation for SSL issues and vulnerabilities.