
Add or Remove Subject Alternative Names (SAN)
Mar 10, 2026
Add or Remove Subject Alternative Names (SAN)
|
OVERVIEW: This page walks you through the process of adding and removing SANs in the GlobalSign Certificate Center (GCC). It highlights important considerations such as order history changes and certificate reissuance requirements, and guides users through updating SANs on an existing SSL certificate order. For more certificate management guides, please refer to this page. |
|
IMPORTANT: Adding or removing SANs creates a new order entry in your order history. After completing this change, you must reissue the certificate to apply the updated SANs. For certificates Managed SSL (MSSL), see Add or Remove SANs in MSSL for reference. |
Adding SANs
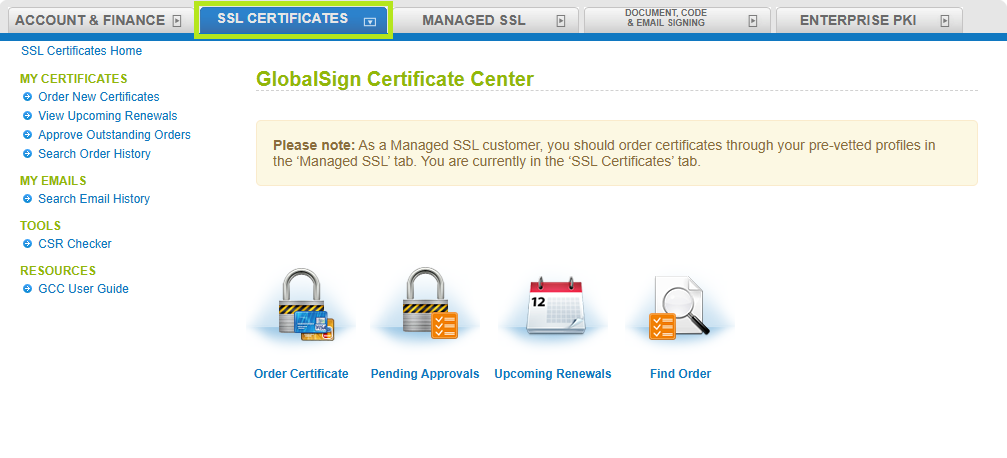
- Log in to your GCC account, then click the SSL Certificates tab.
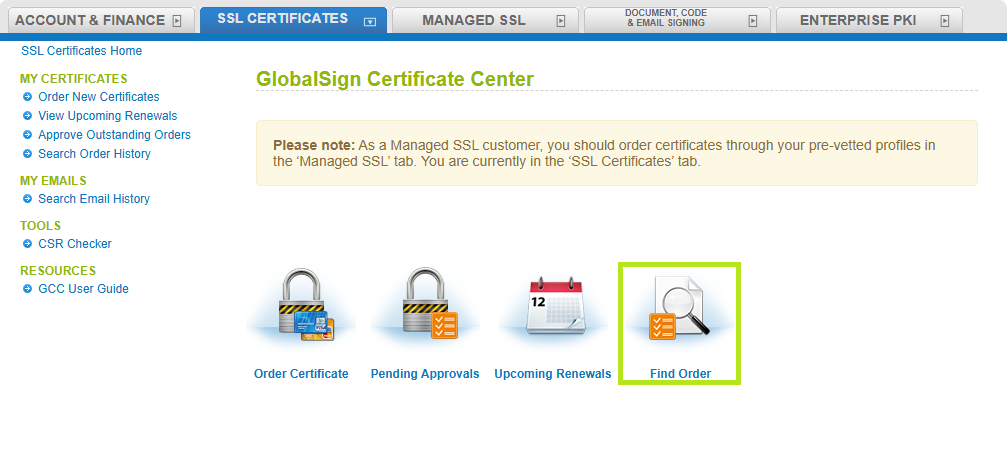
- Click on the Find Order icon.
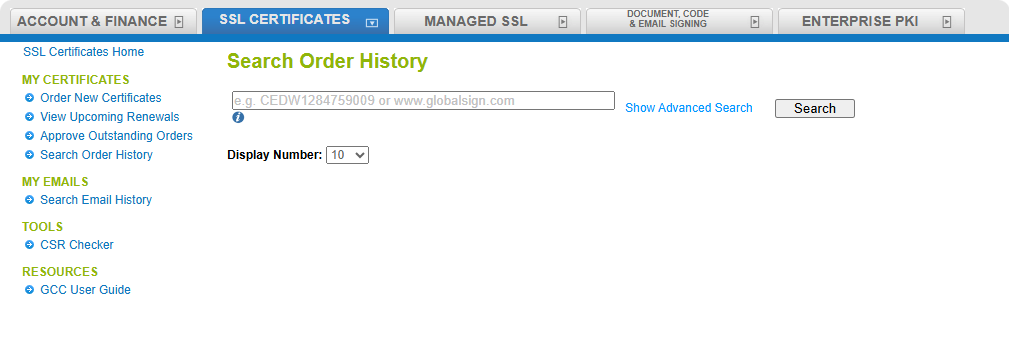
- Enter your order number in the space provided or click Search to retrieve the list of orders.
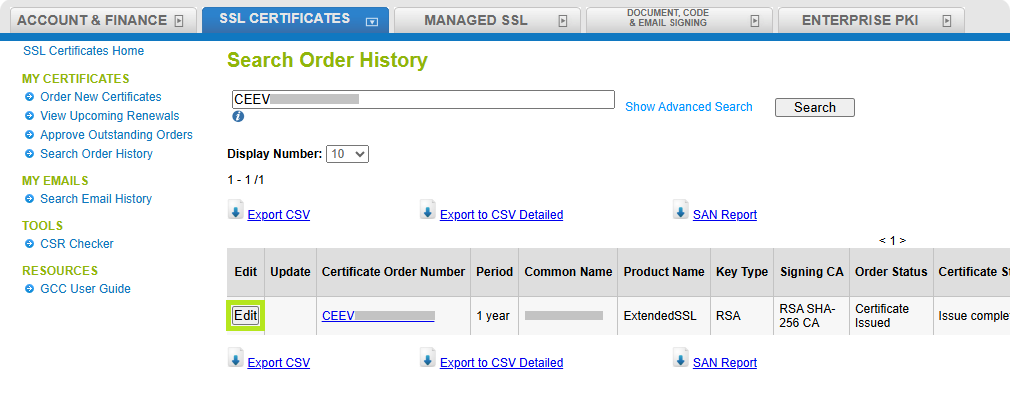
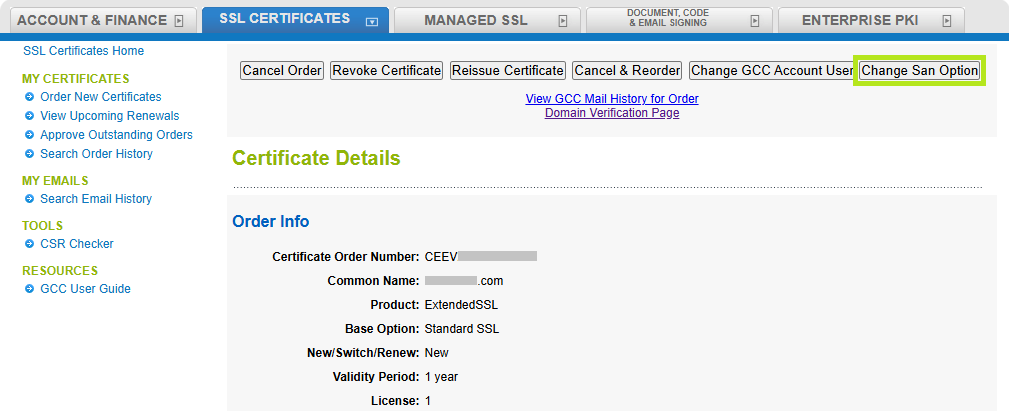
- Click the Edit node next the order you wish to add SANs.
- Click the Change SAN Option button.
IMPORTANT: GlobalSign no longer supports AutoCSR. To change SANs on an order originally placed using AutoCSR, you must first reissue the certificate and submit a new CSR (see Certificate Signing Request (CSR) for reference).
-
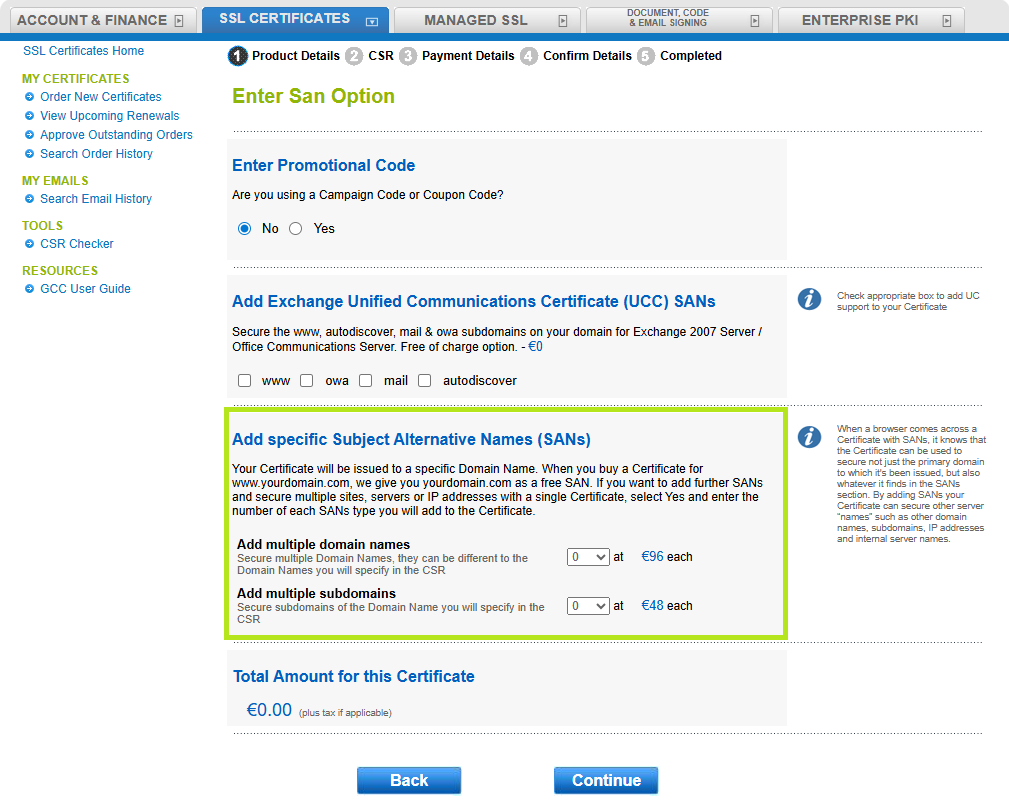
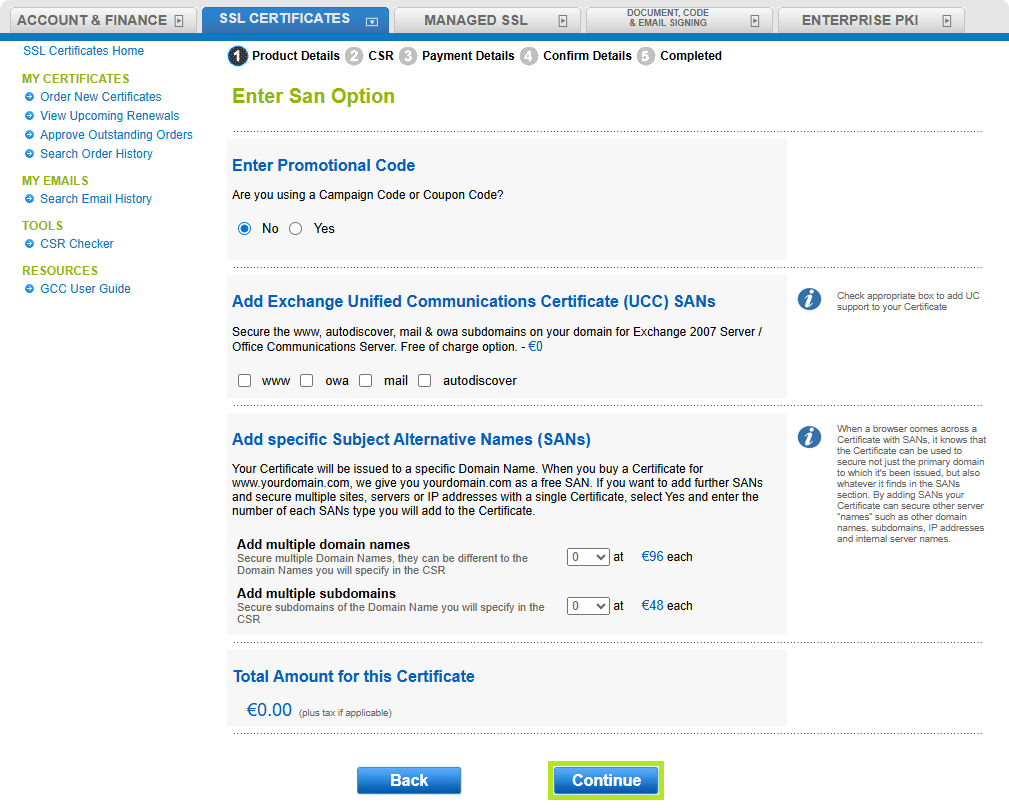
In the Enter SAN Options window, select the appropriate dropdown menu to specify the number of domains, subdomains, or IP addresses to add to the certificate. Then click Continue to be redirected to the Enter Option page.
INFORMATION: When a browser encounters a certificate that includes SANs, it recognizes that the certificate can secure not only the primary domain for which it was issued, but also the additional entries listed in the SANs field. By adding SANs, a single certificate can be used to secure multiple server names, such as additional domain names, subdomains, IP addresses, and internal server names.
-
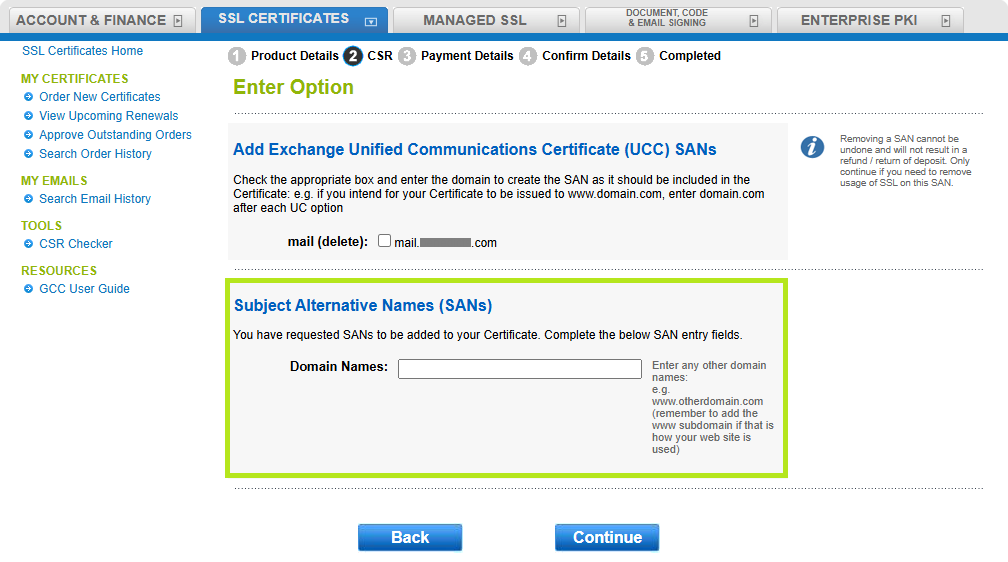
Enter the Domain Name/s in the Subject Alternative Names (SANs) area, then click Continue to proceed.
NOTE: Remember to add the www subdomain if that is how your web site is used (Example: www.otherdomain.com).
-
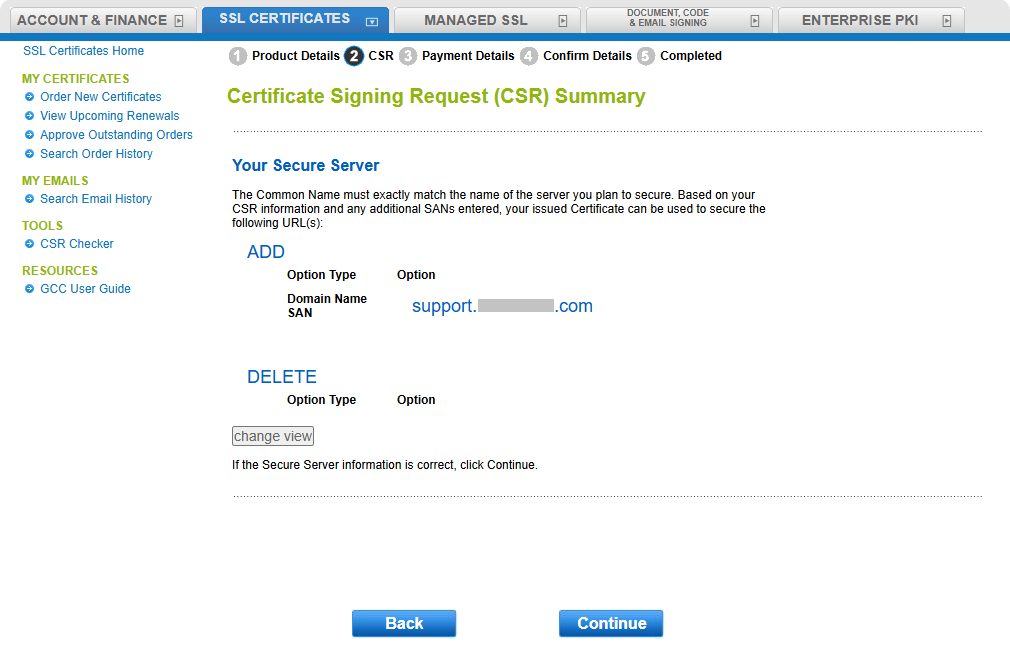
Review CSR summary, then click Continue to move to the next step. Else, click Back to modify recent entry.
- Select the appropriate payment method, then click Continue to proceed to the next step.
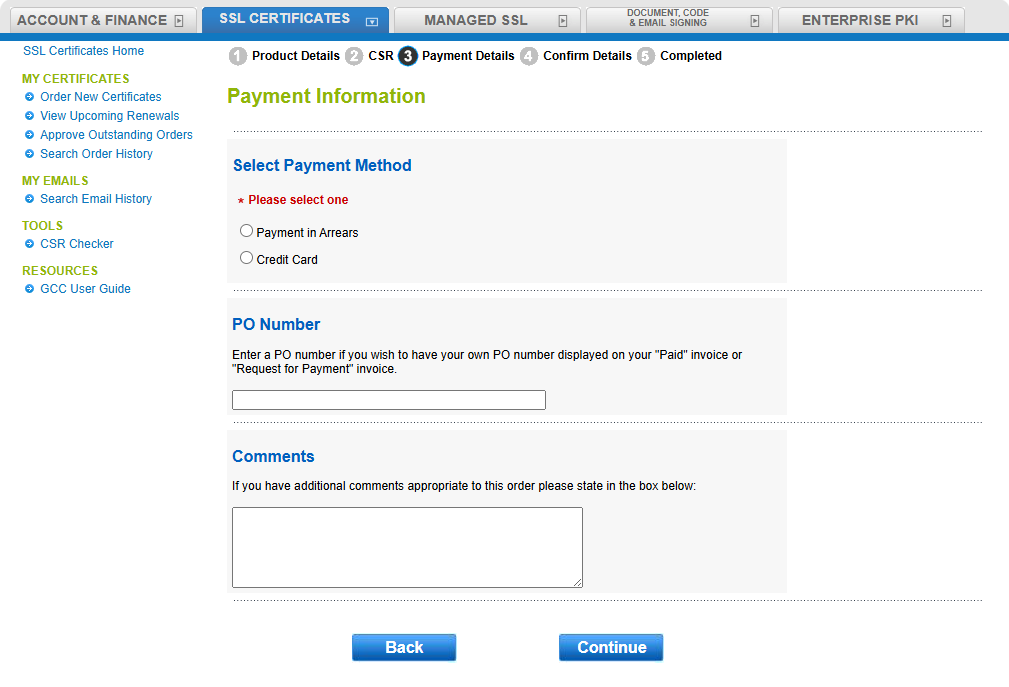
Additional Payment Information Options:- PO Number - Enter a PO number if you wish to have your own PO number displayed on your Paid invoice or Request for Payment invoice.
- Comments - If you have additional comments appropriate to the order, enter details in the space provided.
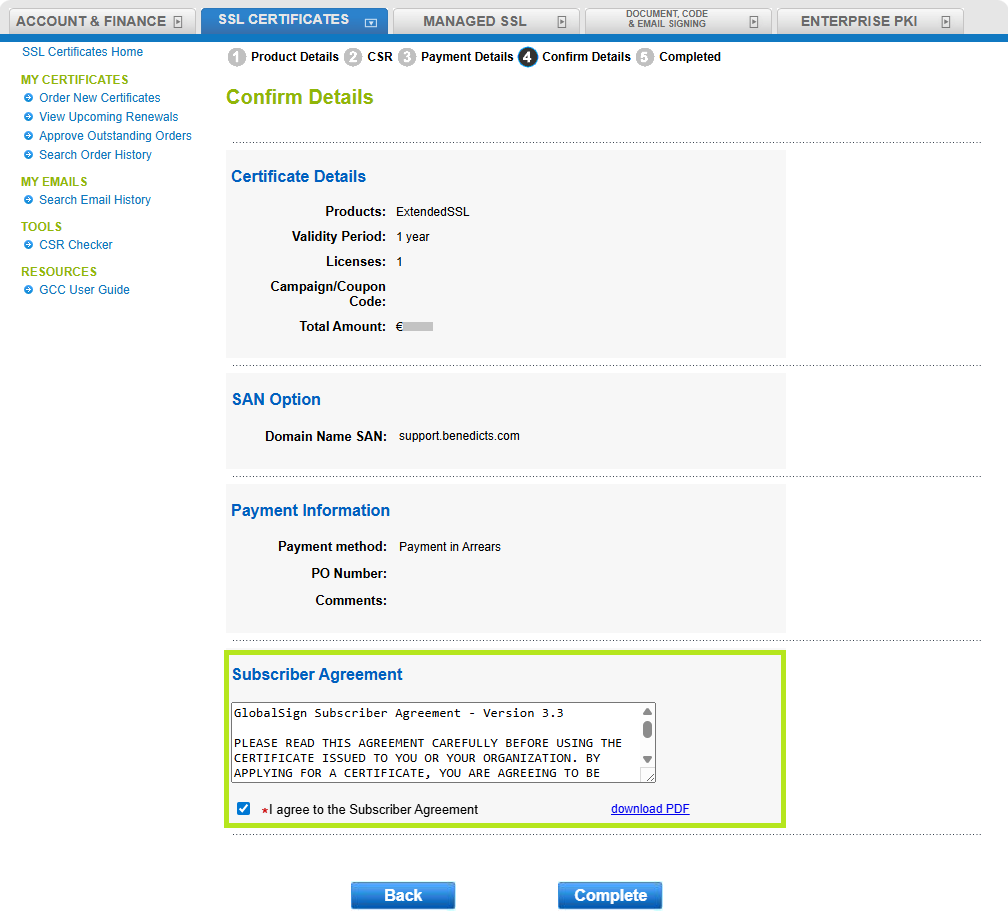
- Review the Confirmation Details, agree to the Subscriber Agreement, and then click Complete to confirm the SAN addition.
-
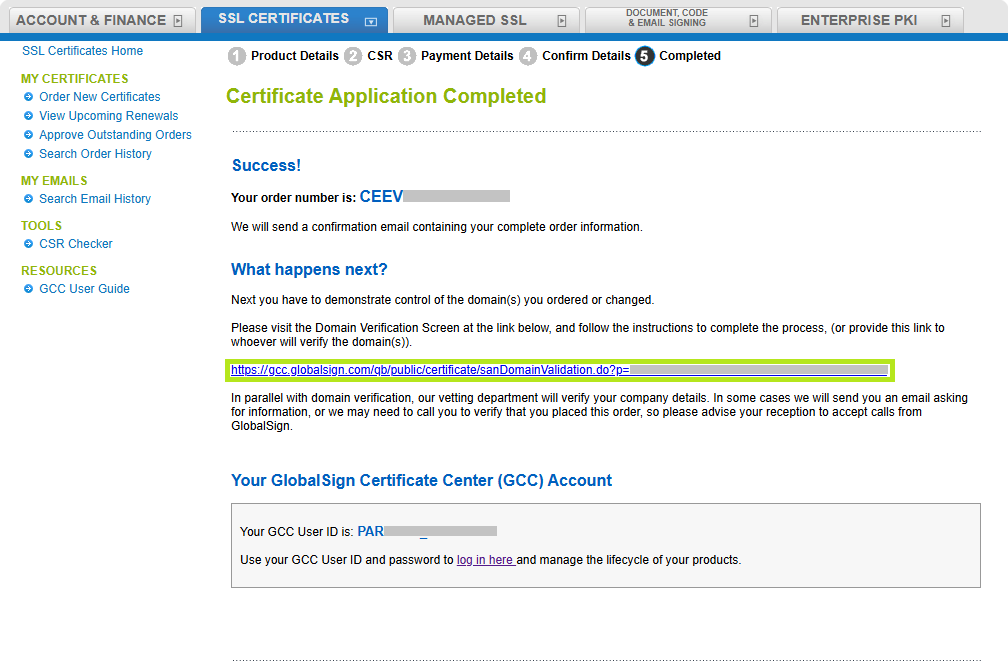
In the Certificate Application Completed window, click the Domain Verification Screen link under the What happens next? section. Follow the on-screen instructions to complete the process, or share this link with the person responsible for verifying the domain(s).
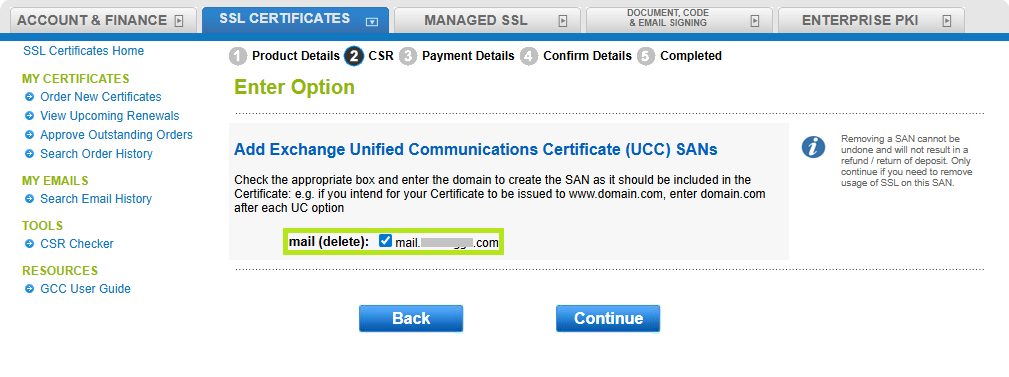
Removing SANs
- Log in to your GCC account, then click the SSL Certificates tab.
- Click on the Find Order icon.
- Enter your order number in the space provided or click Search to retrieve the list of orders.
- Click the Edit node next the order you wish to remove SANs.
- Click the Change SAN Option button.
IMPORTANT: GlobalSign no longer supports AutoCSR. To change SANs on an order originally placed using AutoCSR, you must first reissue the certificate and submit a new CSR (see Certificate Signing Request (CSR) for reference).
- On the Enter San Options page, leave the options unchanged and click Continue.
- Select the domains, subdomains, or IP addresses you want to remove, then click Continue.
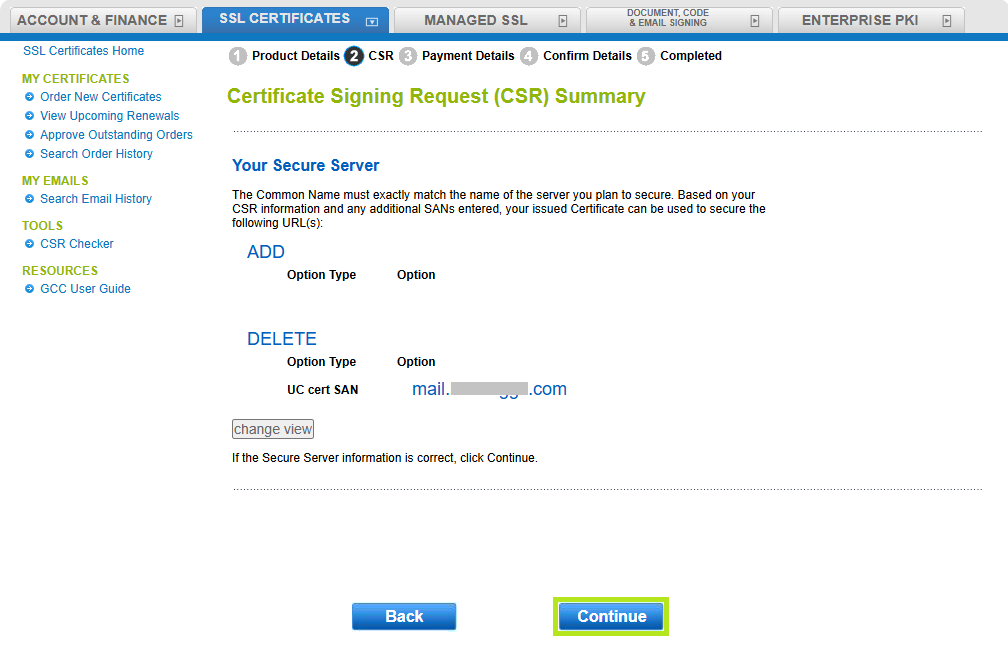
- Review CSR summary, then click Continue to move to the next step. Else, click Back to modify recent entry.
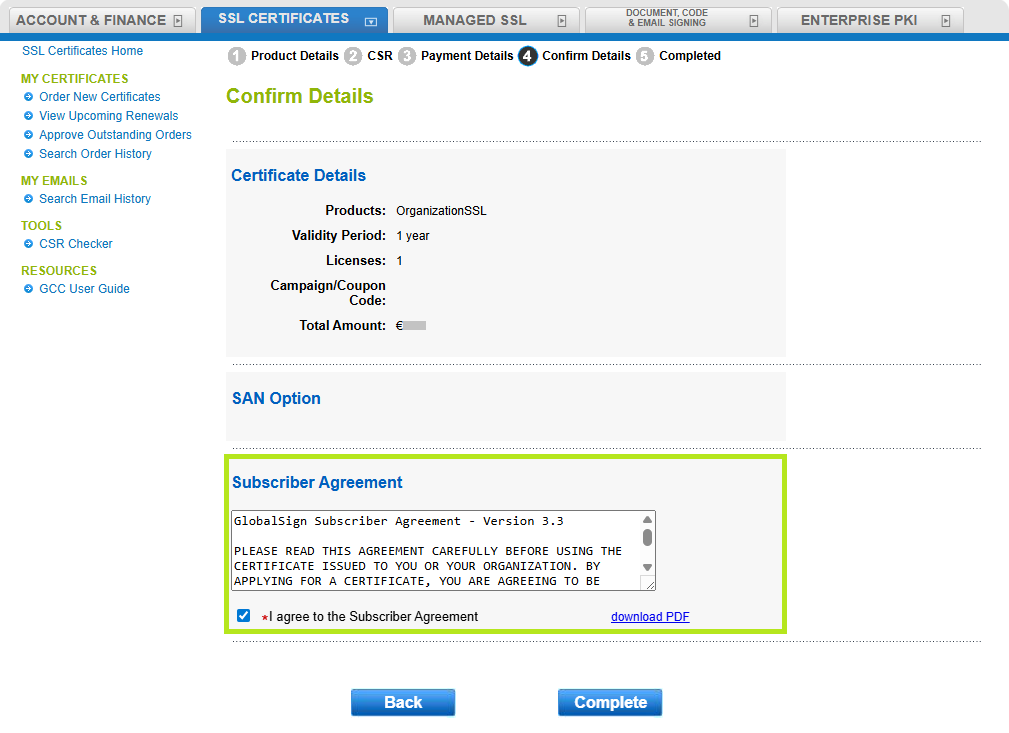
- Review the Confirmation Details, agree to the Subscriber Agreement, and then click Complete to confirm SAN removal transaction. Else, click Back to modify recent entry.
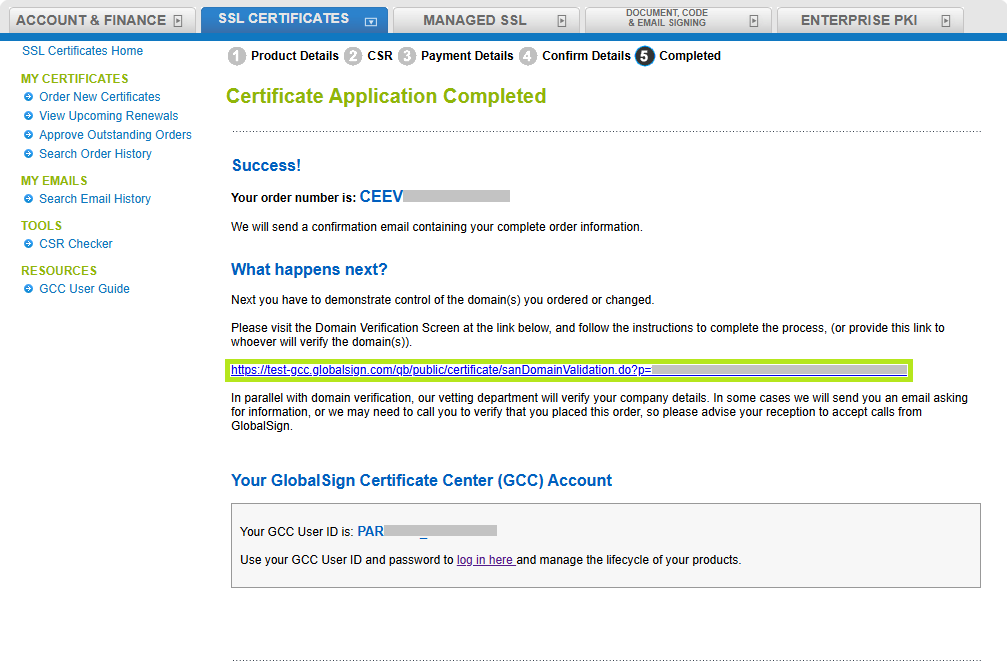
- In the Certificate Application Completed window, click the Domain Verification Screen link under the What happens next? section. Follow the on-screen instructions to complete the process, or share this link with the person responsible for verifying the domain(s).
Related Articles
SSL Configuration Test
Check your certificate installation for SSL issues and vulnerabilities.