
Download and Install AATL Certificates (Token-based)
Jun 1, 2026
Download and Install AATL Certificates (Token-based)
OVERVIEW: This page walks you through the process of downloading and installing your GlobalSign Adobe Approved Trust List (AATL) Certificate (token-based). At the completion of this procedure, your certificate will be ready to place signatures on Adobe® Acrobat® or Reader® documents. For more certificate management guides, please refer to this page. For HSM-based Certificates, please go to this page.
Prerequisites
-
Approved and vetted GlobalSign AATL Certificate. To approve your application, please refer to this page.
-
Temporary password refers to the Pickup Password created during the order process which will be used to download the certificate. If you forgot or lost this password, you will have to cancel and reorder your certificate.
-
GlobalSign-provided SafeNet eToken. Depending on your need, select the tab that applies to your order:
Download Guidelines
Once the application is approved and the vetting process is completed, the certificate will be ready for issuance.
-
Open the Certificate Download Ready email and review your order.
WARNING: Make sure you are using the computer where you intend to install your certificate. Otherwise, an error will occur. For certificate pickup, you must have access to a Windows PC to proceed. Once the Certificate is installed and stored in the removable device, you may sign from other platforms such as OS X.
-
Copy the Certificate Generation and Installation link and paste it to your browser.
IMPORTANT: If you selected Download using Internet Explorer (IE) Compatibility Mode as your Key Generation Option during ordering process, you must open the pickup link from your e-mail in Microsoft Edge with IE Compatibility Mode enabled.
-
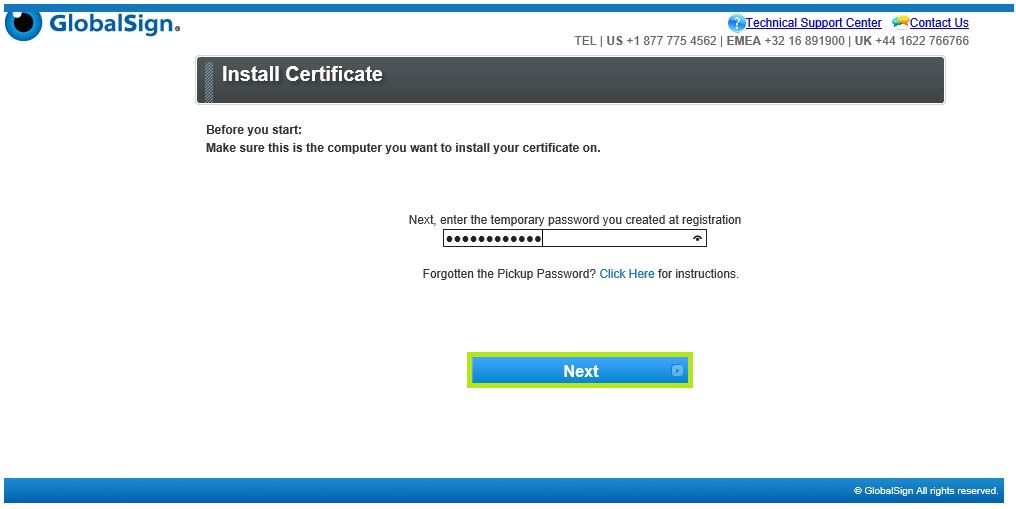
Enter the Pickup Password that was set during the ordering process and click Next.
-
Read the Subscriber Agreement and tick the I agree to the terms above box to confirm, then click Next.

-
Proceed to the Install Guidelines below.
Install Guidelines
Select the appropriate tab to view installation instructions.
If you selected Download using Internet Explorer (IE) Compatibility Mode as your Key Generation Option during ordering process, use this guidelines.
-
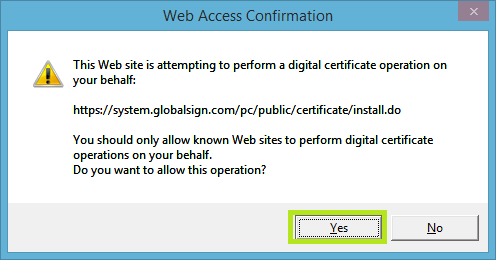
In the Web Access Confirmation prompt, click Yes to allow digital certificate operations.

-
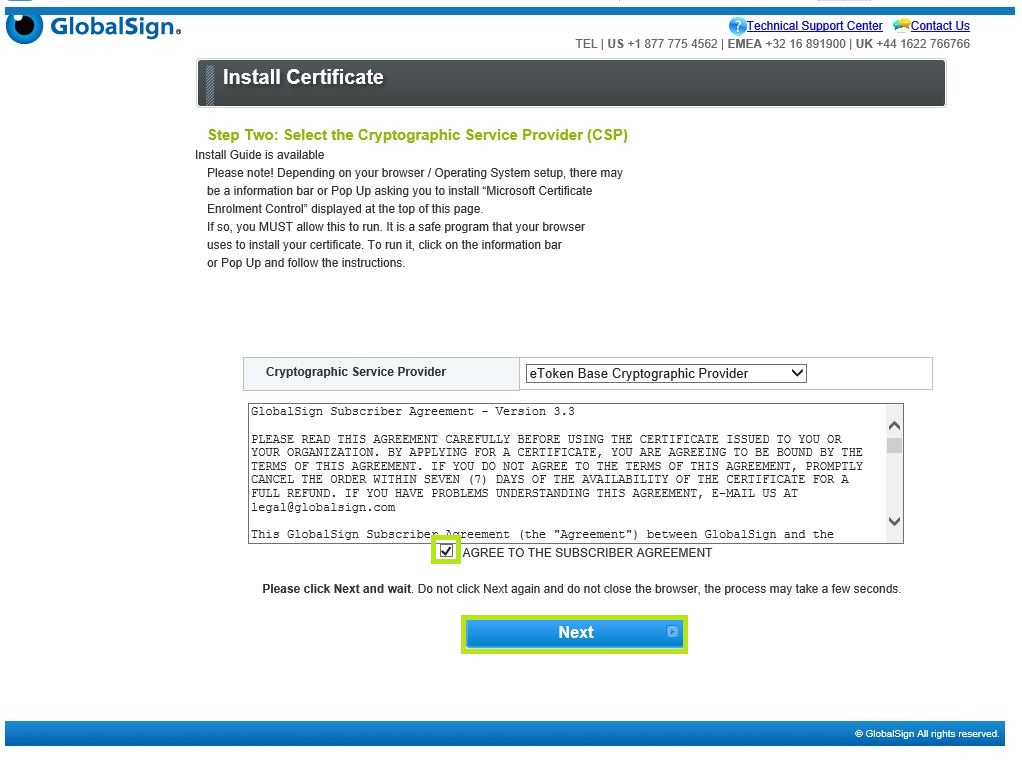
In the Install Certificate window, choose one from the Cryptographic Service Provider dropdown options:
• If you want to install the GlobalSign-provider SafeNet eToken, select eToken Base Cryptographic Provider.
• If you want to install a private-owned smart card, select Microsoft Base Smart Card Crypto Provider.
Then, tick the box to agree to the subscriber agreement and click Next.
-
Insert your SafeNet USB token into your computer.
-
Enter the password for your USB token. This was set during the initialization process, then click OK.
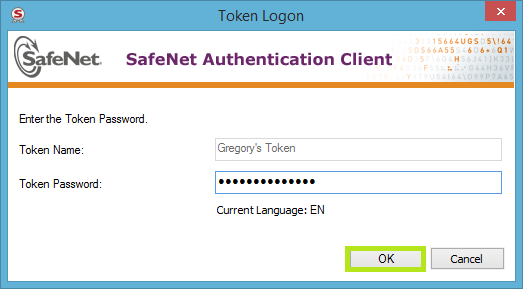
WARNING: The screen may appear to freeze for a minute or two. DO NOT press any button on your browser until the process is complete as it will interrupt the progress. There should be a blinking light from your eToken and a message in the screen reminding to wait for a while.
-
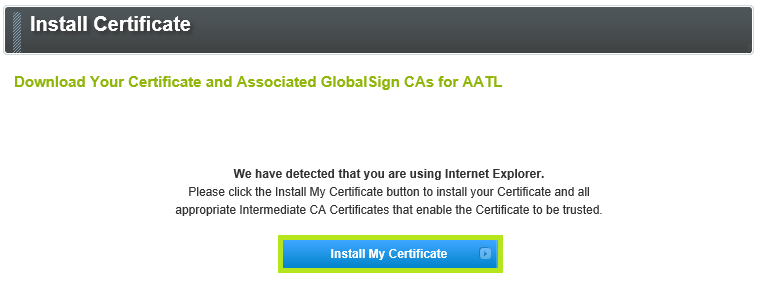
Once the token has finished the keypair generation, click the button to Install My Certificate.
-
In the Web Access Confirmation prompt, click Yes to allow digital certificate operations.
-
Click OK to complete the process.
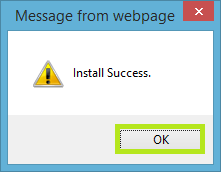
You are now ready to use your certificate.
IMPORTANT: You are required to download and install Fortify App in your operating system. Ensure that you meet the following system requirements:
• Browsers supported by Fortify: Microsoft Edge, Safari, Firefox and Chrome
• OS supported by Fortify: MAC OS 10.12 or higher, Windows 7 or higher, and Ubuntu 16.04 or higher
-
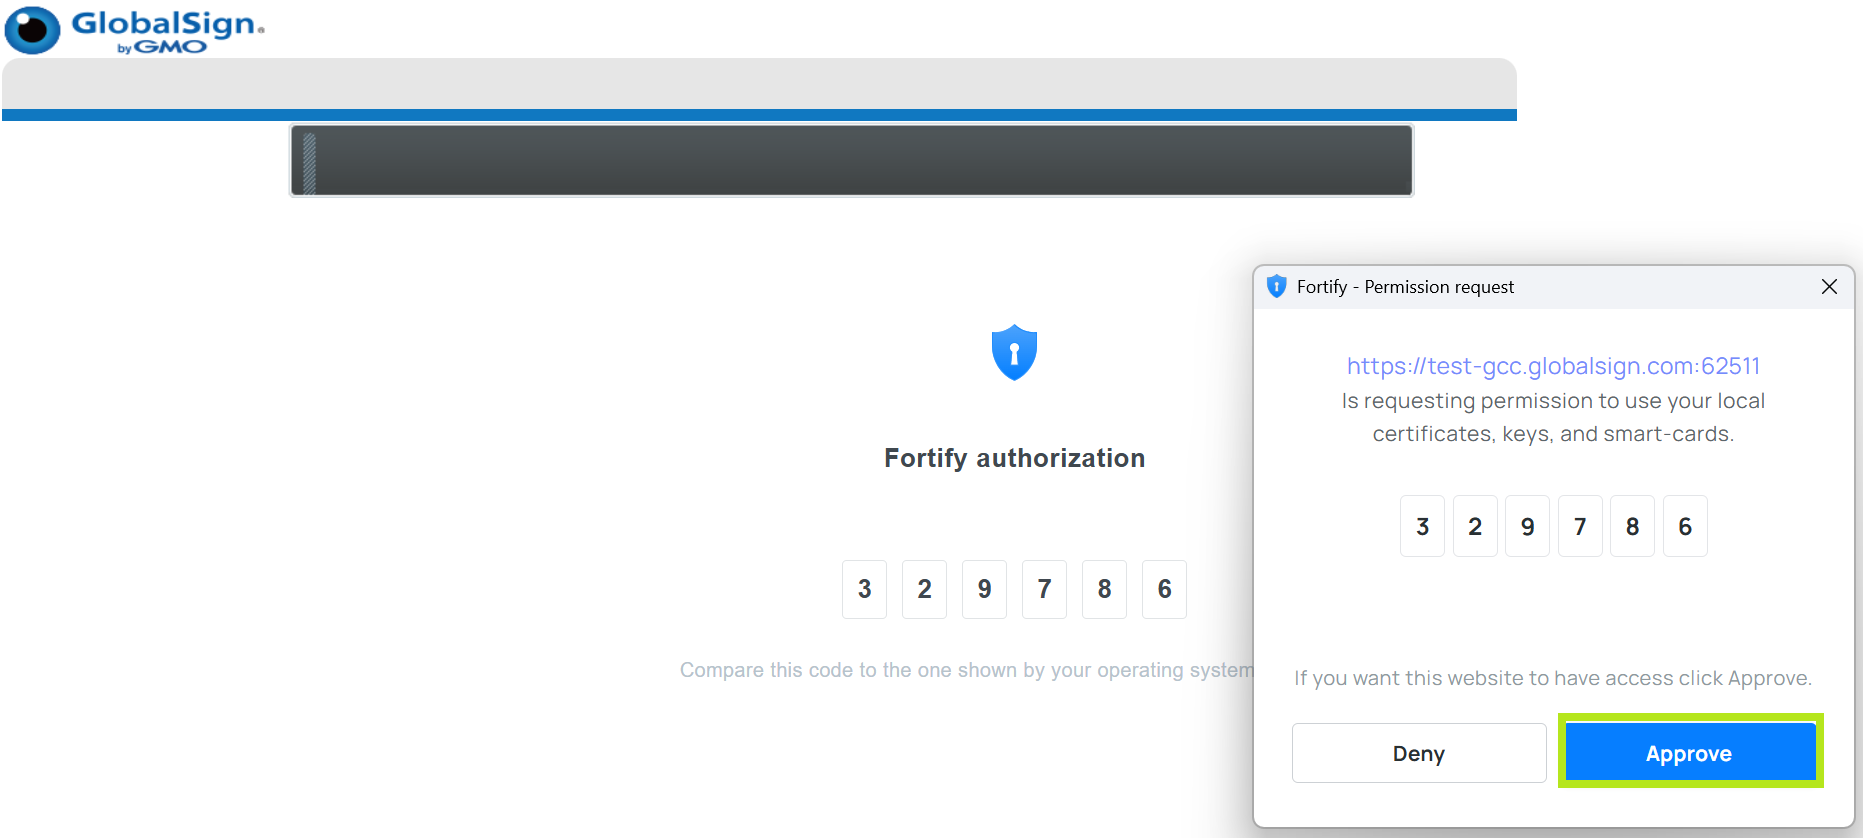
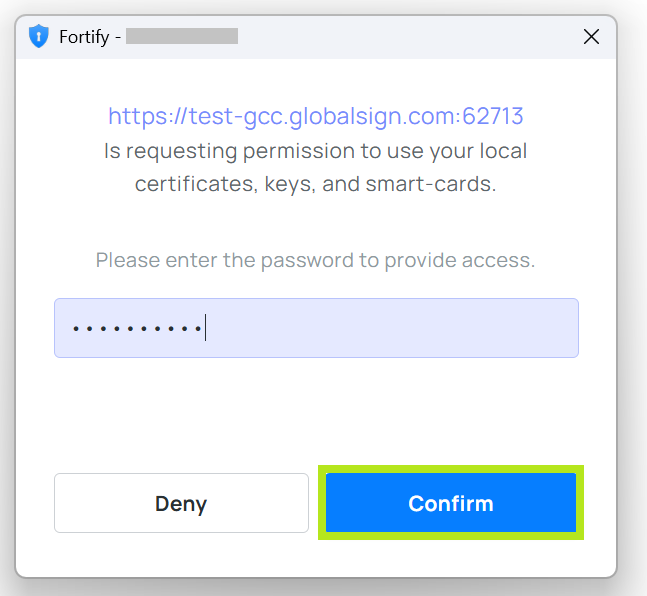
A pop-up window for the authorization of code will appear on the Access Permission and on Fortify Authorization. If the both codes matched, click Approve to continue.
-
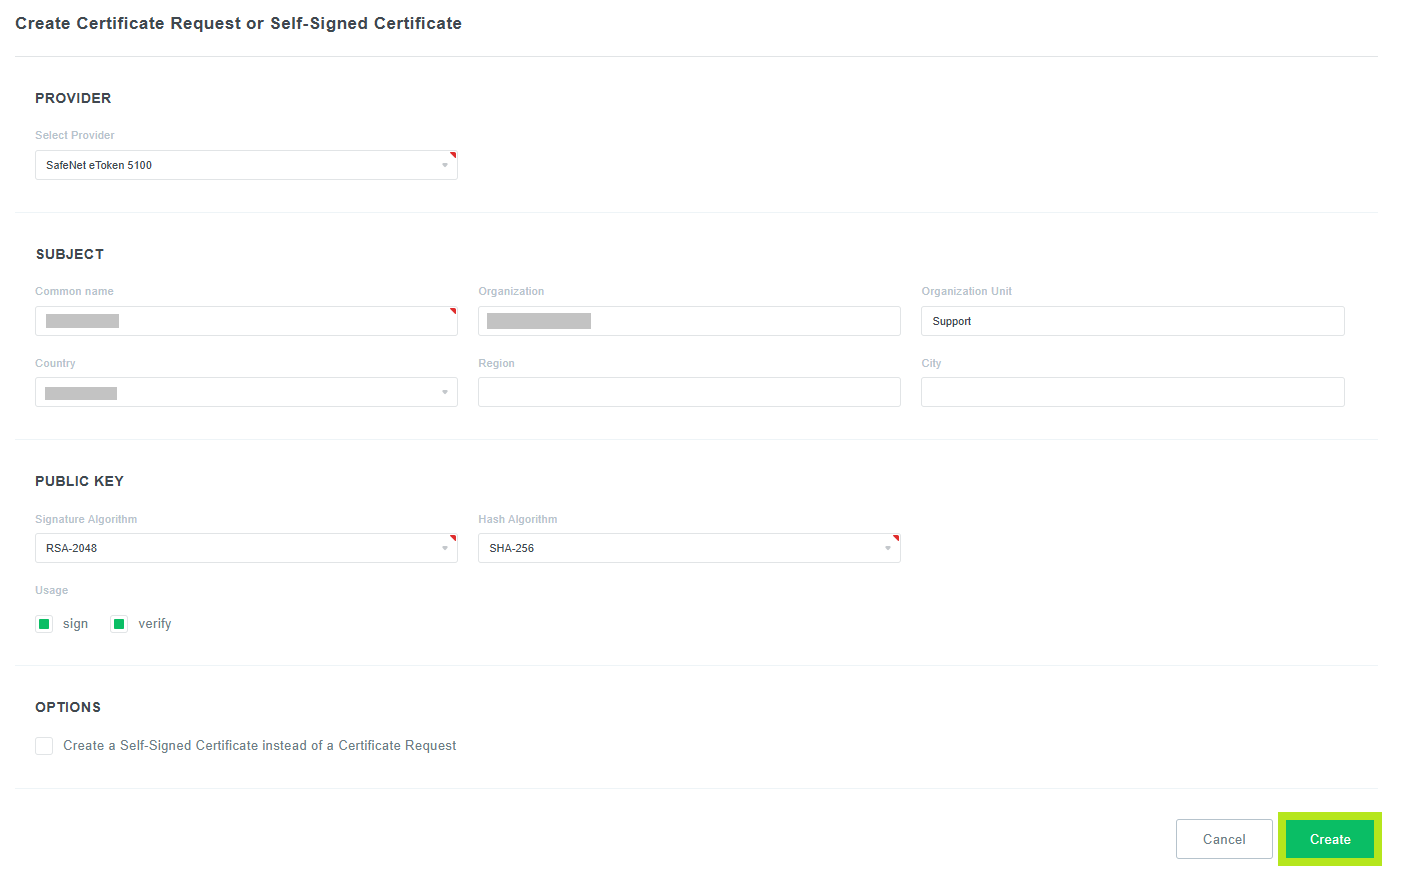
In the Create Certificate Request or Self-Signed Certificate window, review the DN or Certificate Identity Detail Information. Then, click Create to continue.
NOTE: If you haven't yet, make sure that your eToken is plugged in to your computer at this point.
-
A pop-up window will appear, then enter the token password.
NOTE: Please wait for a while as it will take a few seconds to process.
-
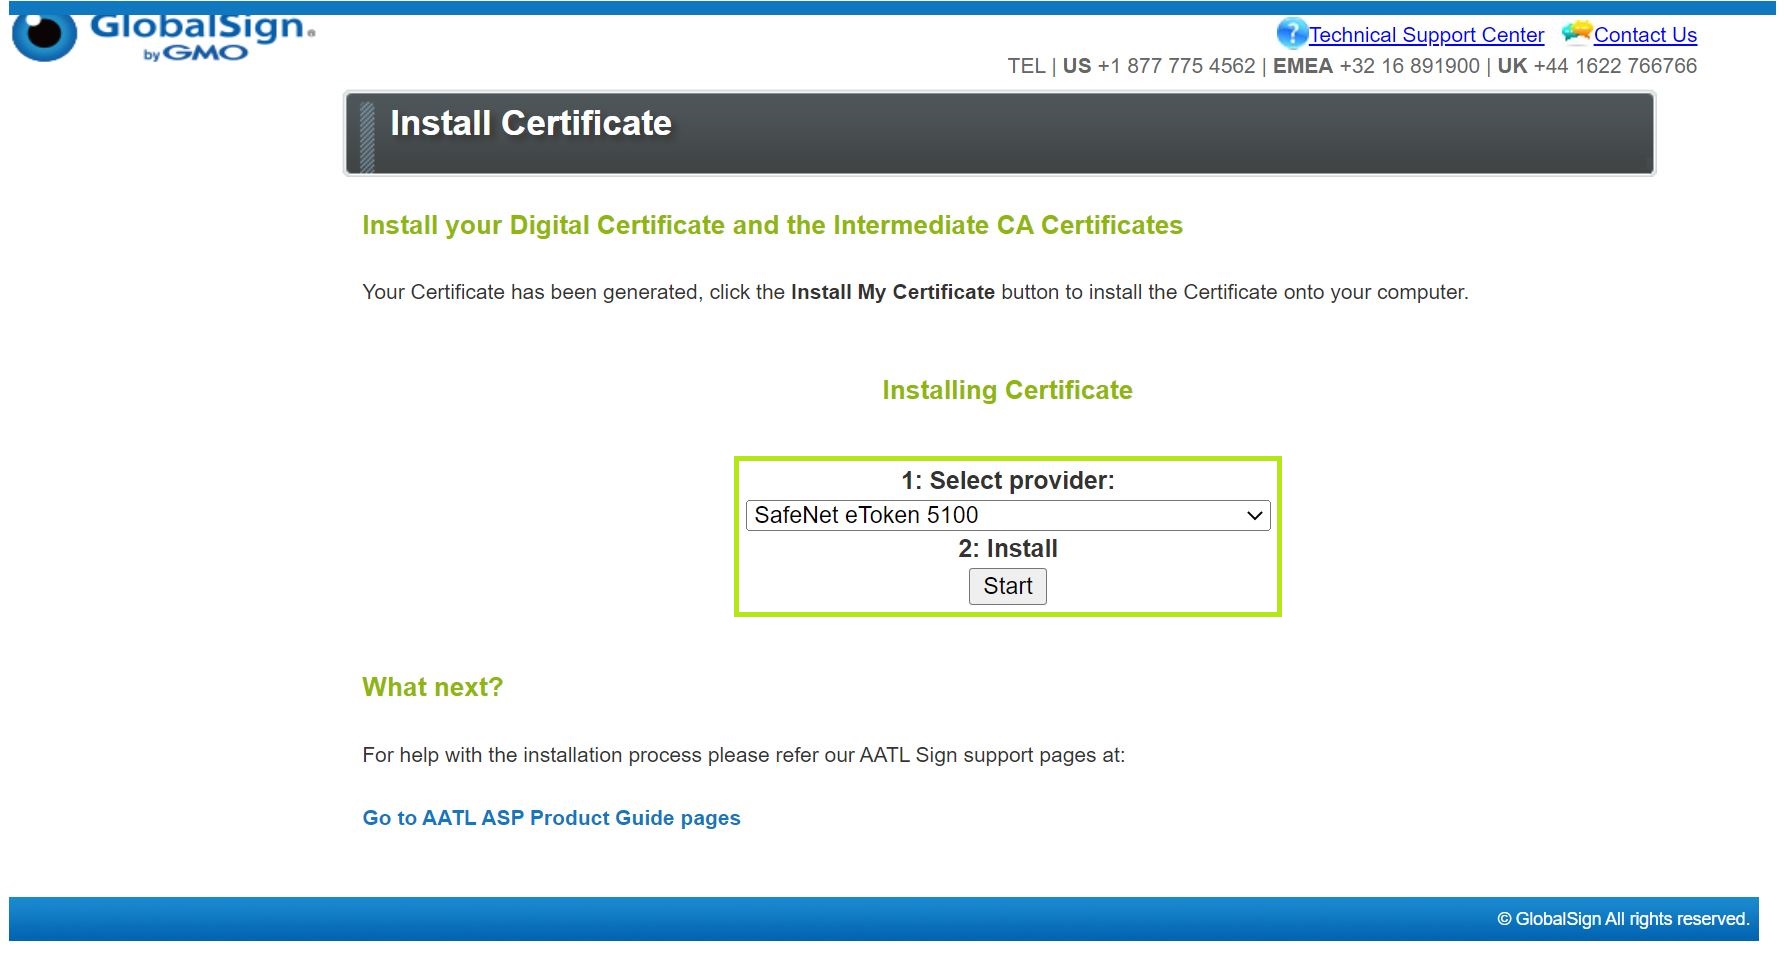
On the Install Certificate window, under Select Provider, select the token that you setup (as a prerequisite). Then, click Start to proceed.
-
Once Certificate is successfully installed on the token (or local certificate store), a pop-up confirmation window will appear. Click on OK.
You are now ready to use your certificate.
WHAT'S NEXT: Now that you have successfully installed your certificate, you may now use it to sign documents. For instructions on how to sign documents, please refer to this page.
Related Articles
SSL Configuration Test
Check your certificate installation for SSL issues and vulnerabilities.